



Fine hair can be a source of constant frustration. You wake up, head to the mirror, and see the same flat, lifeless strands staring back at you. It is the kind of hair that defies gravity in the wrong way—it clings to your scalp, refuses to hold a curl, and looks limp by midday. If you are nodding in agreement, you have likely spent years searching for a haircut that actually works. The inverted wavy bob is the answer, provided you get the cut right.
The secret isn’t just in the length; it is in the physics of the cut. By stacking the hair in the back, you create immediate, built-in volume that does not rely on heavy styling products. When you add a wavy texture, you break up the smooth, uniform sheet of fine hair, creating the illusion of density where there was none before. This style creates a scaffolding effect, lifting the hair away from the scalp and framing the face in a way that feels intentional and styled, even when you have put in zero effort.
Choosing the right variation of this cut matters more than you might think. A heavy, blunt cut might drag fine hair down, while too many layers could make it look wispy or thin. It is about striking that precise balance between structure and movement. Let’s look at 28 distinct ways to interpret the inverted wavy bob, each designed to give you that much-needed boost in volume, shape, and confidence.
1. The Stacked Graduated Bob
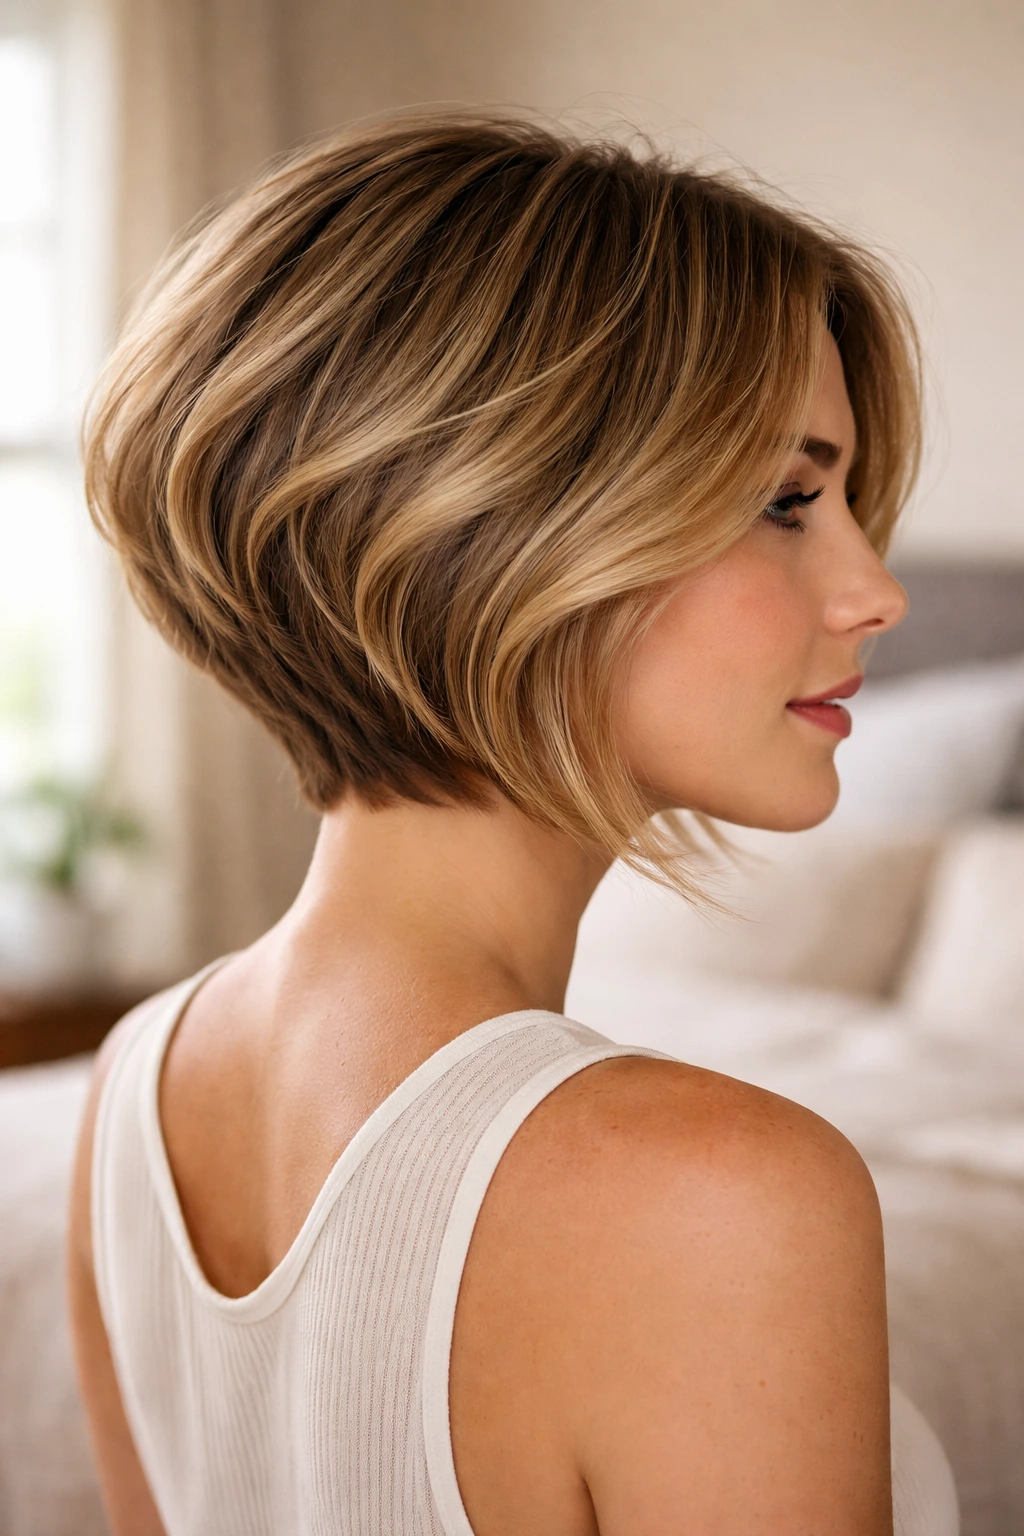
This is the classic foundation. The back is cut shorter and stacked with internal layers to create height, while the front pieces are left longer to frame the jawline. For fine hair, the stacking is crucial—it acts as a built-in bouffant. You do not need to tease it or spray it into submission; the physical weight difference between the nape and the crown does the heavy lifting for you.
Why It Works for Fine Hair
The stacking effect forces the hair at the occipital bone to stand up and out, rather than lying flat against the neck. This provides a permanent lift that stays in place all day.
Styling Tip
Use a lightweight texturizing mousse on damp hair before blow-drying. Focus the heat at the roots in the back to maximize that stacked lift, then use a small round brush to pull the hair away from your scalp. Finish with a spritz of dry texture spray—not hairspray—to keep the movement airy and light.
2. Choppy Razored Ends
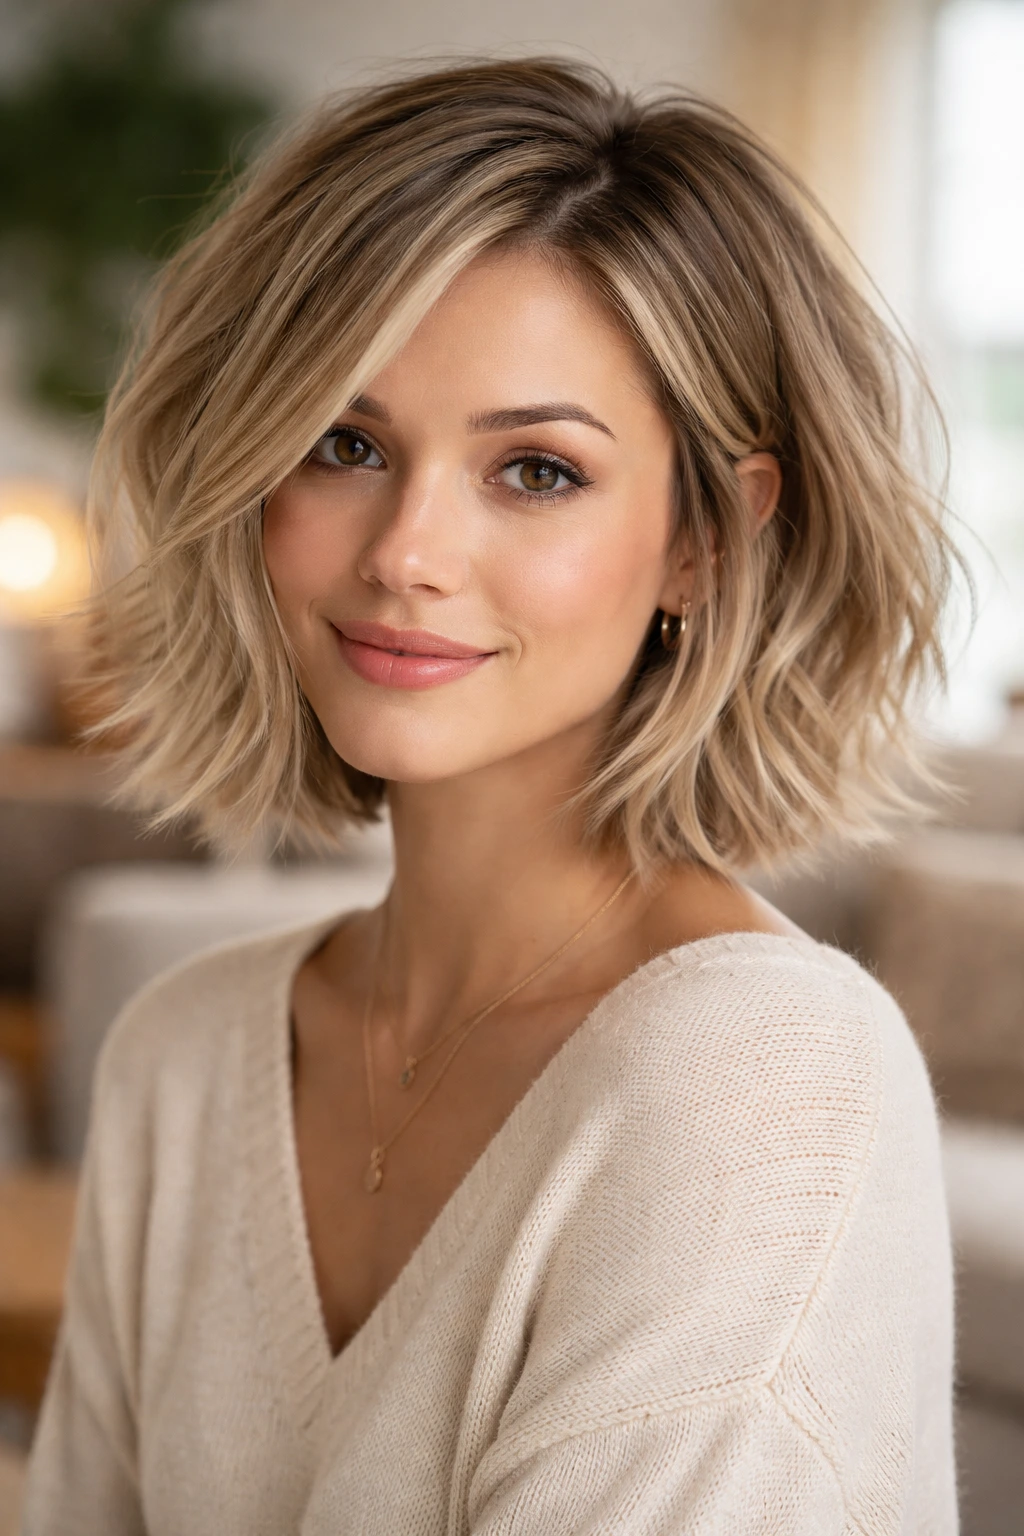
If your fine hair feels a bit “stringy” at the bottom, a razor cut is your best friend. Instead of a blunt, heavy line that highlights the thinness of your ends, a razor creates a soft, feathered finish. It removes the blunt weight that tends to pull fine hair down, making the ends look thicker and more lived-in.
The Mechanism of the Razor
A razor cut creates a beveled edge. Each strand is cut at an angle, which allows the hair to lay over itself more naturally. It prevents that dreaded “triangle” shape that many fine-haired women fear when getting a bob.
Who Should Get This
If you want an effortless, bedhead look, this is it. It works beautifully for those who prefer to air-dry their hair, as the feathered ends provide enough natural texture that you do not need to manipulate them too much.
3. The Lob with Invisible Layers
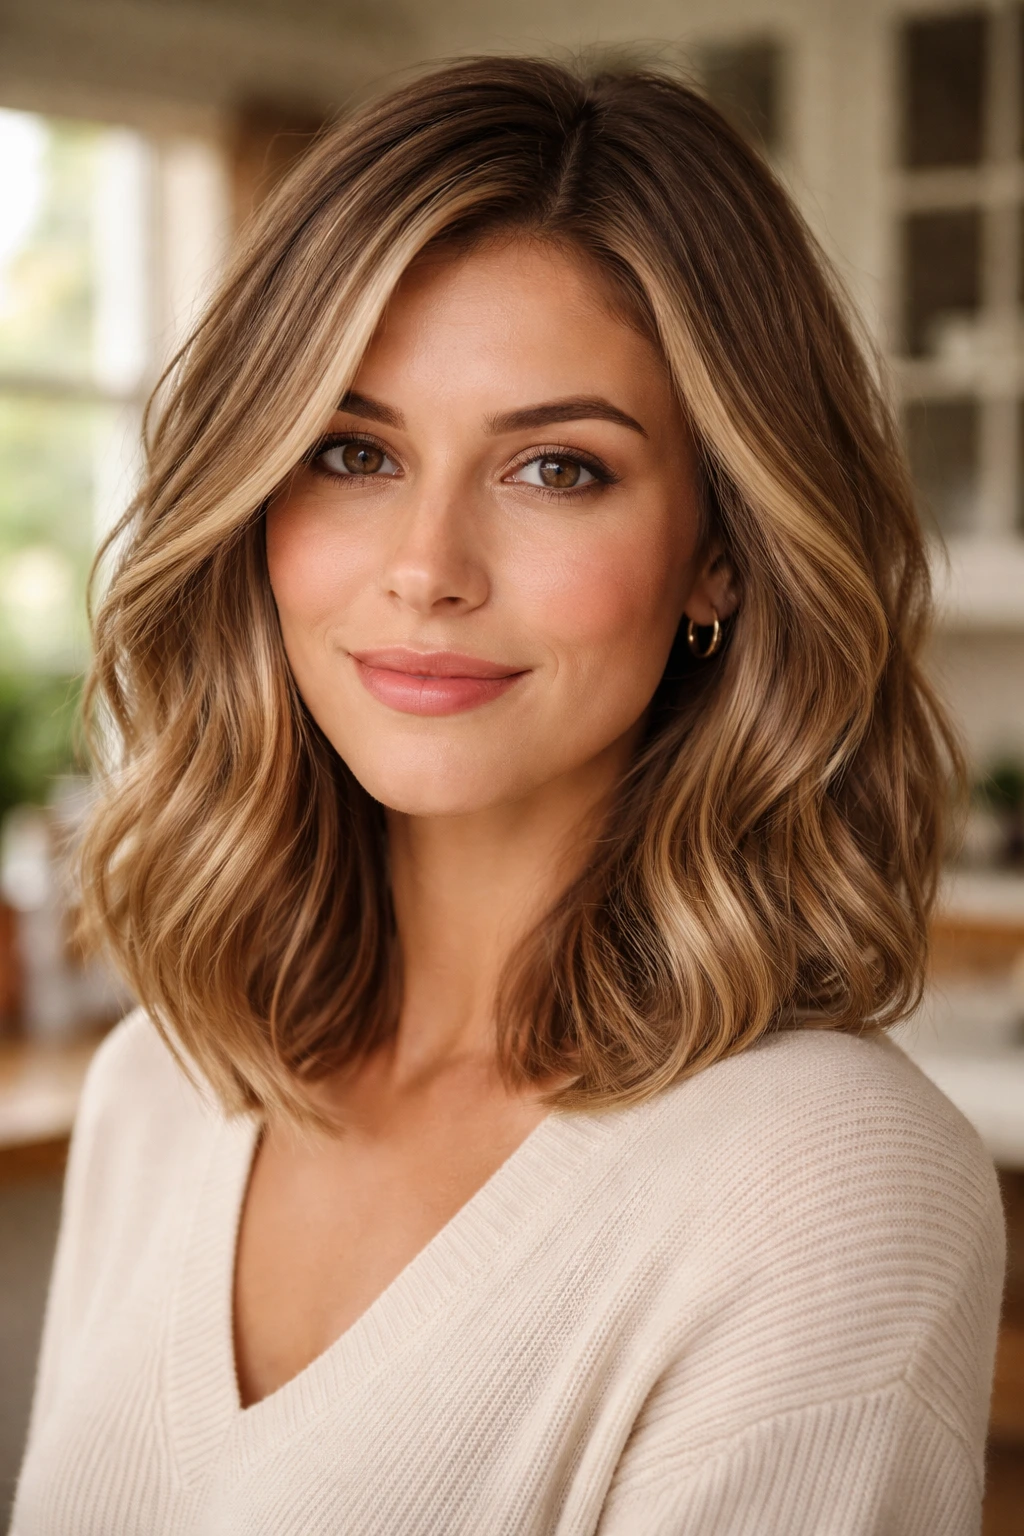
A long bob, or “lob,” is a great entry point for the inverted style. By keeping the length skimming your collarbone, you maintain enough weight to keep the hair looking substantial, but you get to add invisible layers. These are layers cut on the inside of the hair shaft, hidden beneath the top layer.
Creating Volume Without Visible Steps
Invisible layers are genius because they push the hair up from underneath. They act like little springs, propping up the outer layer. You get the volume of a heavily layered cut without the potential for looking choppy or sparse on the ends.
Daily Maintenance
This cut requires a bit more styling time. You will want to use a flat iron or a large-barrel curling iron to create loose, irregular waves. The waves camouflage the invisible layers, making the overall haircut look thicker and healthier.
4. Asymmetrical Inverted Bob
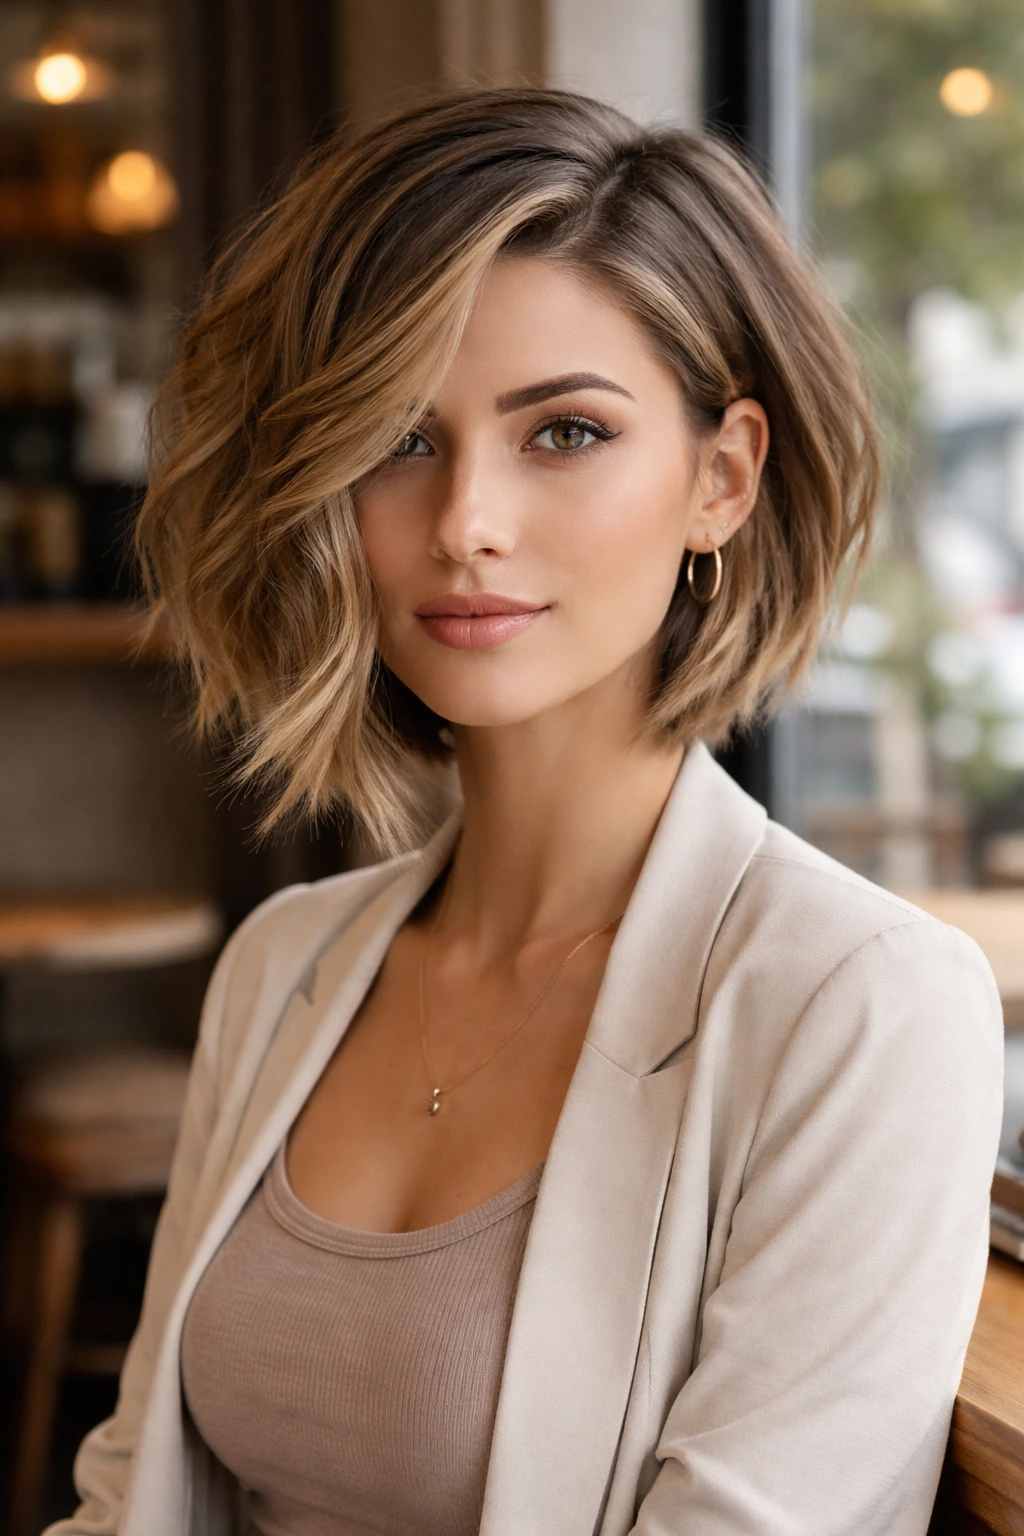
If you want to add a bit of edge to a classic cut, go asymmetrical. One side is cut slightly longer than the other. This isn’t just about style; it is about weight distribution. The visual interest shifts the focus away from the fineness of the hair and toward the bold shape of the cut.
The Visual Distraction Technique
Because the eye is drawn to the sharp angle of the asymmetry, it stops scanning for thin spots. It is a classic stylist trick. When you style this with soft, tousled waves, the asymmetry becomes less severe and more romantic, but the volume-boosting shape remains.
How to Style
Part your hair on the deeper side to maximize the volume on the crown. Use a sea salt spray on damp hair and scrunch the ends as they dry. The goal is a disheveled, “cool girl” texture that feels intentional.
5. The Messy Beach Wave Bob
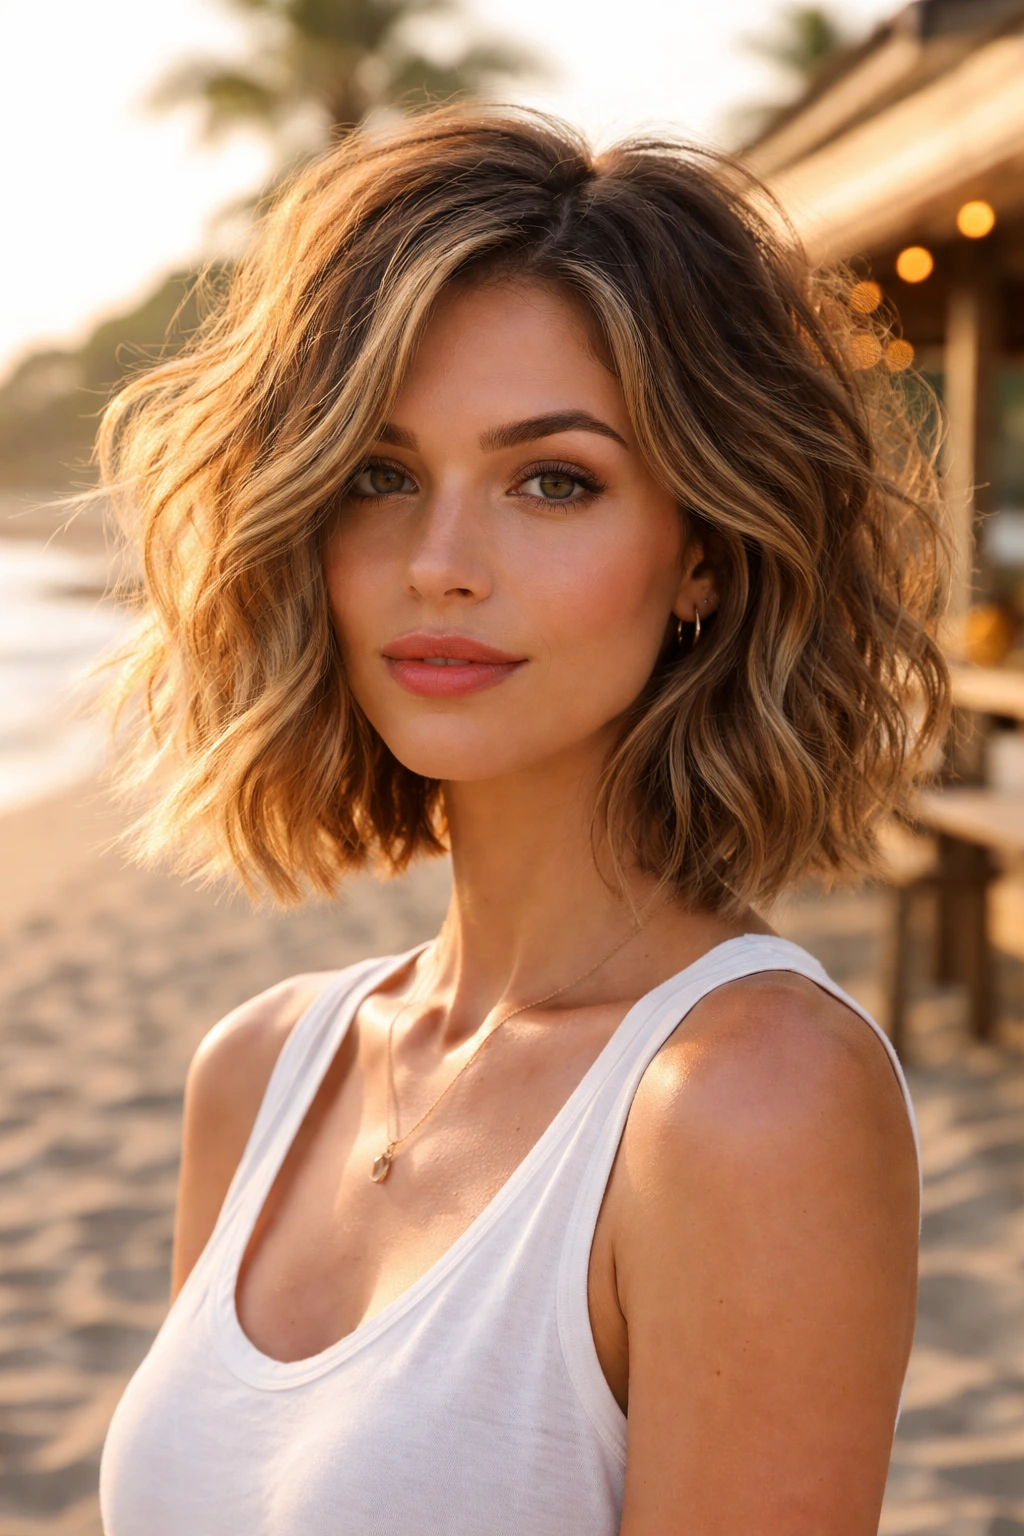
This style is all about movement. The cut itself is a fairly standard inverted bob, but the styling is where the magic happens. By using a deep-barrel curling iron or a waver tool, you create S-patterns that overlap. These overlapping waves create friction, and friction is the enemy of flat hair—it’s actually a good thing here, as it pushes the hair strands apart to create bulk.
The Importance of the Waves
Do not aim for perfect, ringlet curls. Those will only pull the hair down and reveal the scalp. You want messy, irregular waves that look like you just spent a week on the coast.
Product Selection
Avoid heavy oils or creams. They will turn fine hair into a greasy mess by noon. Stick to dry texturizers and light-hold finishing sprays.
6. The Deep Side-Part Bob
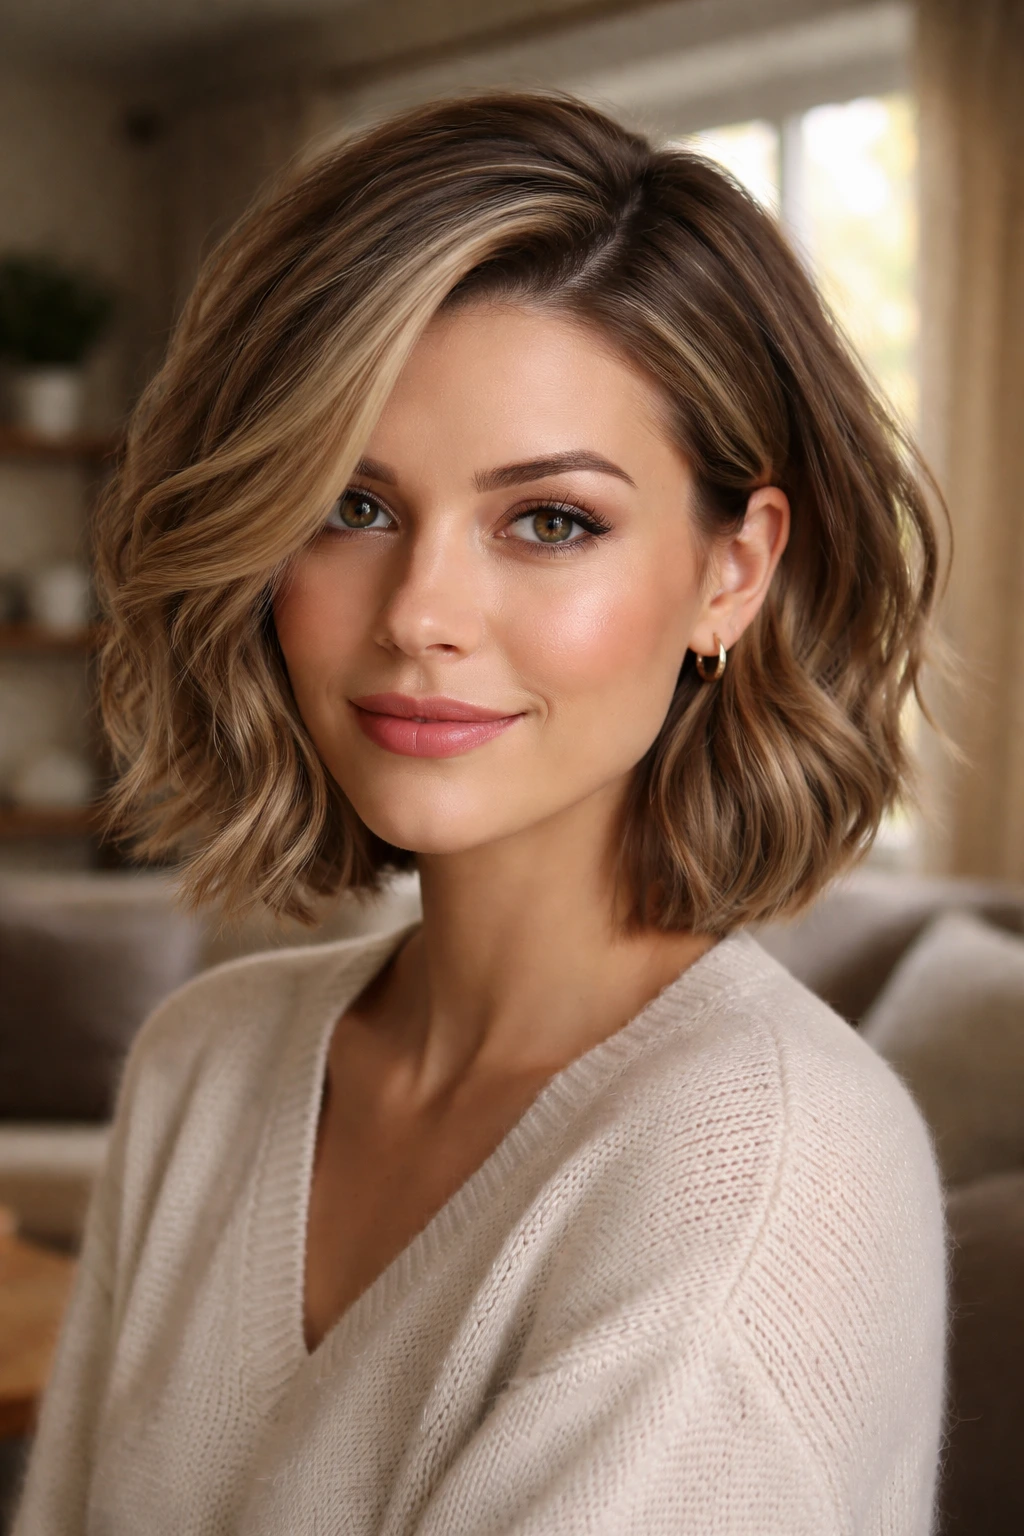
Never underestimate the power of a part. If your hair is currently parted down the middle, it is likely laying flat on both sides of your head. By flipping your hair to a deep side part, you are instantly moving a larger volume of hair to one side, which creates immediate lift at the root.
The Physics of the Flip
When you pull hair from the opposite side, it creates a “tent” of hair that stands up higher than if it were resting naturally. This is the simplest way to cheat volume without a haircut, but when paired with an inverted bob, it is transformative.
Styling Strategy
Blow-dry your hair in the opposite direction of where you want your part to sit. Once it is 80% dry, flip it over. The roots will be trained to stand up, giving you a root-lift effect that lasts all day.
7. The Soft Ombre Inverted Bob
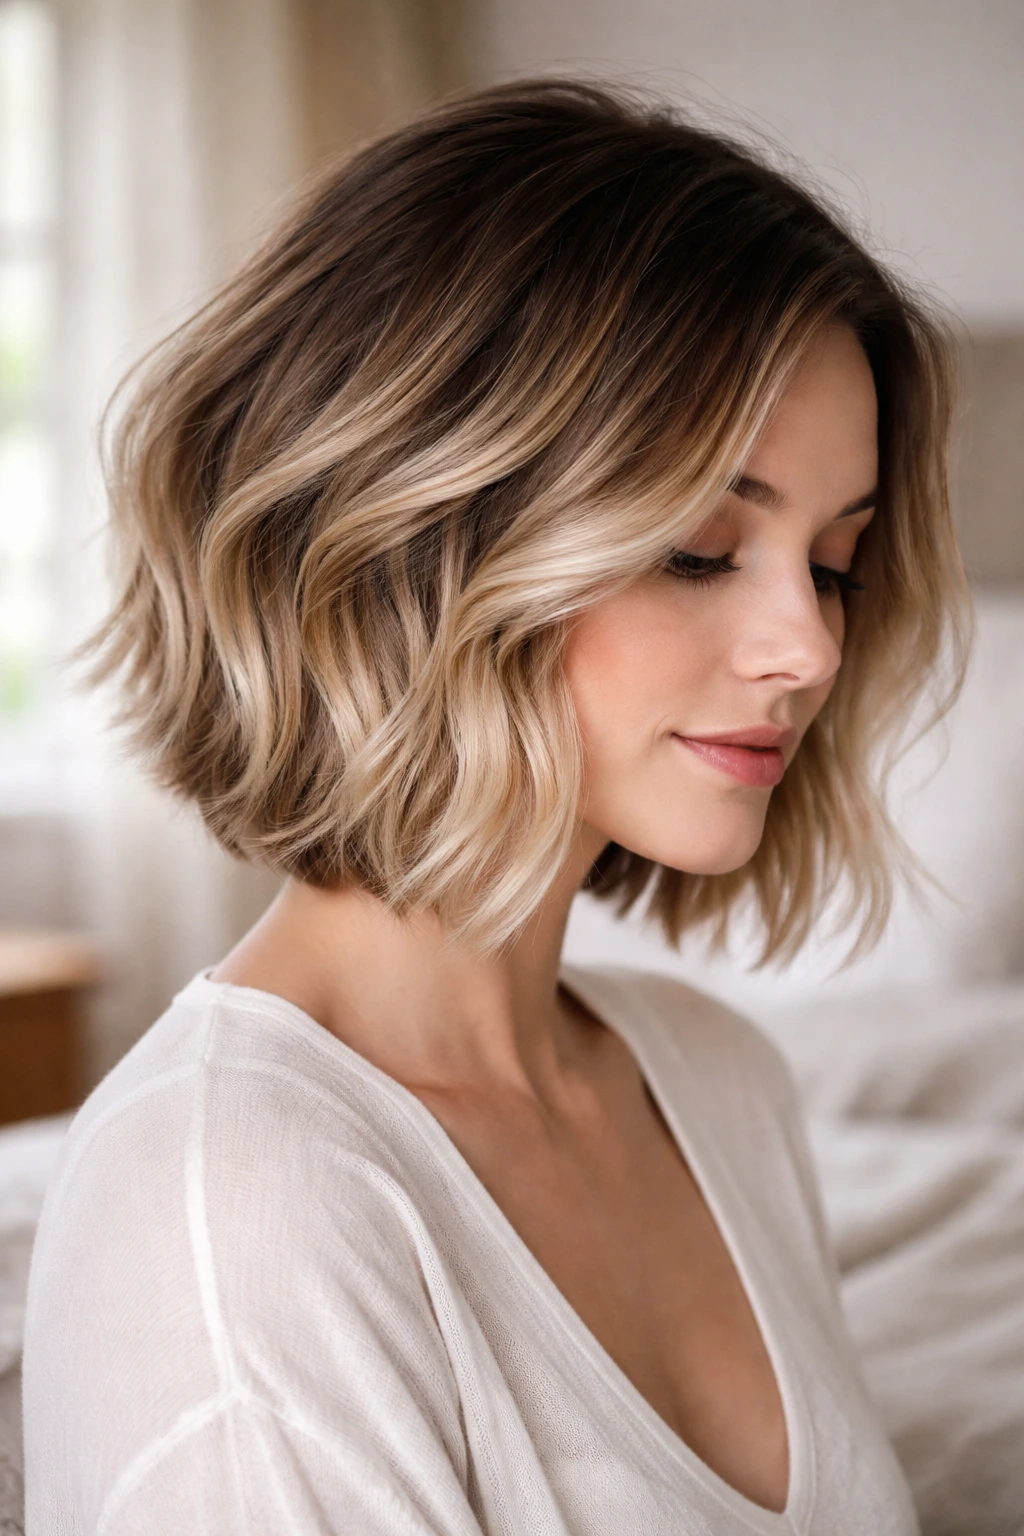
Sometimes the issue with fine hair isn’t just the density; it is the color. A single-tone, dark color can make hair look like one solid, thin sheet. By adding soft, blended highlights—an ombre or balayage technique—you create visual depth.
Color as a Volume Booster
The lighter pieces, when curled or waved, stand out against the darker base. This contrast creates an optical illusion of depth. Your eyes perceive the varied tones as different layers of hair, which makes the style appear fuller.
Maintenance Note
Keep the roots darker. This mimics the natural shadow of your hair and makes the “inverted” part of the bob look even more dramatic and structured.
8. Face-Framing Curtain Bangs
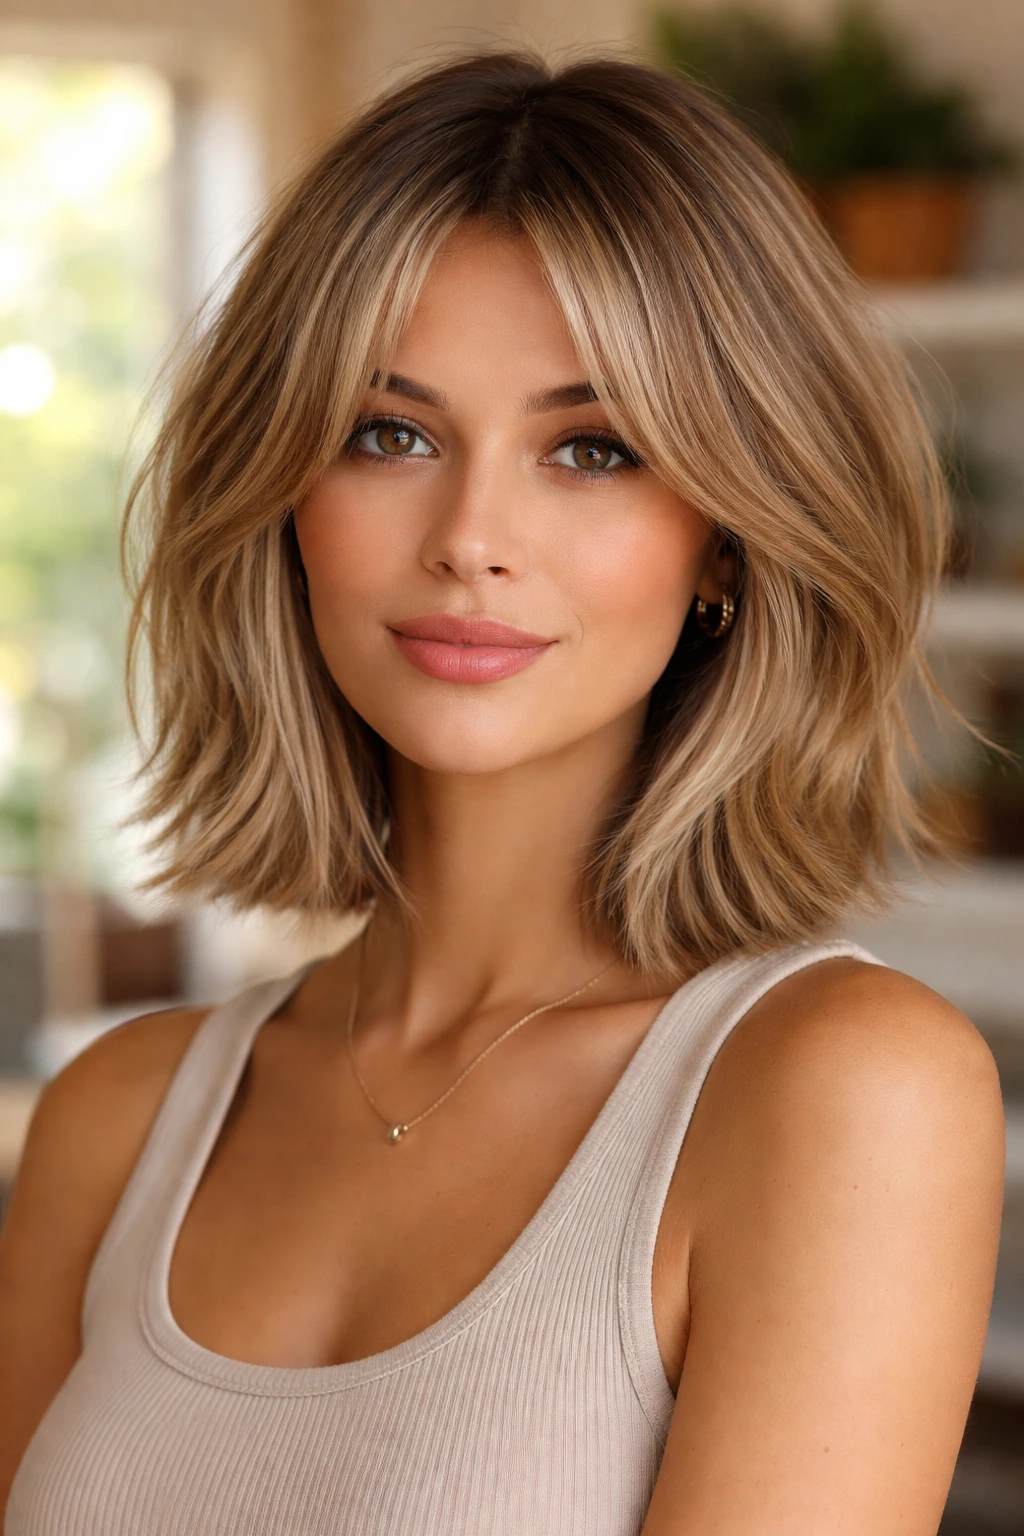
If you are hesitant to cut your hair short in the back, start by focusing on the front. Adding soft, curtain-style bangs that sweep outward helps blend the shorter front pieces of the inverted bob into your facial features.
Why This Helps Fine Hair
Curtain bangs require you to cut into the density of the front hairline. While that sounds counterintuitive, it actually frames the face and prevents the front from looking like two limp curtains hanging by your cheeks. It creates a cohesive, styled look that feels balanced.
Styling Tip
Use a round brush to blow the bangs away from your face while they are damp. This creates that iconic “swoop” that blends perfectly into the rest of the wavy inverted layers.
9. The Blunt Perimeter Bob
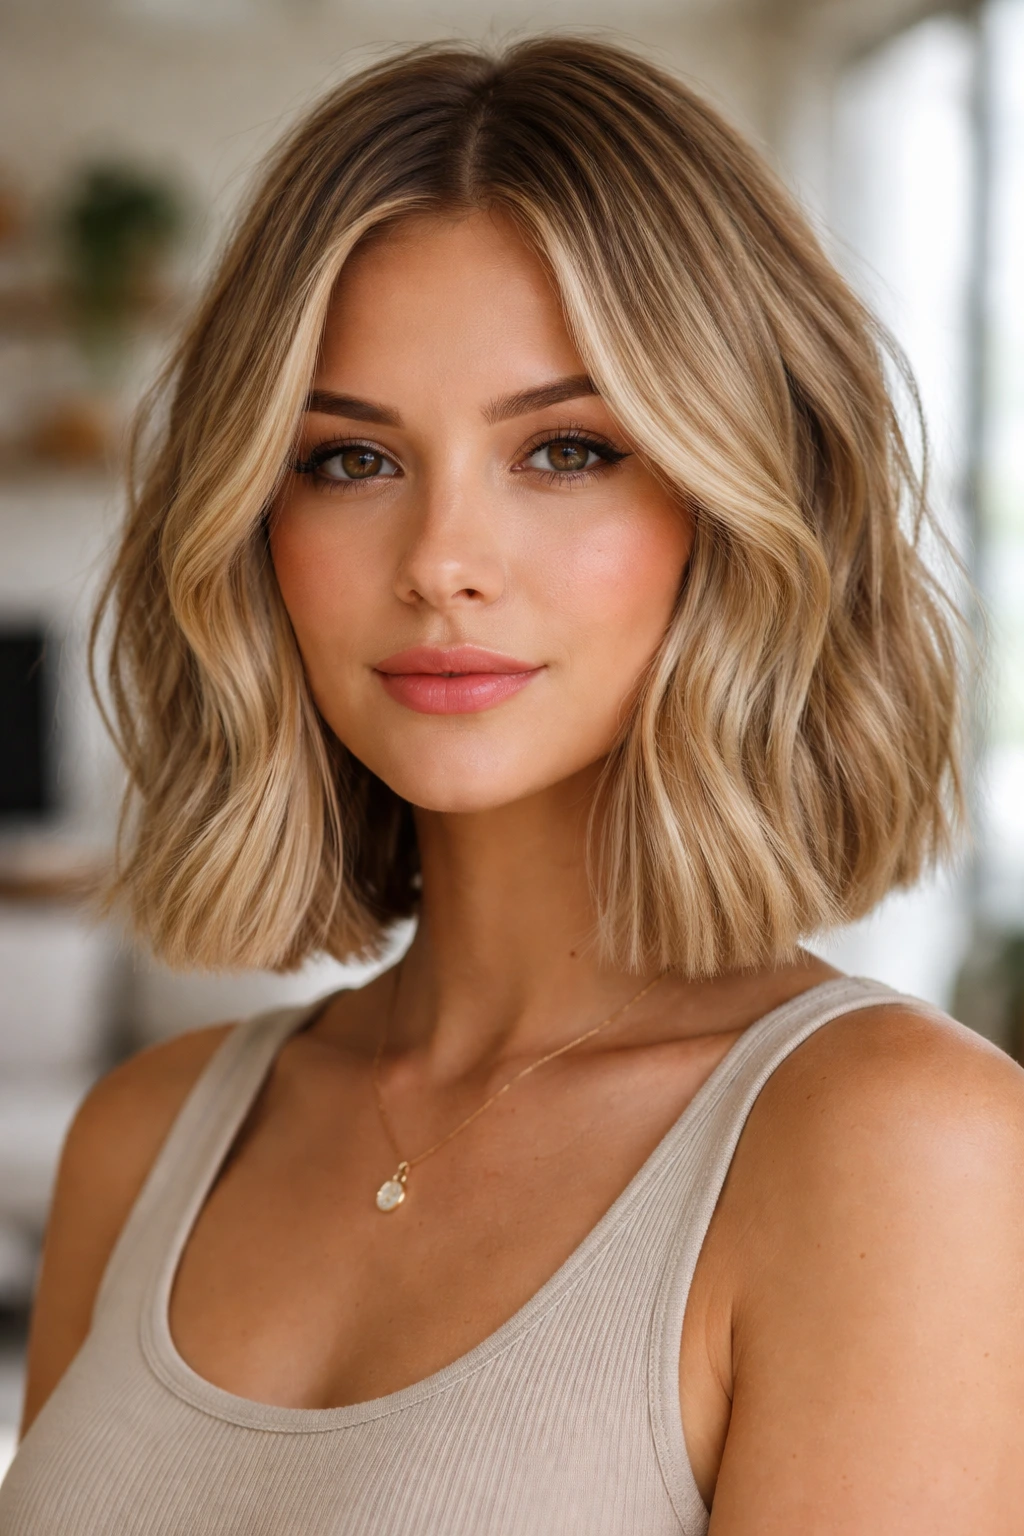
Usually, fine hair benefits from layers, but a blunt perimeter can be a surprising volume booster. When you cut the very ends of the hair straight across—zero layering at the bottom—it gives the appearance of a thicker, denser line.
The Illusion of Density
A blunt cut makes every single strand of hair reach the same point. This “thickens” the appearance of the ends. When you style this with soft, broken-up waves, the ends stay looking full rather than wispy.
The Best Texture for This Cut
This style thrives on “lived-in” waves. Don’t go for a polished look. You want the ends to look thick and solid, even if you style it messy.
10. The Platinum Pixie-Bob Hybrid
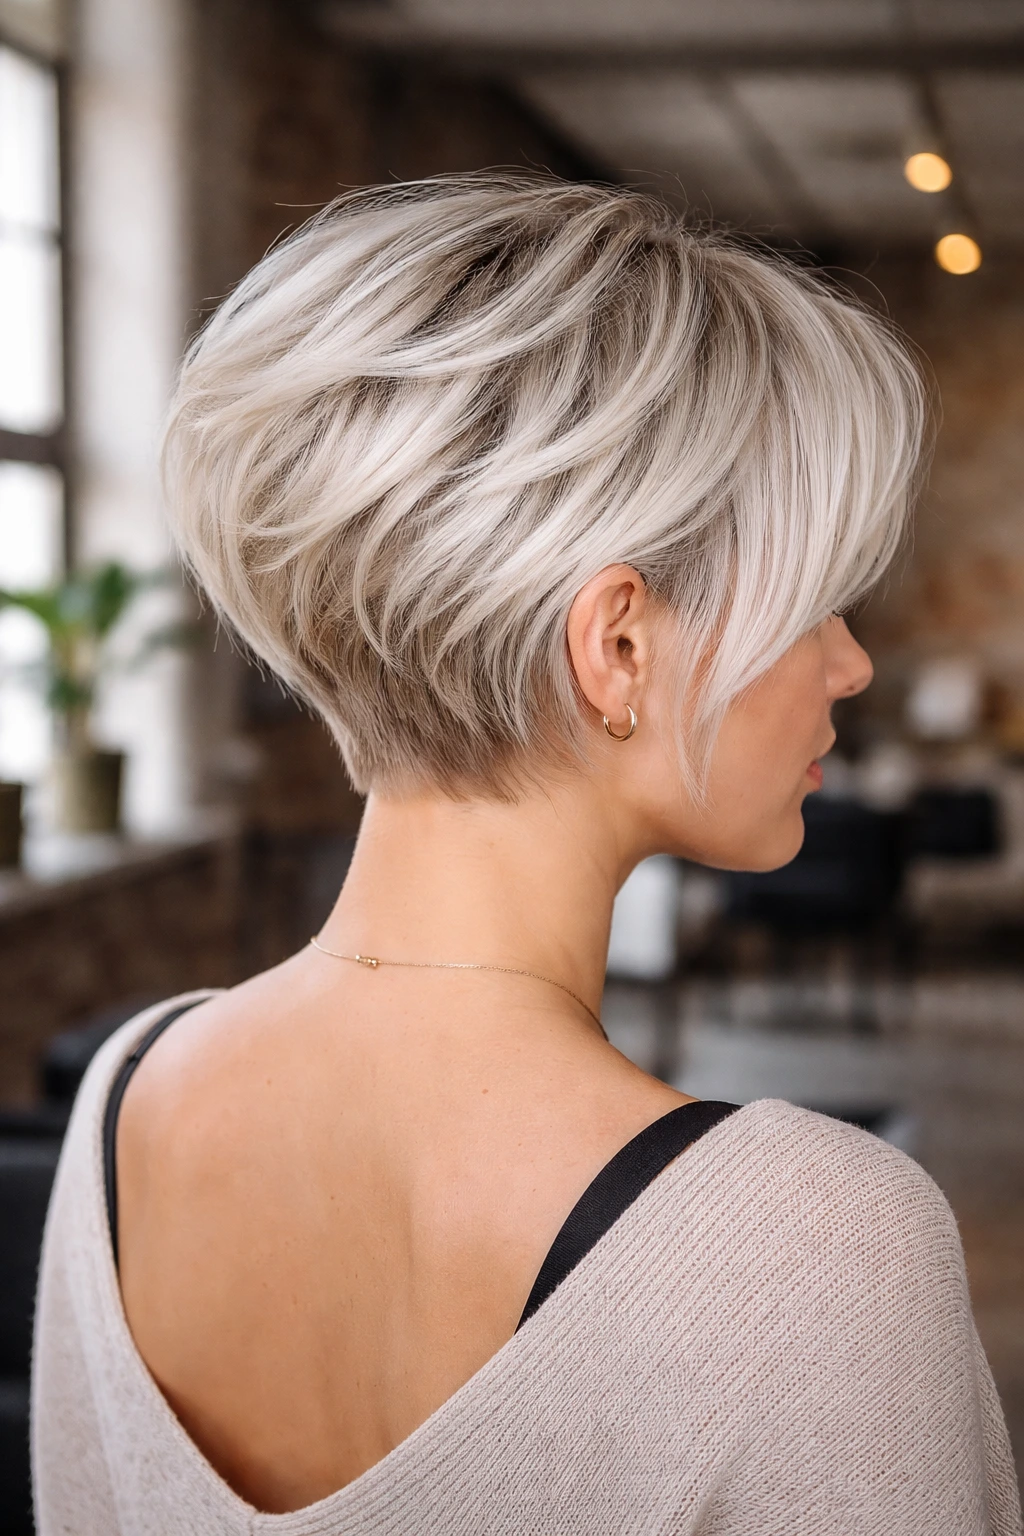
This is for the brave. A short, inverted bob that leans toward a pixie in the back. By going much shorter in the nape, you maximize the stacking effect. The shorter the hair in the back, the more it pushes the hair above it outward.
Why Platinum?
Bleaching fine hair actually creates a slight swelling of the hair cuticle. It makes the hair shaft feel rougher and thicker. While you have to be careful with damage, this texture change often gives fine hair a “grip” that it otherwise lacks.
Hair Health Caution
Because bleaching can damage fine strands, you must invest in a high-quality bond-building treatment. Without it, the hair will become brittle, which is the exact opposite of the volume you are trying to achieve.
11. Subtle Highlights
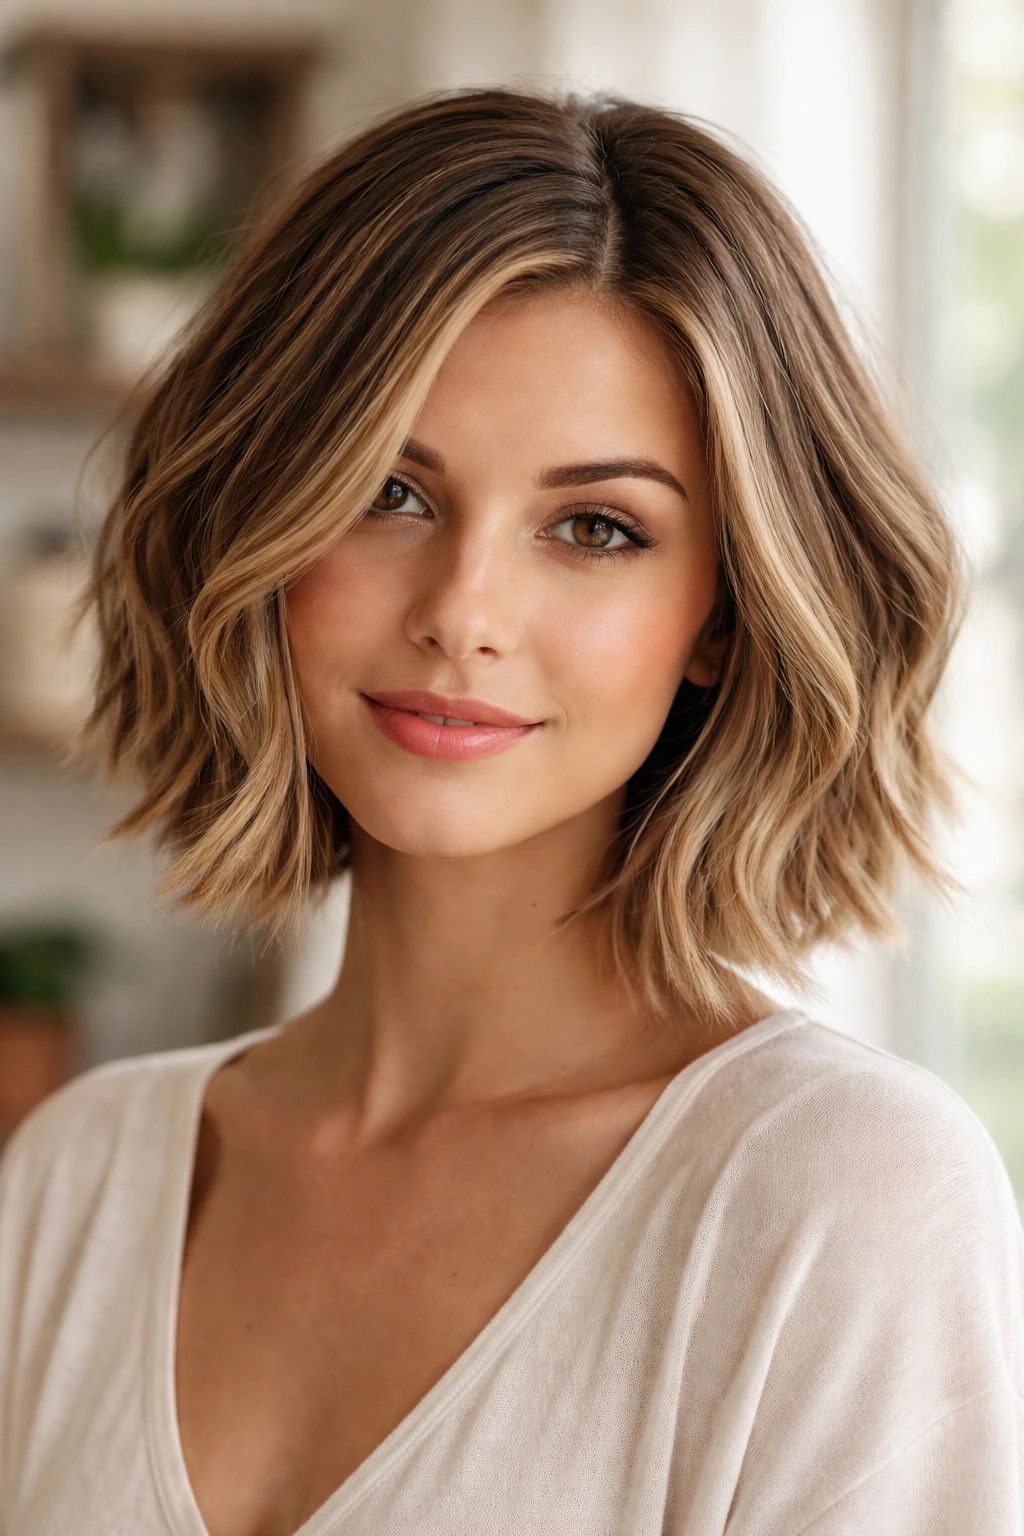
If you aren’t ready for a full ombre, try subtle highlights. We are talking fine, babylights that are only a shade or two lighter than your base color.
The Subtle Impact
These tiny ribbons of color break up the solid color and add texture. When your hair moves, the color catches the light, creating a sparkling, multifaceted look that hides the fineness of the strands.
Positioning
Focus these highlights around the face and on the top layer of the hair. Leave the underneath darker. This mimics how the sun naturally lightens hair and provides a subtle contouring effect for your bob.
12. Soft Tousled Curls
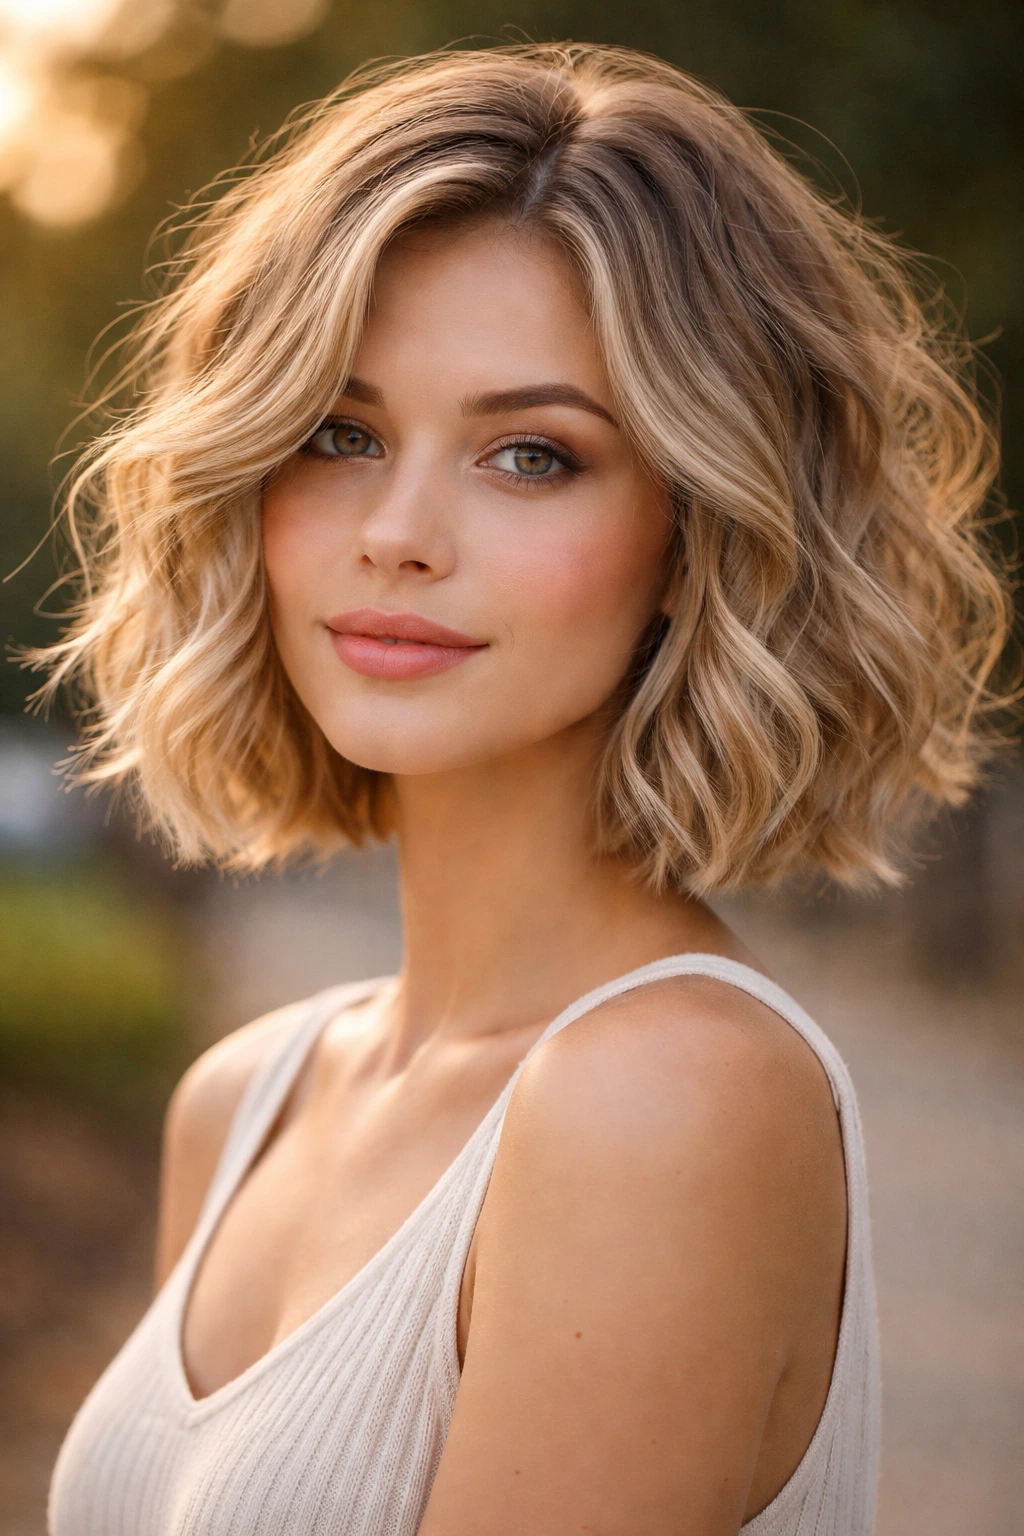
Instead of waves, go for soft, loose curls. The key here is the tool size. Use a 1.25-inch or 1.5-inch curling iron. Smaller irons will give you tight curls that look like ringlets, which can look dated and thin.
The Technique
Wrap the hair around the barrel, leaving the ends out. This is called the “beachy” method. By leaving the ends straight, you keep the style modern and avoid that “poodle” look that fine hair often falls victim to.
Finishing
Once the curls cool, run your fingers through them aggressively. You want to break up the structure and create a cloud-like texture. If it looks too perfect, it isn’t voluminous enough.
13. The Shaggy Inverted Bob
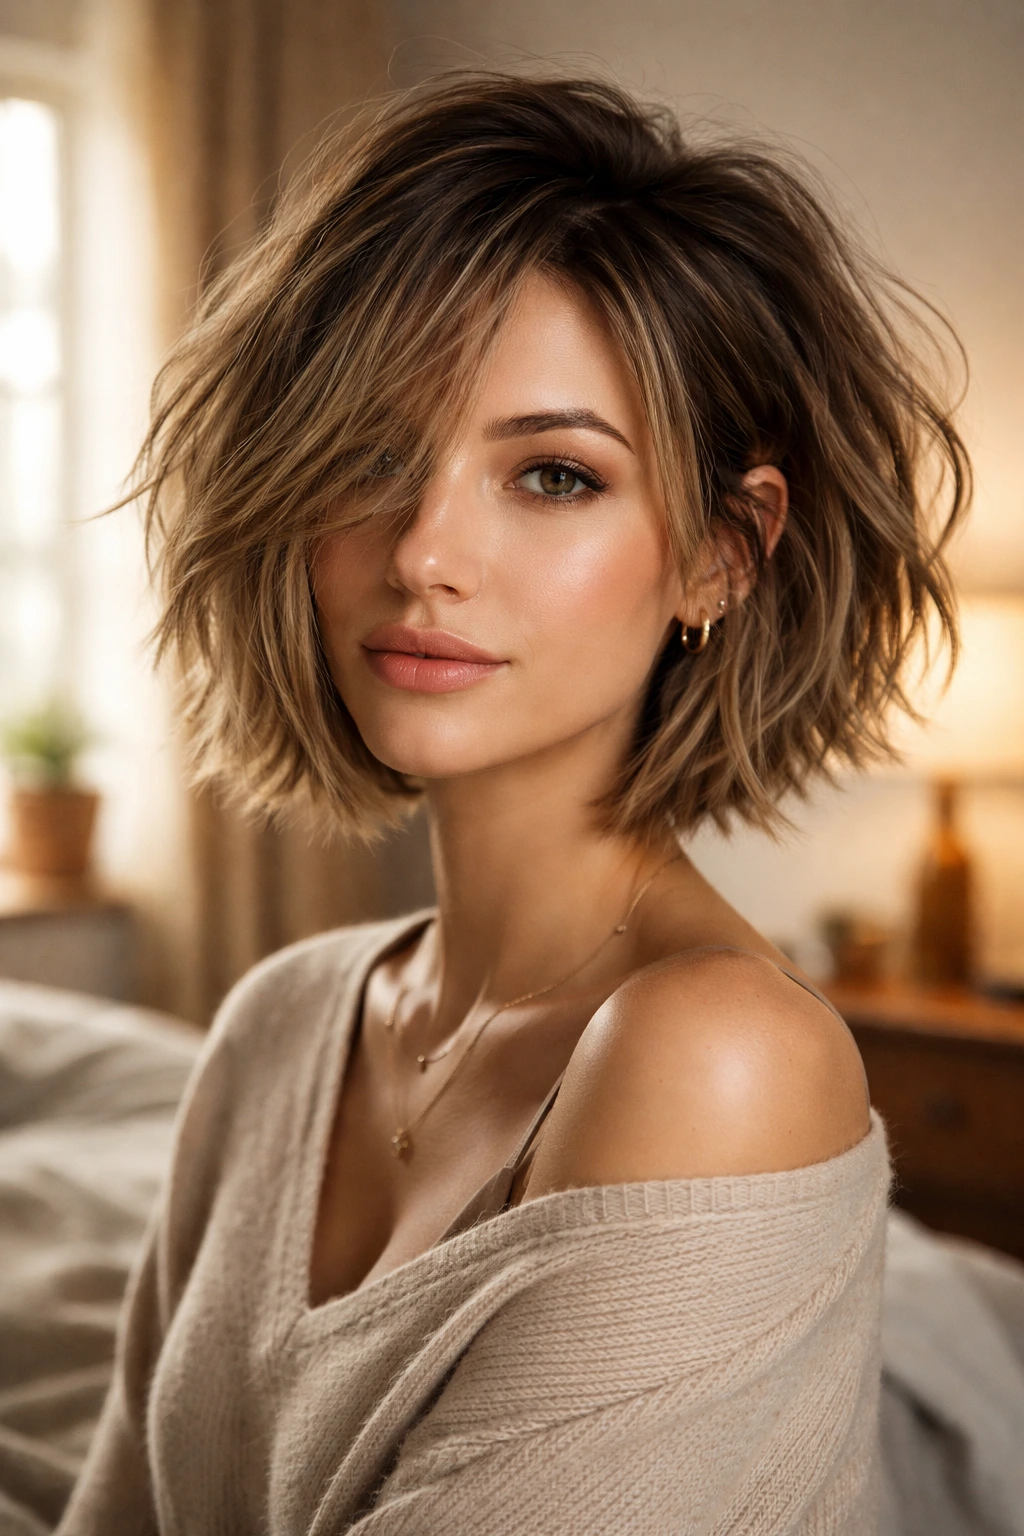
The “shag” is essentially an inverted bob with lots of layers cut throughout the crown and the ends. It is purposeful, textured, and incredibly forgiving for fine hair.
Embracing the Grunge
Fine hair often looks “thin” when it is too polished. The shag embraces imperfection. It looks like it is supposed to be messy. By adding layers throughout the crown, you are lifting the hair off the scalp, which is exactly what you need.
Styling Tip
Skip the round brush. Use a texturizing paste on your palms and work it through your hair while it is 90% dry. Twist random sections and let them air dry. The paste adds the “grit” that fine hair usually lacks.
14. The Undercut Detail
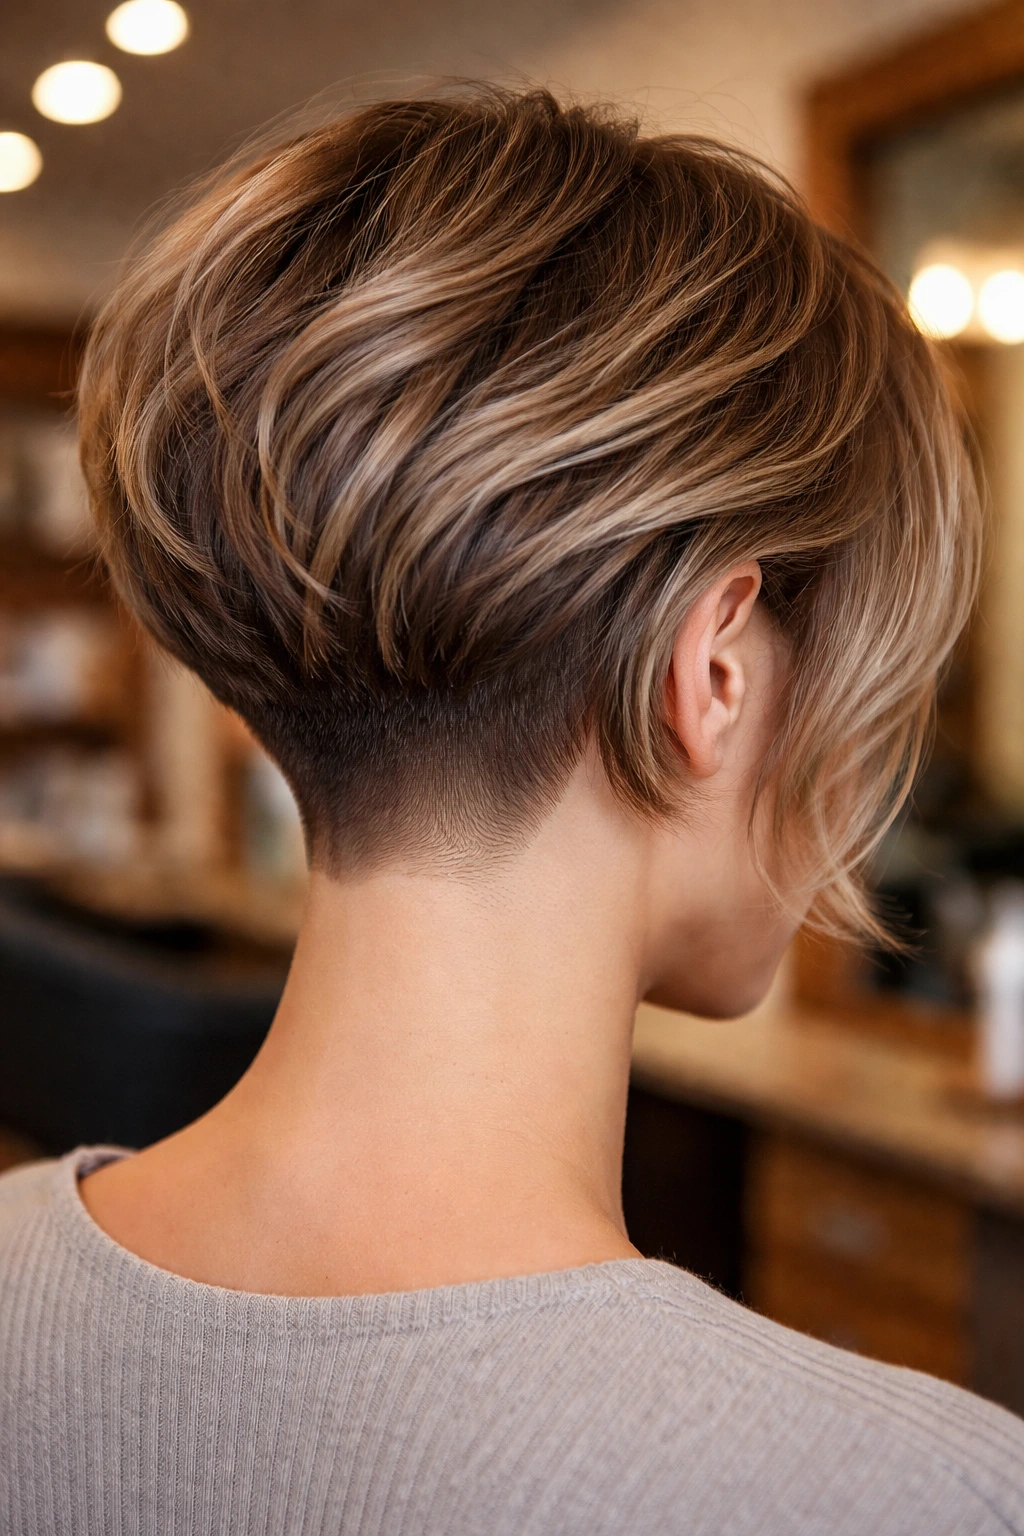
This is a bold move, but it works wonders for fine hair that is prone to looking limp. An undercut involves shaving or trimming the hair at the nape of the neck very short, while leaving the hair above it to fall over.
Why It Eliminates Bulk
If you have too much hair on the very bottom of your neck, it can pull the style down and make it look flat. An undercut removes that dragging weight. It creates a super-sharp, clean line that makes the bob look intentional and modern.
Who Is It For?
This is for the person who wants a low-maintenance style. The nape stays clean and neat, and the rest of the hair sits on top with a massive boost in volume.
15. The “Tucked-Behind-the-Ear” Bob
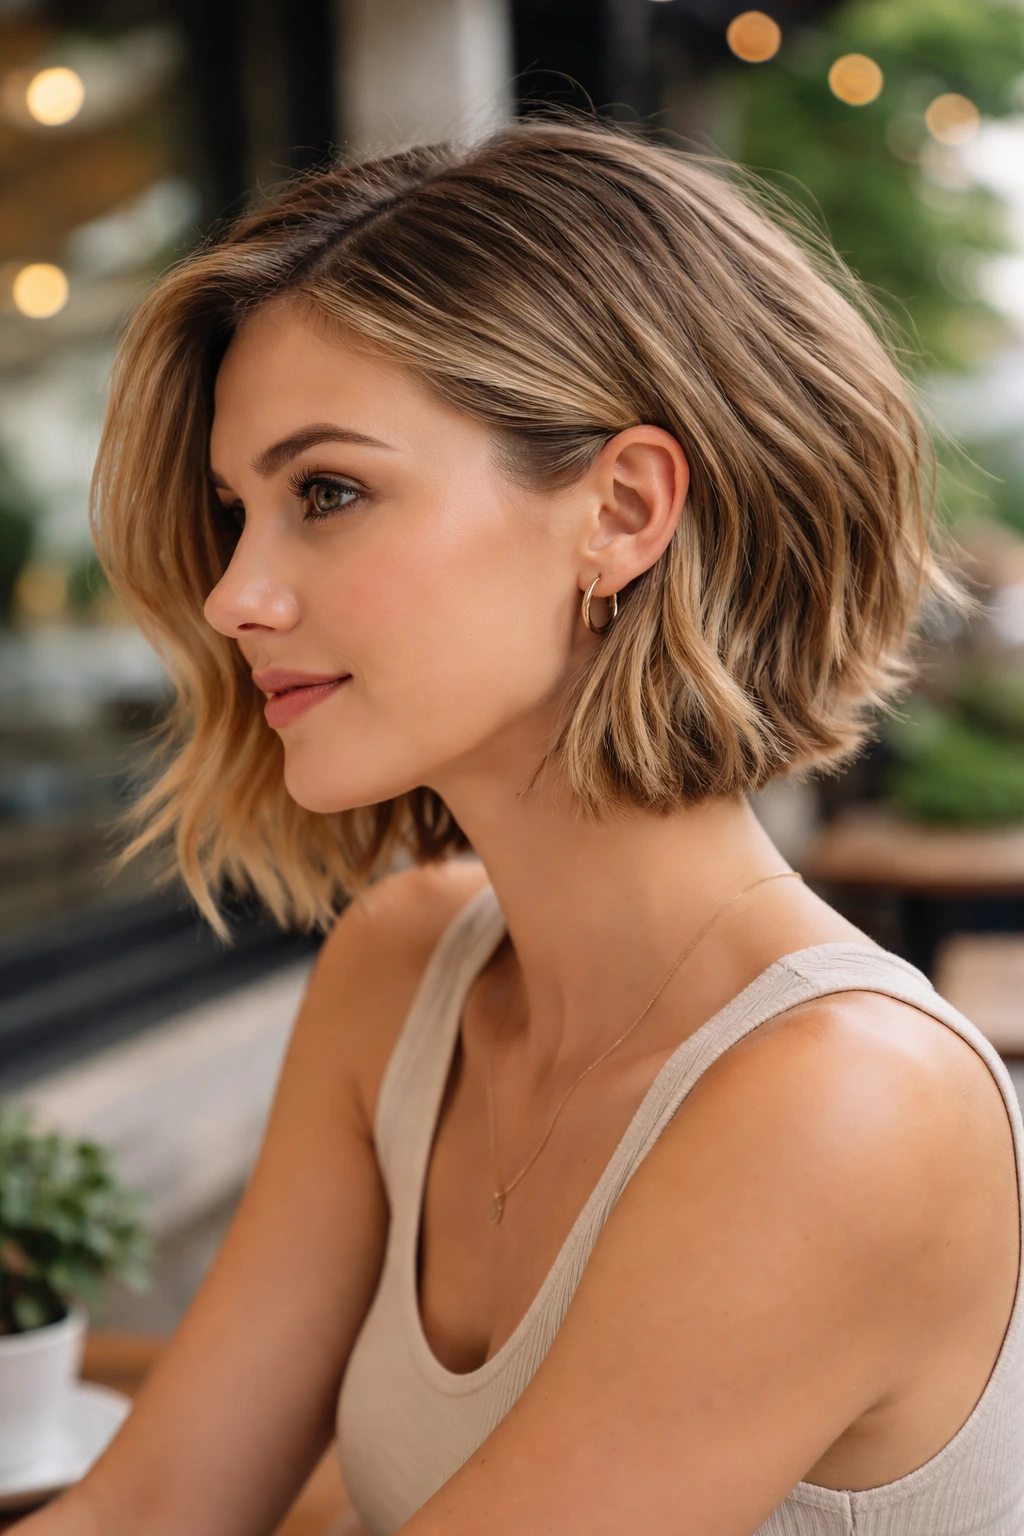
This isn’t a cut per se, but a styling technique that works best with a specific type of inverted bob—one that is slightly longer in the front. By tucking one side behind your ear, you create an instant asymmetry.
Creating Volume
Tucking the hair behind the ear pushes the hair at the crown upward and forward. It exposes your jawline and neck, which visually lifts the whole face.
The Trick
Don’t pull it back too tightly. Leave a few wispy pieces near your temples to frame your face. This keeps the look soft and prevents it from appearing too severe or “slicked back.”
16. Wispy Ends with Blunt Layers
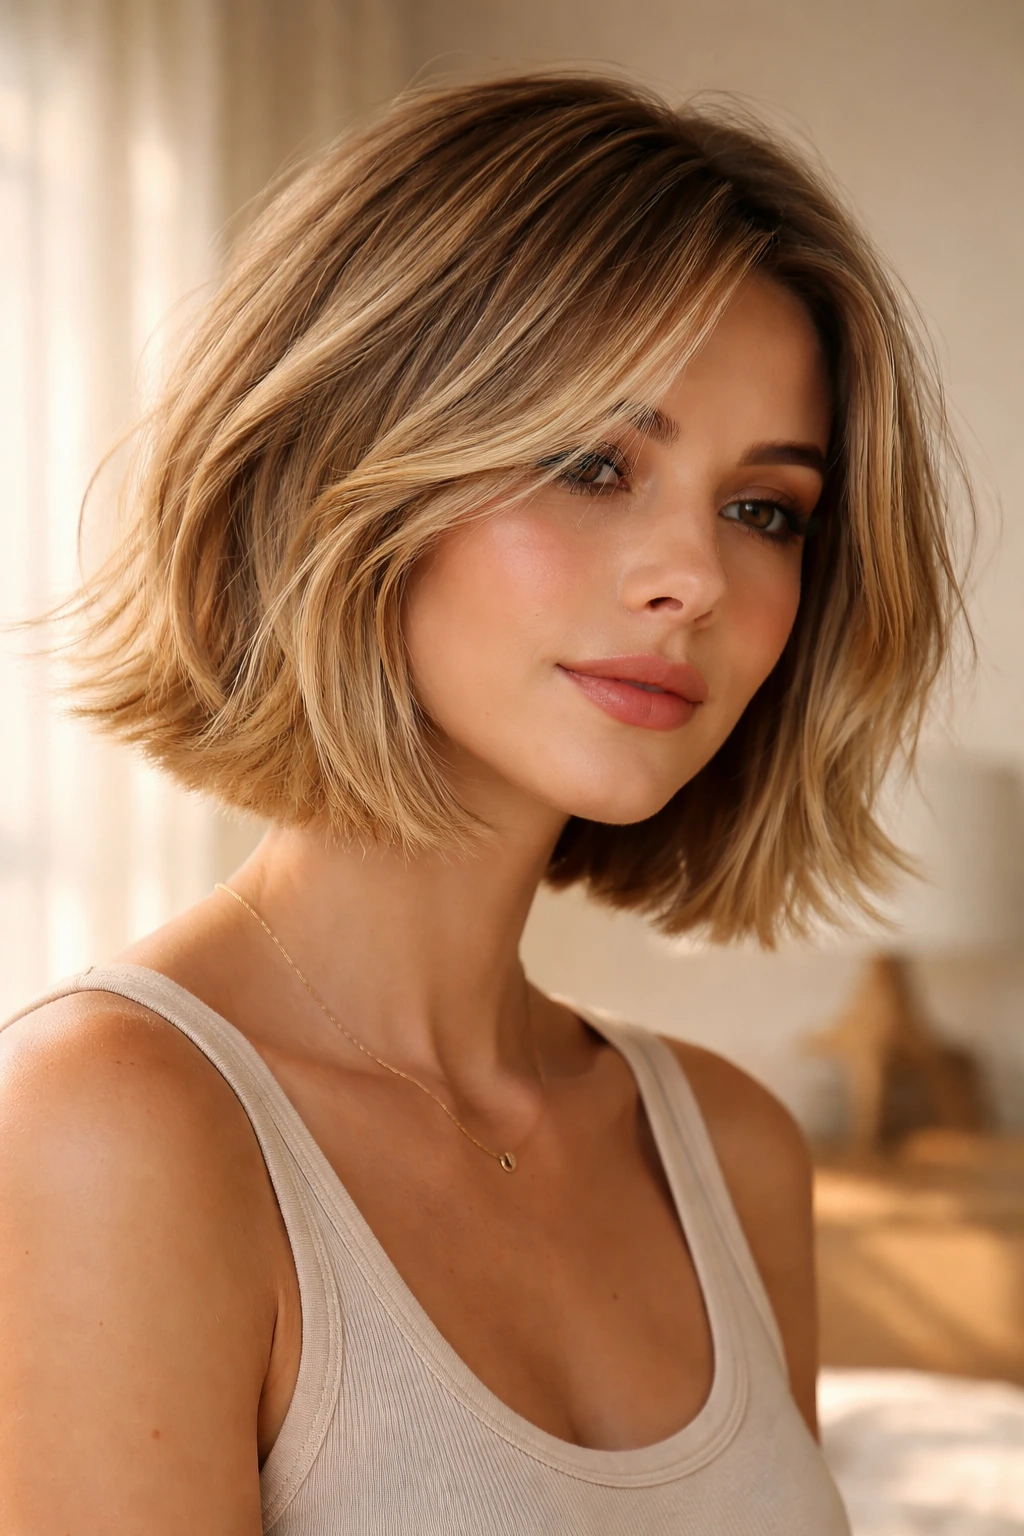
This is a sophisticated cut. The base of the bob is cut with a razor to give it a soft, wispy feel, but the layers higher up are cut blunt. It is the opposite of the standard bob structure.
The Logic
The blunt layers higher up provide the structure and volume, while the wispy ends prevent the cut from looking too heavy or old-fashioned. It is a very “French girl” aesthetic.
Styling
This cut is made for air-drying. Because the ends are already textured, they will naturally wave up as they dry. Just apply a little bit of light cream to the ends to prevent frizz, and let it do its thing.
17. The Golden Blonde Balayage
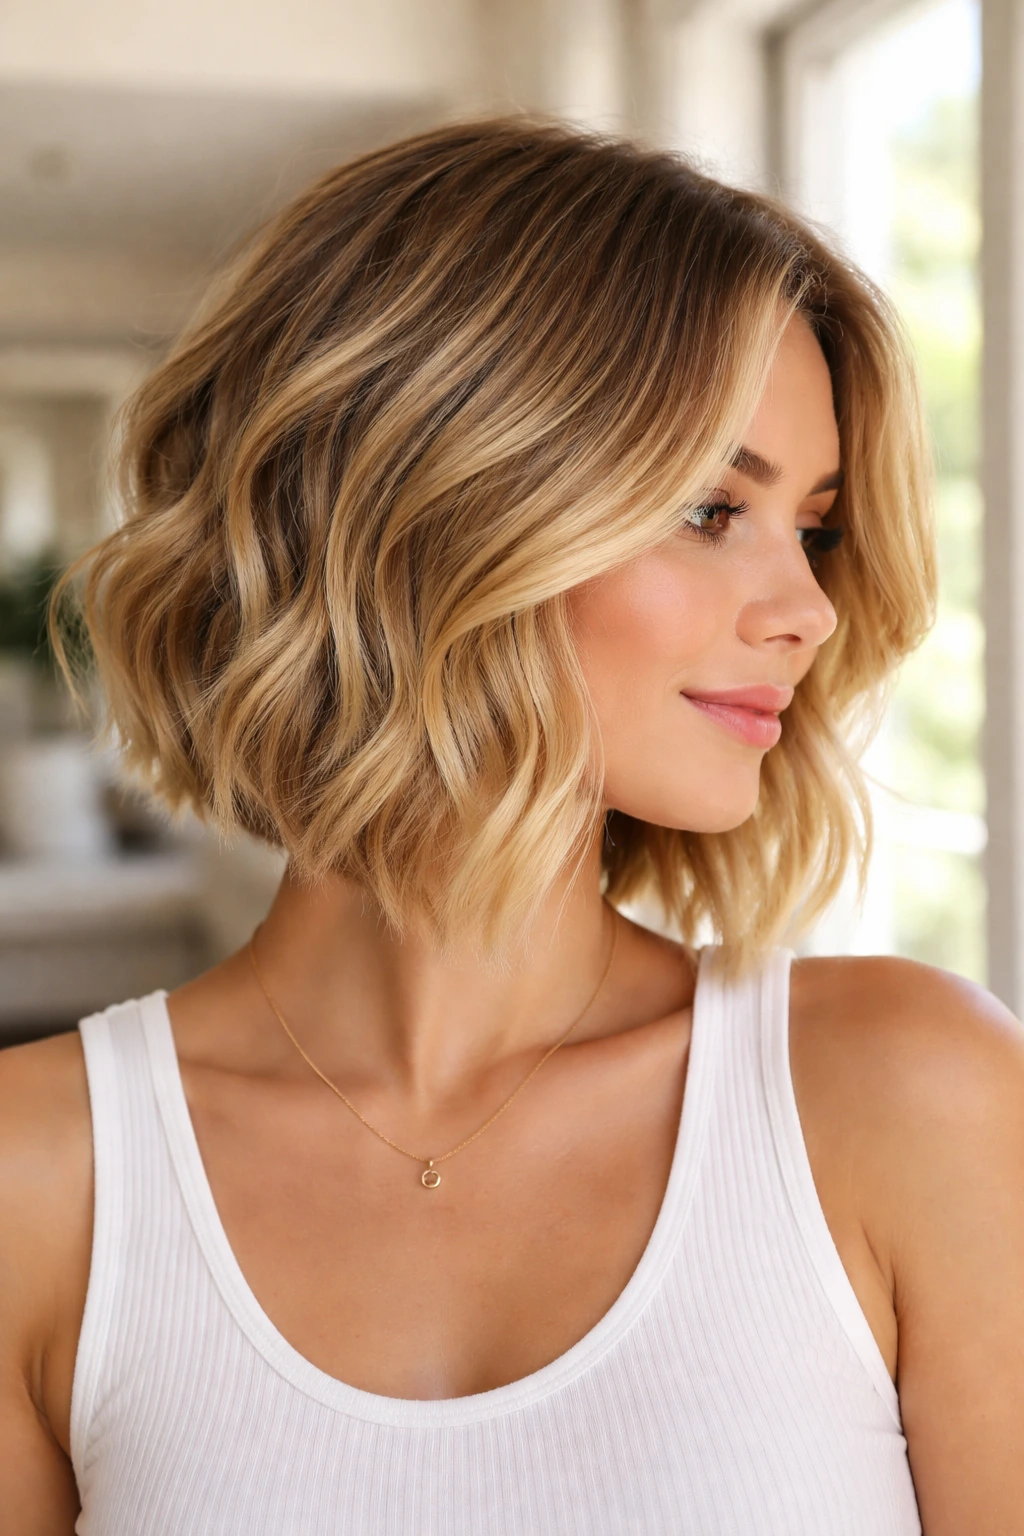
Color placement can dictate how we perceive density. A golden blonde balayage, where the color is painted on by hand, creates a “lived-in” effect.
Contrast is Key
If you have fine hair, having a little bit of root smudge (where the roots are darker than the ends) is a lifesaver. It creates an illusion of a deeper, denser root, which makes the hair look thicker overall.
The “Sunkissed” Benefit
The lighter ends create a visual lightness that prevents the bob from feeling “heavy” or “dull.” It bounces light, making the hair look shiny and healthy rather than flat.
18. Shadow Roots
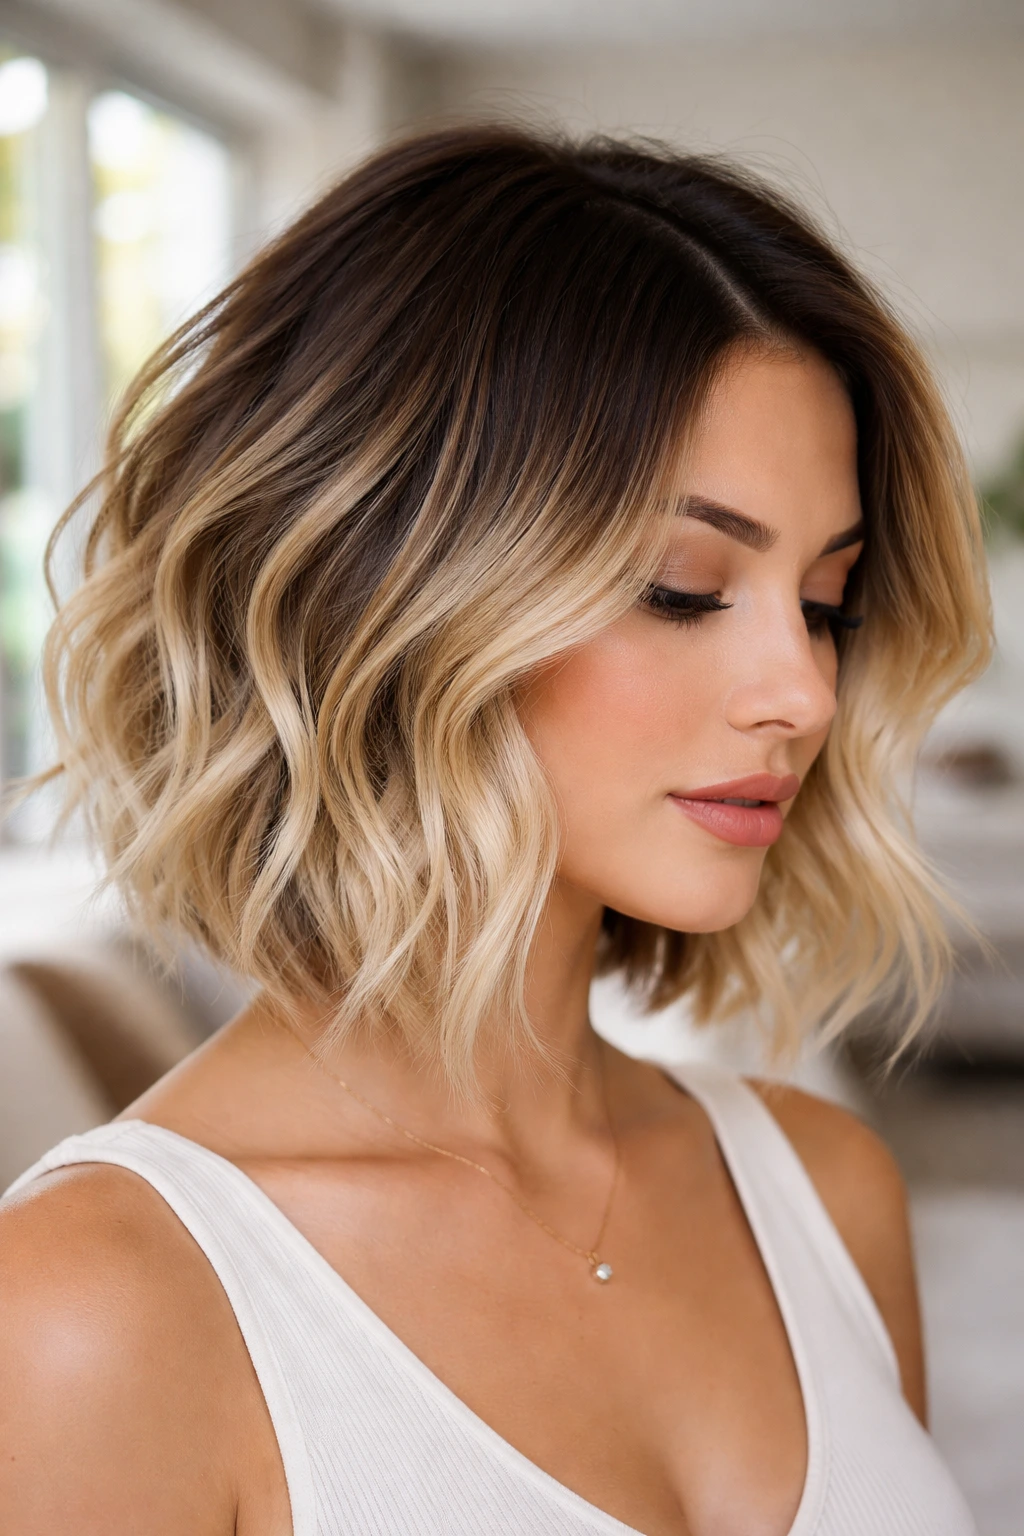
This is a technique where the stylist keeps your natural color at the roots and blends it into a lighter, brighter color through the mid-lengths and ends.
Why It Works for Inverted Bobs
The inverted bob is all about shape. By keeping the root darker, you highlight the shape of the stack in the back. It adds depth where the hair is physically shortest, which is a powerful volume booster.
The Best Hair Type for This
If you hate root touch-ups, this is for you. It grows out beautifully, and the dimension it adds is perfect for those who want their fine hair to look multi-tonal.
19. The Deep-Parted Wavy Bob
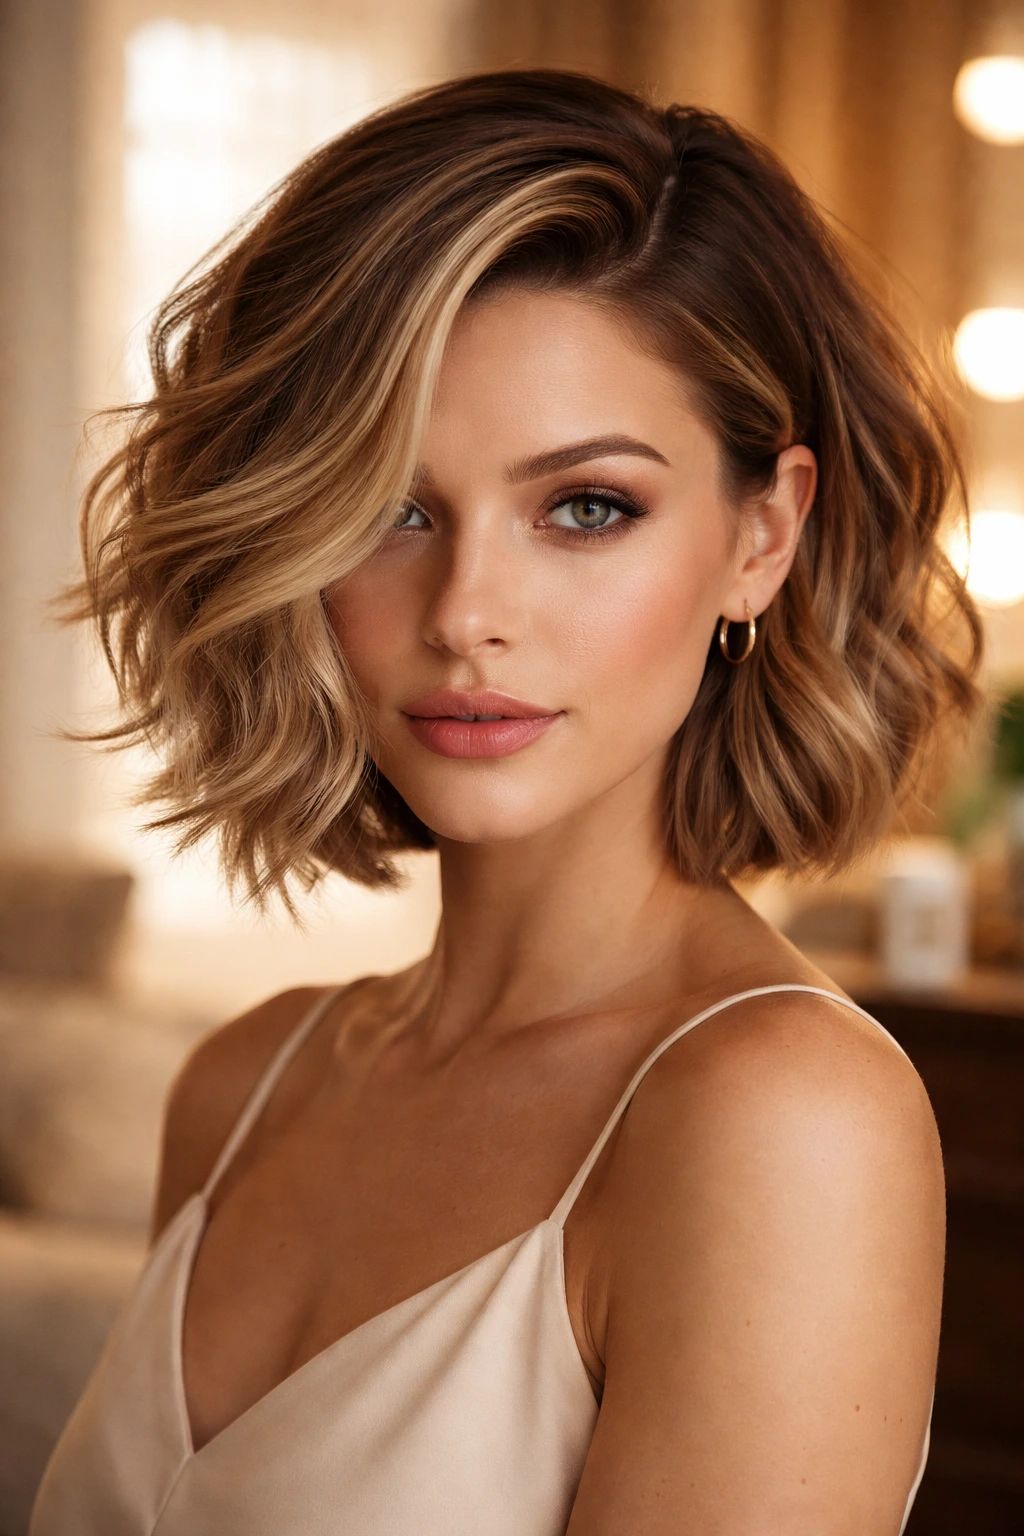
We touched on the side part earlier, but adding a deep, messy wave to a side-parted bob is a different beast. This is the “Hollywood” version of the inverted bob.
The Volume Hack
Use a large-barrel iron to create big, sweeping waves. Because of the deep part, the hair on the “heavy” side will cascade over your forehead, creating a huge amount of volume.
The Secret
Don’t use a brush. Use your fingers to break the waves apart. The goal is to make the hair look like a single, massive wave that flows seamlessly across your face.
20. Sleek-to-Wavy Hybrid
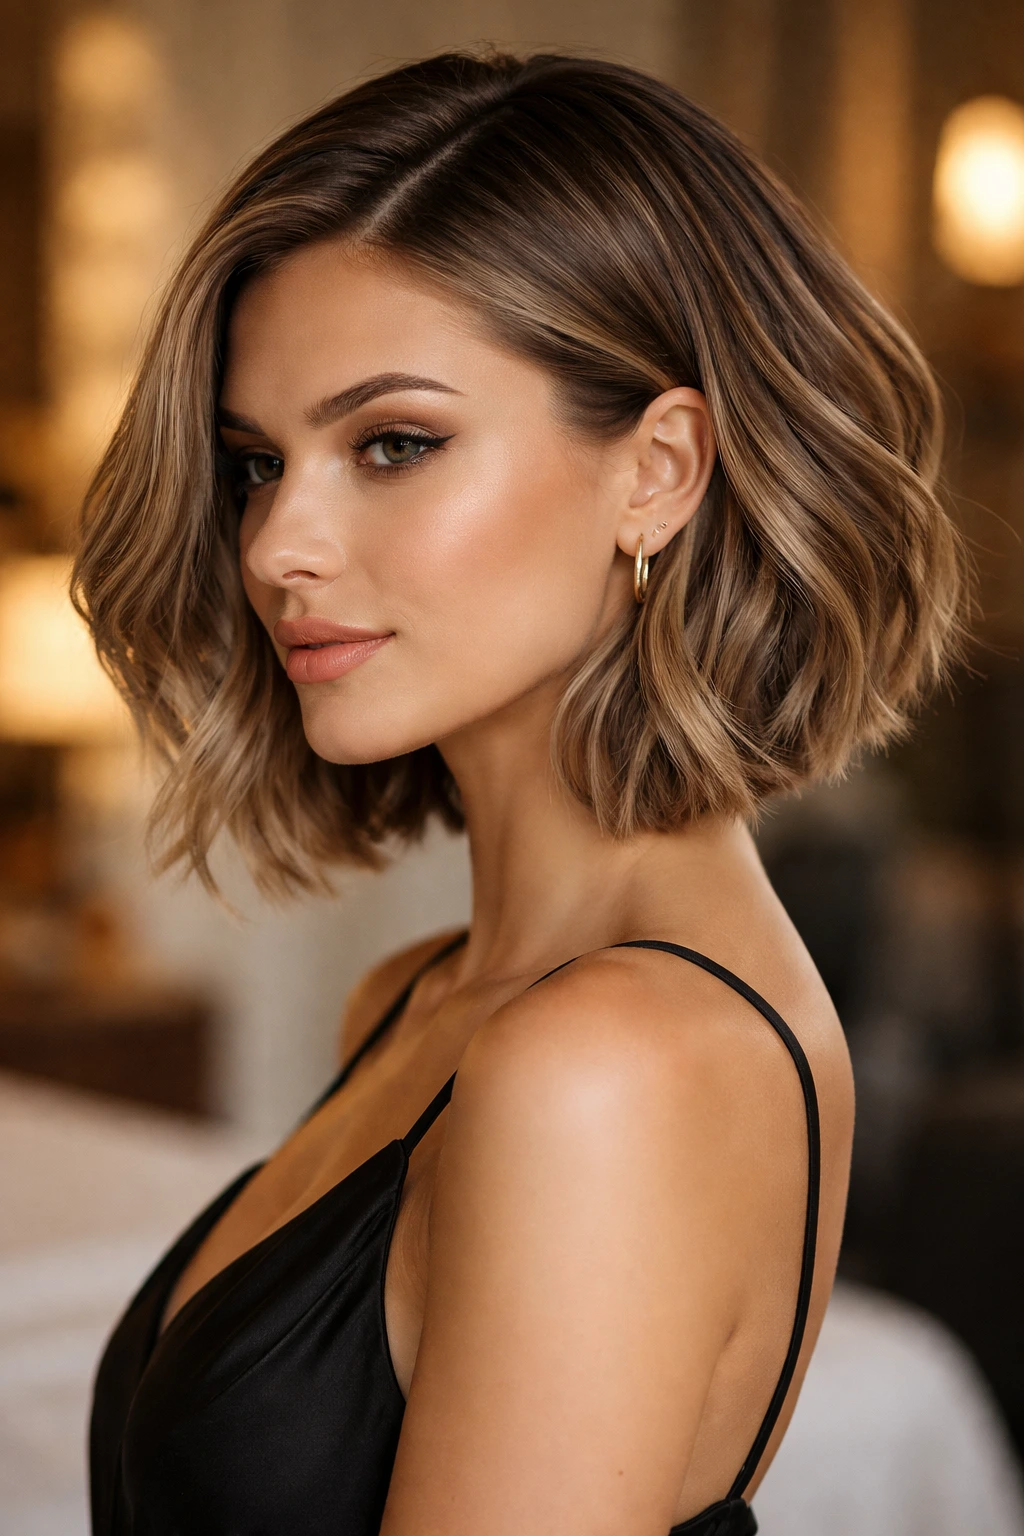
You don’t have to have waves everywhere. Try styling the roots and the nape of your neck sleek and straight, and only adding waves to the mid-lengths.
The Contrast
This contrast highlights the “inverted” shape. By keeping the back tight and smooth, the “stack” becomes very pronounced. The waves in the front add the volume where you want it—around your face.
Effort vs. Reward
This is a great style for when you have an event. It looks polished, intentional, and very expensive. It requires a bit of heat styling, but the results are dramatic.
21. Pastel Tones
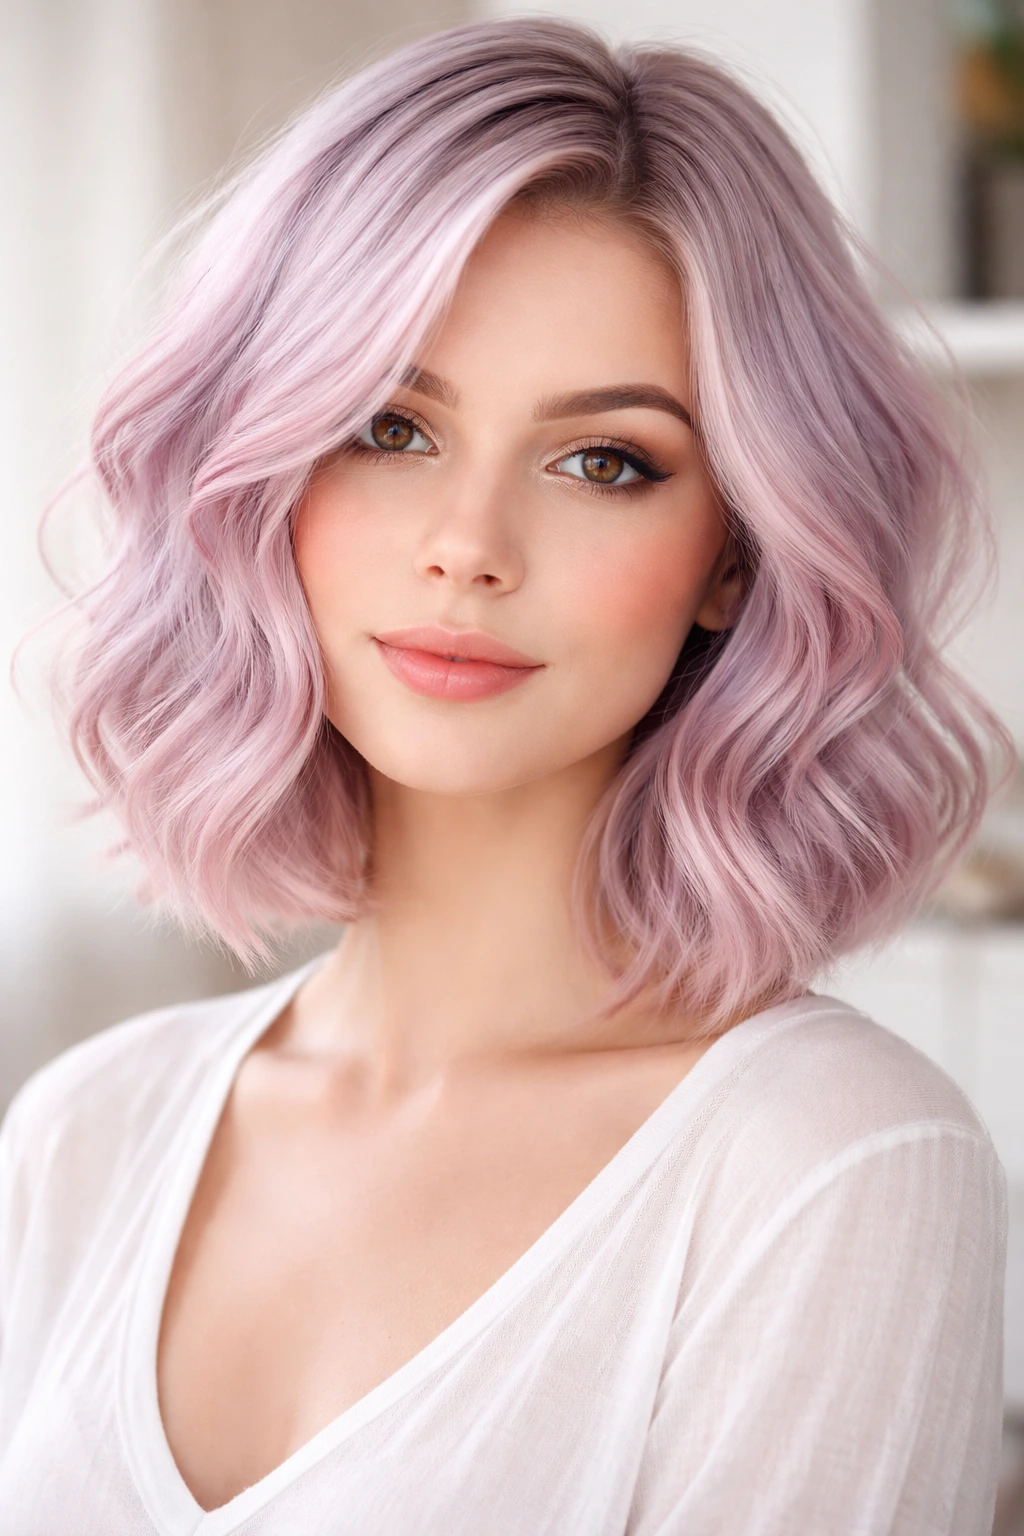
Color doesn’t always have to be natural. A soft, dusty pink or lavender can actually make fine hair look thicker.
Why Pastel?
Pastel colors usually require a very light blonde base, which, as mentioned earlier, swells the cuticle and adds a bit of “grit” to the hair. This rougher texture holds waves and volume better than silky, virgin hair.
The Visual Effect
These colors are ethereal. They diffuse light differently than dark colors, which makes the hair look like a soft cloud rather than a flat sheet.
22. The Curly Inverted Bob
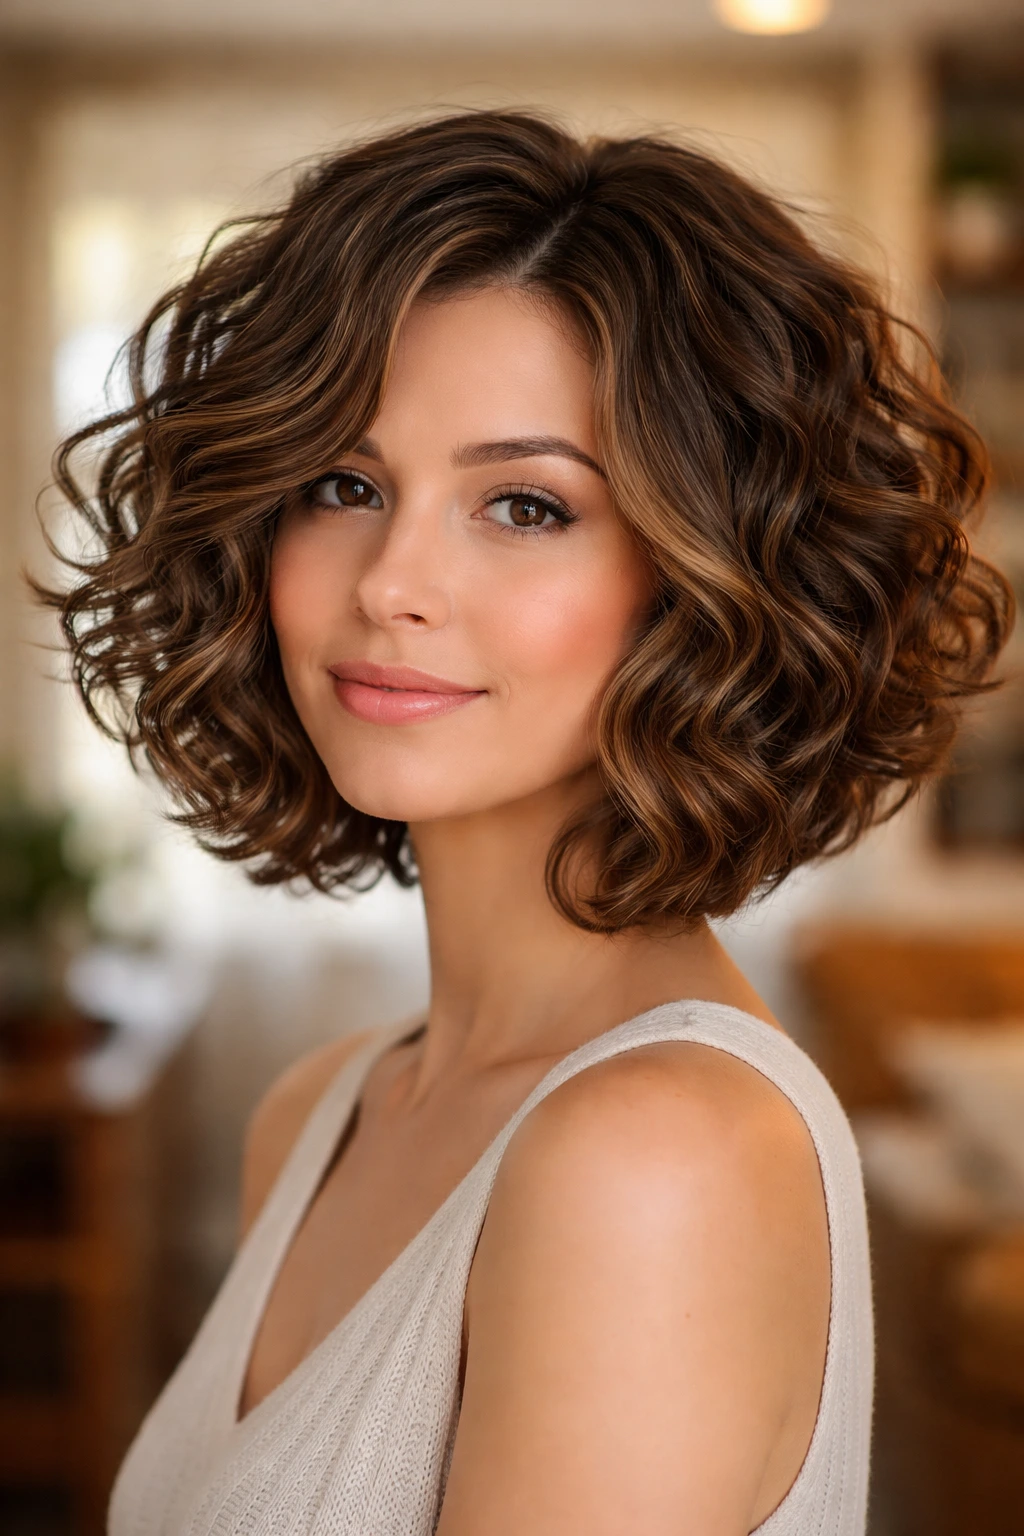
If you have naturally wavy or curly hair, stop trying to straighten it. Your natural texture is the best tool for volume you could possibly have.
Working With Your Texture
An inverted bob for curly hair needs to be cut specifically for your curl pattern. The layers need to be longer than they would be on straight hair, so they don’t shrink up too much.
The Result
The stack in the back will be bouncy and defined, and the front will frame your face with natural, beautiful texture. It is the ultimate low-maintenance, high-impact style.
23. Face-Framing Highlights (Money Pieces)
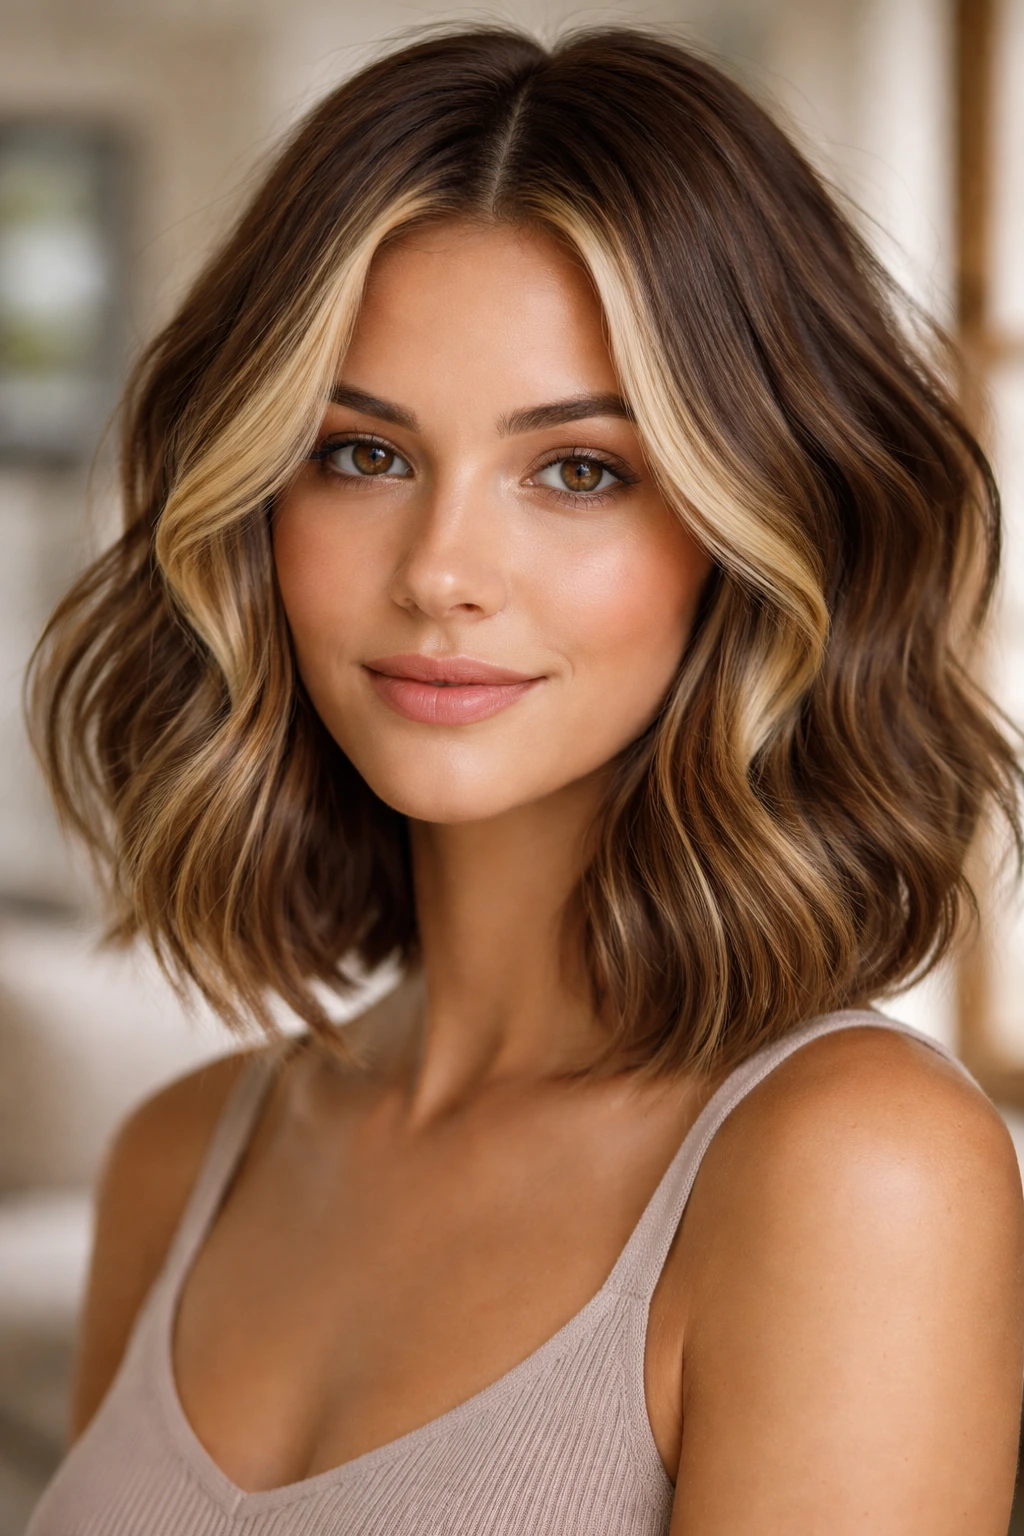
If you want to draw attention to your face and away from the density of your hair, the “money piece” trend is perfect.
Directing the Eye
By lightening the two strands of hair directly framing your face, you pull focus forward. It makes the style look very bright and fresh.
Styling Tip
These pieces are the first thing people see. Make sure to style them with a bit of a wave to match the rest of the inverted bob. If the money pieces are dead straight and the rest of the hair is wavy, it will look disjointed.
24. The Voluminous Root Lift
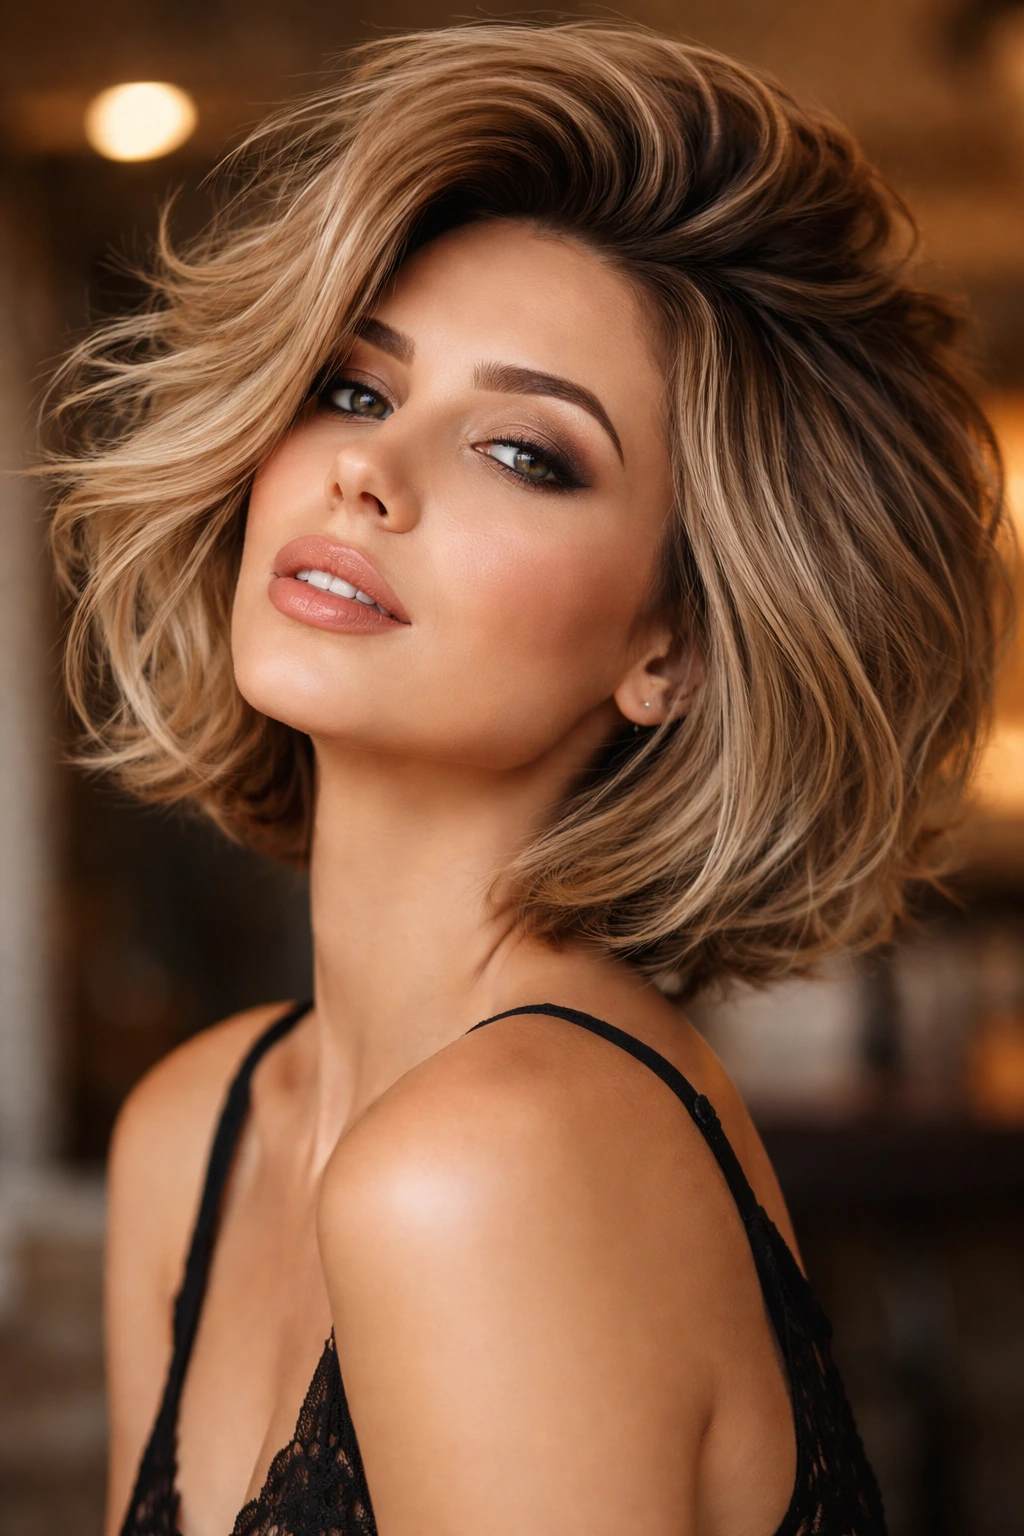
Sometimes you need to cheat. If your hair is just not cooperating, use a root-lifting spray.
How to Apply
Flip your head upside down and spray the roots generously. Then, blow-dry the hair in that position until it is dry. When you flip your head back up, you will have a massive amount of “poof” at the roots.
Maintaining It
This look won’t last three days, but it is perfect for a night out. Use a little bit of powder spray at the roots to keep the lift from collapsing as the day goes on.
25. Golden Honey Tones
Warm tones generally appear thicker than cool, ashy tones. A golden honey shade adds richness to fine hair.
Why It Works
Cool colors can sometimes look translucent on fine hair. Warm, honey colors are more opaque. They reflect light in a way that suggests density.
The Vibe
This color looks incredible with a slightly messy, wavy inverted bob. It gives off a healthy, sun-drenched vibe that makes the hair look like it is in its prime.
26. Subtle Razored Layers
If you are afraid of the full razor-cut look, just ask your stylist for “subtle razored layers.”
The Effect
They will use the razor to soften the layers, not to remove bulk. It makes the transition between the lengths of the inverted bob seamless and soft.
Softness
This style is all about movement. Every time you turn your head, the layers will shift and change, creating a dynamic look that doesn’t rely on being perfectly “set.”
27. The Tousled Finish
This isn’t a cut—it’s a philosophy. For any inverted bob you get, the secret to success is the “tousled finish.”
Stop Being Perfect
Fine hair looks thinnest when it is perfectly smoothed. It looks thickest when it is chaotic. Lean into the chaos.
The Routine
When you style your hair, mess it up. Run your hands through it. Use a dry texture spray. Don’t worry about symmetry. A slightly messy, slightly asymmetrical inverted bob will always look better than a perfectly coiffed, flat one.
28. The Long-Layered Inverted Bob
If you aren’t ready to go short in the back, try an inverted bob that hits below the chin. It is the longest version of the cut, but it still maintains the inverted shape.
Who Is This For?
This is perfect for the person who wants to be able to pull their hair back into a small pony if needed. You still get the volume and the shape, but you keep a bit more length to play with.
The Flexibility
It is the most versatile option. You can wear it straight for a sharp, sleek look, or wave it for a soft, feminine style. It bridges the gap between a bob and a medium-length cut.
Final Thoughts
When you are working with fine hair, the battle is almost always against gravity. An inverted wavy bob is not just a style; it is a structural solution. It uses the weight of the hair to your advantage, creates space at the roots where you need it most, and allows you to use texture to fake the density you crave. The key to nailing this look isn’t finding a “perfect” picture on social media and demanding your stylist replicate it. It is about understanding your hair’s specific nature—where it falls flat, how it takes a wave, and what color tones make it look robust rather than translucent.
Don’t be afraid of the cut. Many people with fine hair avoid the short, stacked bob because they fear it will highlight how little hair they have. The reality is usually the opposite. The extra length, which seems like it should provide volume, is often the very thing dragging your hair down. Once you commit to the shape of an inverted bob, you liberate your hair from its own weight. Combine that with a wavy texture—whether natural or created with a tool—and you have a style that is finally working with your hair, not against it. Remember to keep your products lightweight, embrace a little bit of mess, and don’t over-process the ends. Your hair will thank you for it.
