



Honey balayage and brown hair are a very good match. The reason is simple: honey lives in that warm gold range that brightens brunette hair without turning it into a hard blonde job, and that softness keeps the color believable.
The trick is placement. A level 5 dark brown base needs a different hand than a level 7 chestnut brunette, and if the lightening is pushed too fast, you get orange stripes or tired-looking ends instead of that expensive, sun-faded effect people actually want. Good honey balayage should look painted, not striped.
Gloss matters.
That is the part a lot of people skip when they talk about honey tones. On brown hair, the prettiest results usually come from a mix of lift, toner, and a final glaze that pulls the brass into a richer gold-beige lane. When all three work together, the color moves in the light instead of sitting on top of the hair like a separate layer.
The looks below lean into different moods: soft ribbons, bold face frames, curly placement, grow-out-friendly blends, and a few richer versions for darker brunettes. Brown hair can wear honey in more than one way, and the differences are worth paying attention to.
1. Soft Honey Ribbons on Medium Brown Waves
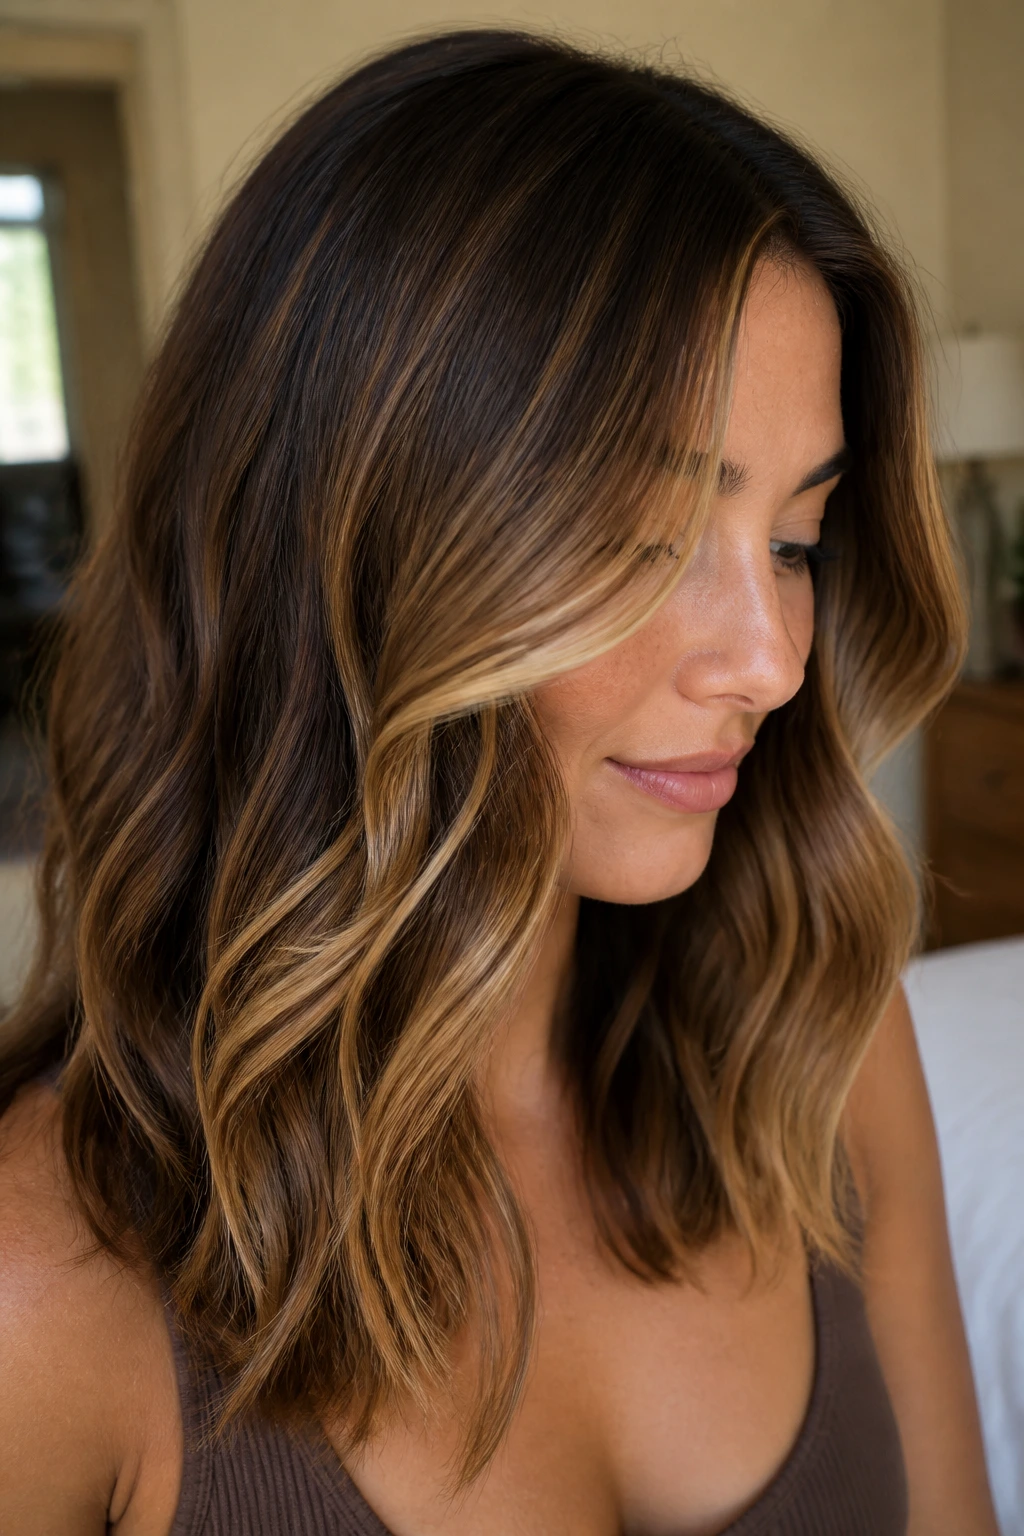
Soft honey ribbons are the look I reach for when someone wants change without the drama of a full blonde moment. On medium brown hair, the contrast is gentle enough to feel natural, but the warmth still reads clearly when the hair moves.
Why It Works on Medium Brown
The best versions use thin, hand-painted pieces that start a little below the roots, usually about 1 to 2 inches from the scalp. That keeps the grow-out soft and avoids a chunky stripe effect near the part. On loose waves, those lighter strands break up the brown base in a way that feels airy instead of busy.
A shoulder-length wave or a longer layered cut makes this placement even better, because the honey pieces catch at the bends rather than hanging in one flat line. I like this look when the goal is shine and movement, not a full color transformation. It has that easy brunette-to-brightness shift that works in almost any setting.
- Ask for fine ribbons through the mid-lengths rather than heavy face framing.
- Keep the lightest pieces a half shade brighter around the front so the face gets a lift.
- Style with a 1.25-inch curling iron and brush the waves out for a softer finish.
Tip: If the ends look a little flat, a clear gloss after toning can make the honey read richer and less yellow.
2. Caramel-Honey Melt on Dark Chocolate Hair
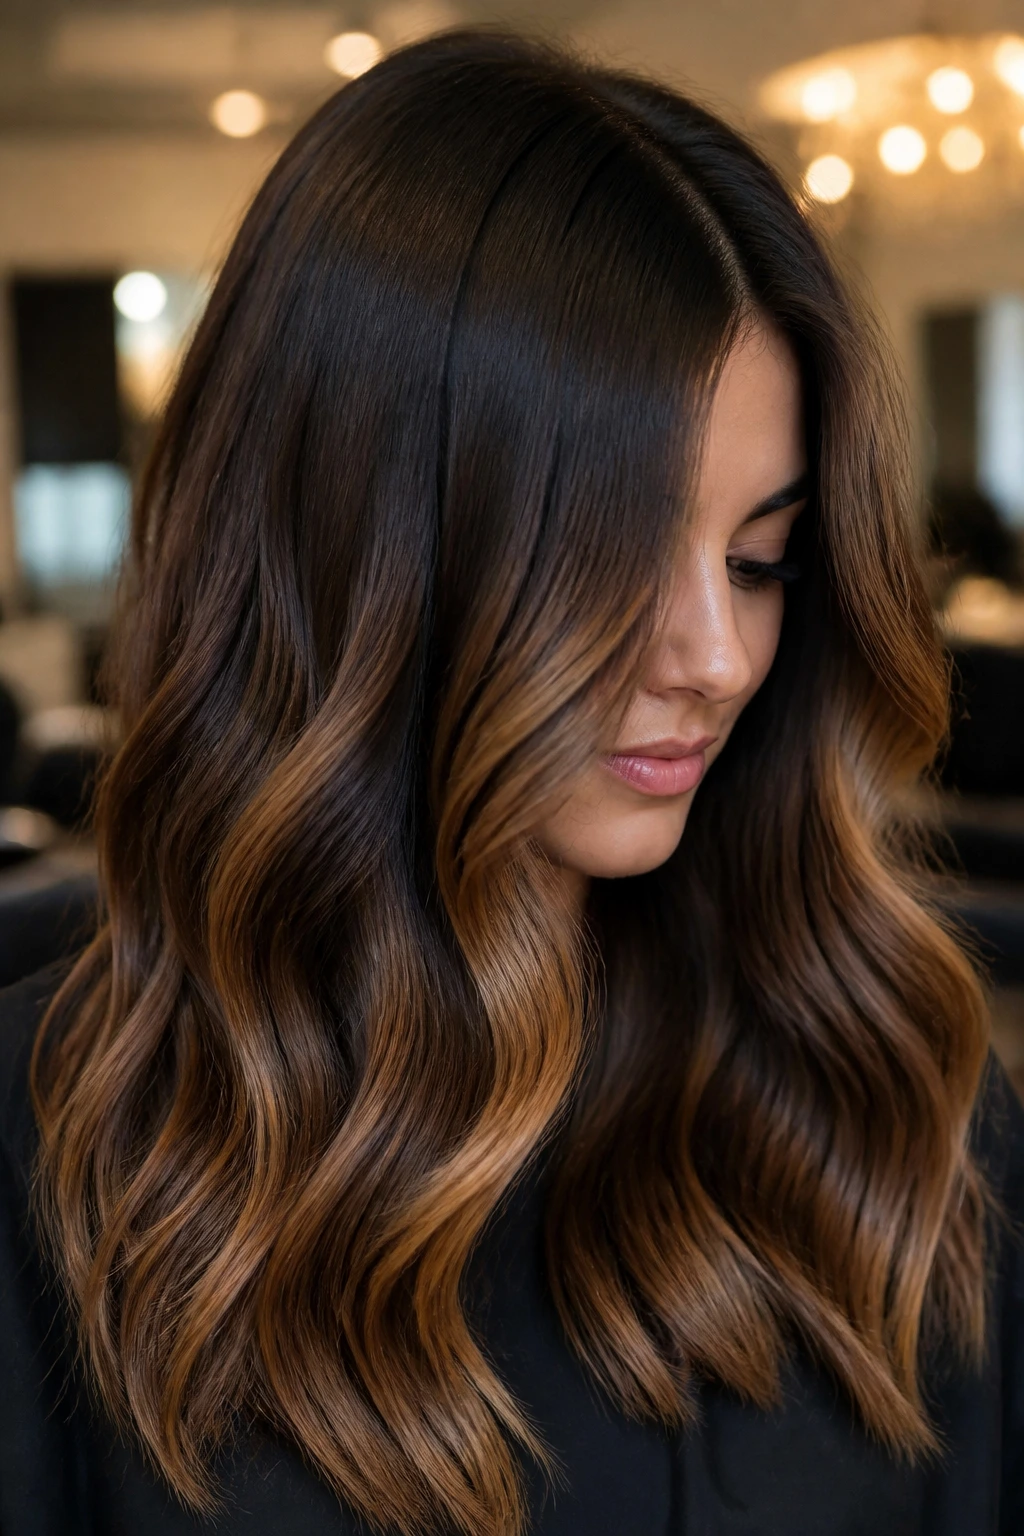
Dark chocolate brown can carry honey beautifully, but only if the lift stays gradual. Push it too far too fast and the whole thing gets loud in the wrong way. Keep it soft, and it turns into one of the most polished brunette color stories around.
The melt should start with a deep root and slowly open into caramel-honey mids and ends. On a level 4 or 5 base, the painterly transition matters more than the exact shade name on the swatch board. A good colorist will keep the first few inches near the root almost untouched, then feather the lightener into the mid-shaft so there is no sudden line where dark ends and honey begins.
That slow fade also helps the hair look thicker. Dark roots create depth, while the lighter ends pull the eye downward and make long hair feel more layered. If the strands are fine, this technique can give the illusion of density without stacking on a bunch of dark lowlights.
The finish should feel glossy, not dry. A honey melt on dark brown hair looks expensive when the warmth stays in the gold-caramel family and never slides into orange. That part is delicate, and yes, it matters.
3. Face-Framing Honey Money Piece
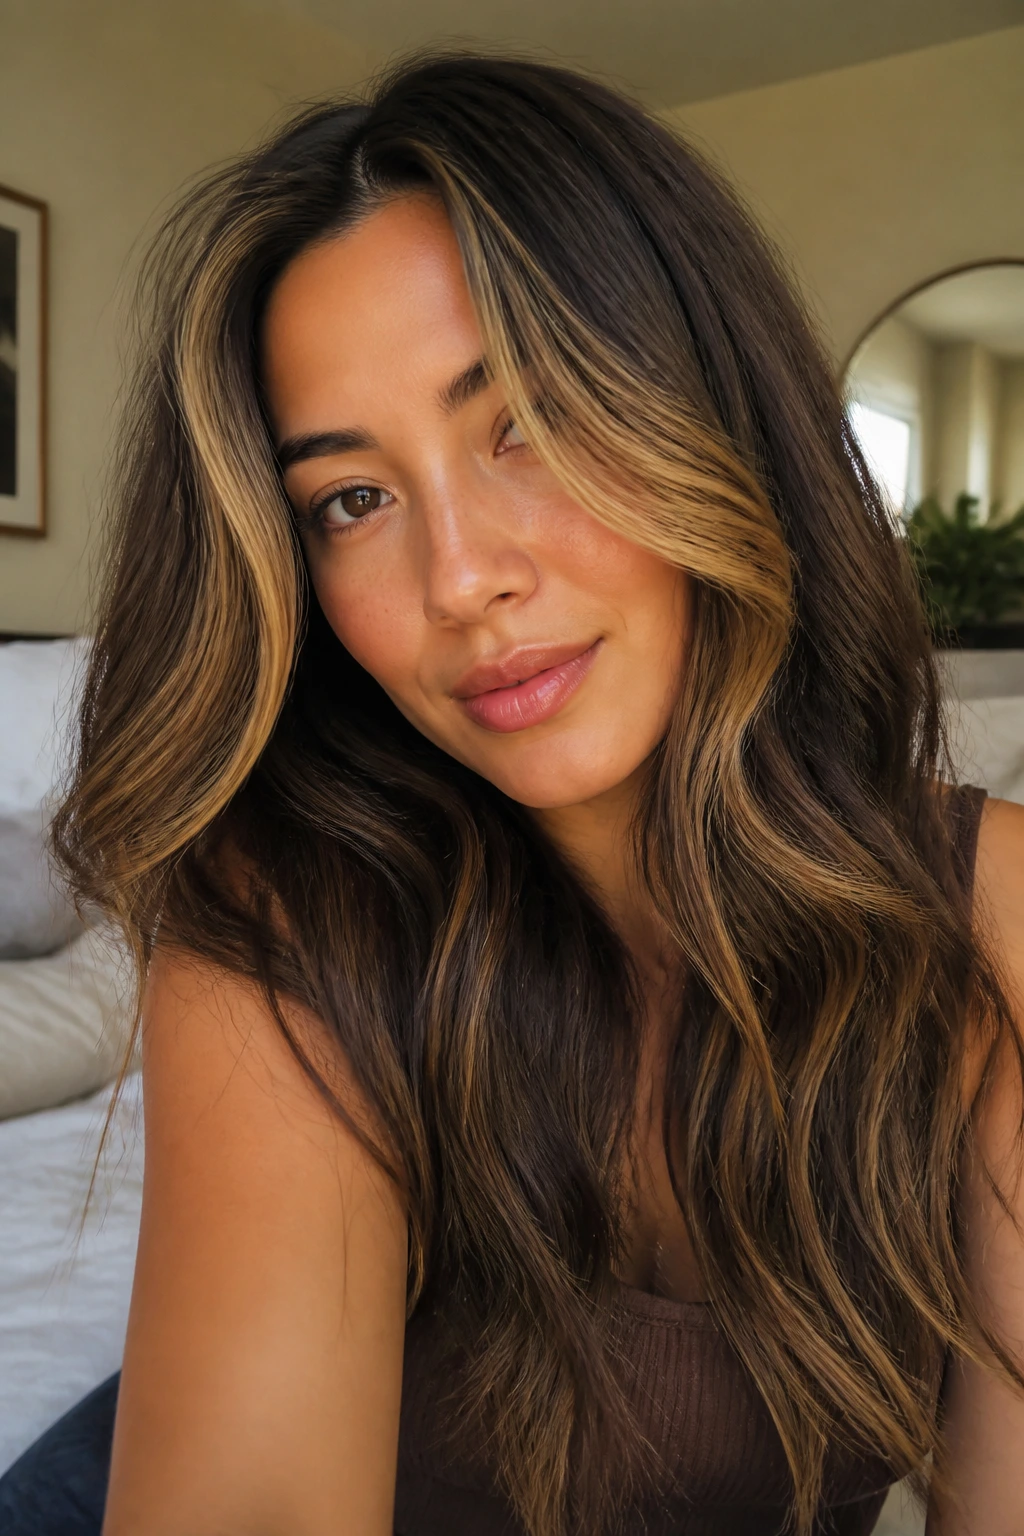
Want the quickest way to make brown hair look brighter around the face without changing the whole head? The money piece is it. A honey version works especially well because it lifts the eyes and cheekbones without screaming for attention.
The bright front sections should be wider than tiny baby highlights, but not so wide that they look like a chunk from a completely different color service. I usually like them to start just off the part and continue into the first few inches around the face, especially if the haircut has curtain bangs or cheekbone layers. A width of about 1 to 1.5 inches per side is a useful starting point.
How to Style It
Keep the rest of the hair soft. If the money piece is the only bold part, a loose bend through the lengths makes the color read intentional instead of random. A round brush at the front can also help the honey streaks sit away from the face and show their brightness.
- Best on layered cuts, curtain bangs, and medium-length brunettes
- Works well when the ends stay only one to two levels lighter than the base
- Needs a gloss refresh a little sooner than all-over balayage because the front pieces take the most heat from styling
This is the look I’d send to someone who wants visible brightness now, not after three appointments.
4. Toasted Honey Balayage for Chestnut Brunettes
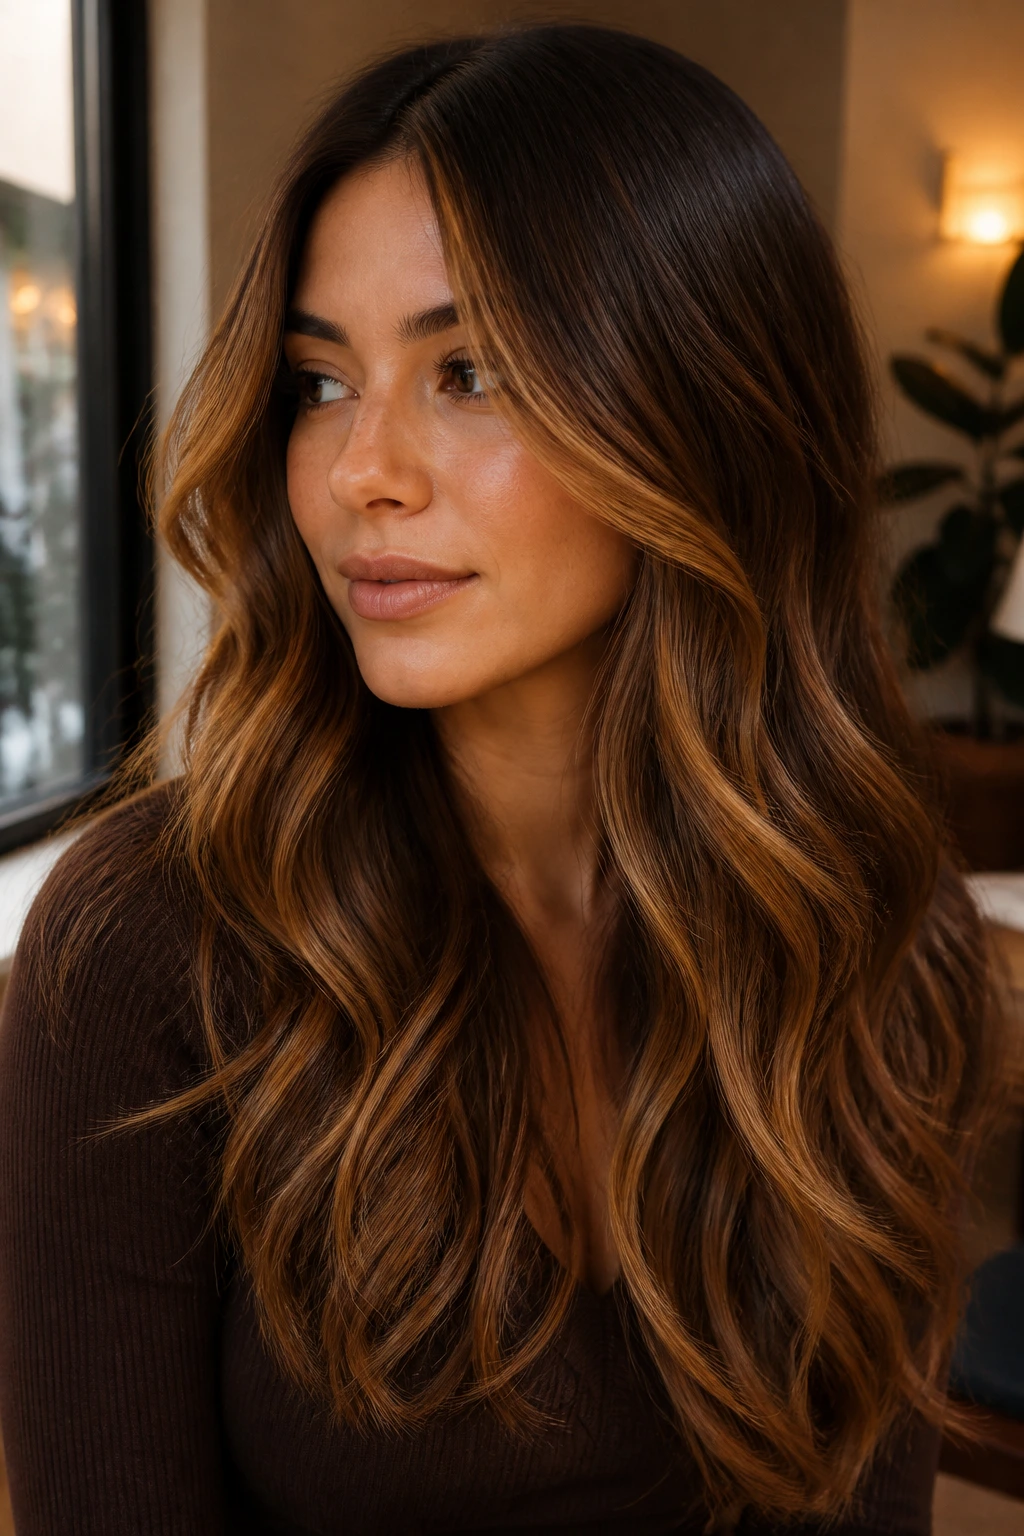
Chestnut brown already has warmth, so toasted honey feels like a natural extension of the base rather than a color leap. That is why it looks so easy in real life. The whole head reads as richer, not louder.
Picture a brunette shade with reddish-brown undertones and a few hand-painted honey strokes woven through the ends. The honey should lean warm, almost like clover honey or a light amber glaze, not pale yellow. On chestnut hair, that warmer bend keeps everything in the same family and avoids a patchy contrast.
A client with medium or thick hair usually wears this especially well, because the texture gives the color room to move. On straighter hair, the placement can feel a touch more uniform, so I’d ask for irregular spacing between painted pieces. That keeps the finish from looking too tidy, which is a weird thing to say about hair, but it matters.
A good sign: the honey shows most when the hair swings, not when it sits still. That is the whole point here.
5. Subtle Honey Lifts on Long Layers
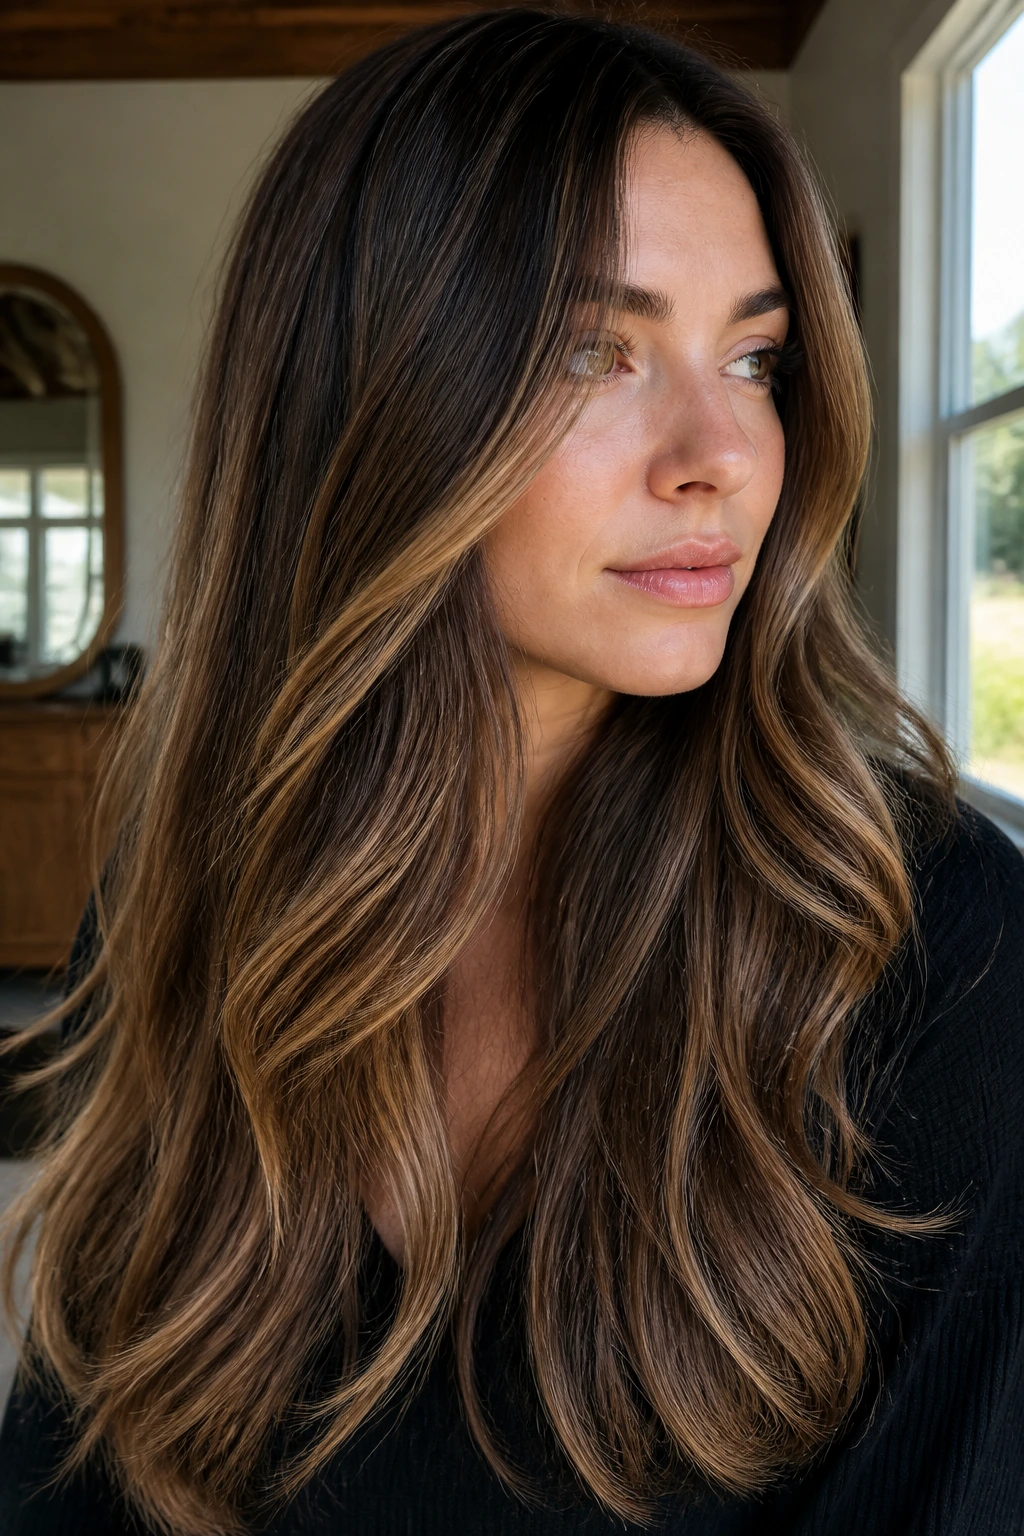
Long layers are the perfect setup for subtle honey balayage because the color can travel down the cut without crowding the top. You get brightness where the movement happens, and the hair still keeps its depth at the crown.
This look is for the brunette who wants dimension, not a makeover. The lightening should stay delicate through the upper half of the hair and become a little stronger near the lower third. Think thin, feathered ribbons that land just enough to catch light on the ends of the layers. On very long hair, that approach keeps the whole shape from looking blocky.
The upkeep is friendly, which is one reason stylists like it for clients who hate obvious regrowth. Because the root area stays close to the natural brown, the grow-out can look neat for months without needing a harsh blend line fixed every few weeks. A toner or gloss around the 6- to 8-week mark keeps the honey from dulling into something muddy.
There is also a practical upside. Long hair can look heavy fast, and a few warm ribbons break up that weight without thinning the ends. That is a small detail, but small details are where good color lives.
6. Honey Bronde Balayage with Beige Ends
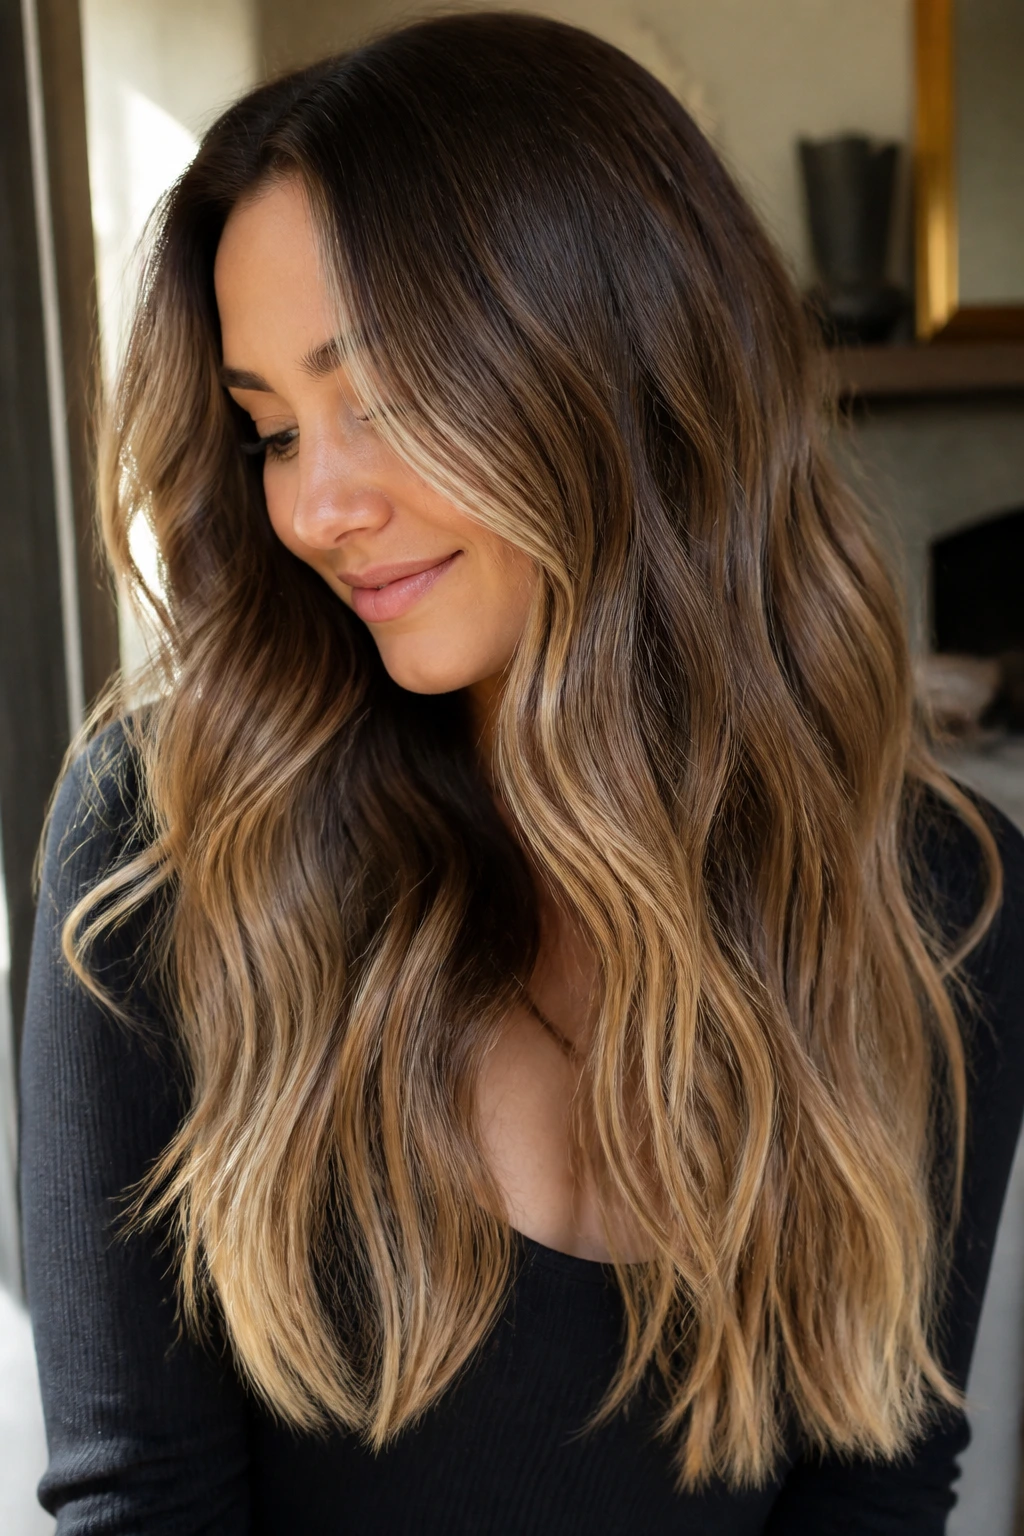
Unlike classic blonde balayage, honey bronde keeps more brunette in the mix. That makes it a useful middle ground for people who want brightness but do not want their hair to look light from every angle.
The beige ends are the part that makes this version work. Pure honey can read warm, sometimes almost coppery, on some brown bases. Beige pulls that warmth back just enough to keep the finish soft and wearable, especially if the base shade already has a lot of red pigment. The result sits between brunette and blonde without feeling confused.
What Makes It Different
This look is stronger on medium brown and light brown hair than on very deep brunette bases, because the beige can show without needing too much lift. It also suits hair that is worn loose more often than pinned up, since the soft ends need movement to show their blend.
If I were asking for it at the salon, I’d say: keep the root shadow natural, let the mid-lengths warm up, and tone the ends to a beige-honey finish instead of a bright gold. That single choice changes the whole mood.
Best for: someone who likes warm brunette color but wants enough brightness to keep the hair from looking flat in low light.
7. Golden Honey Highlights on Curly Brown Hair
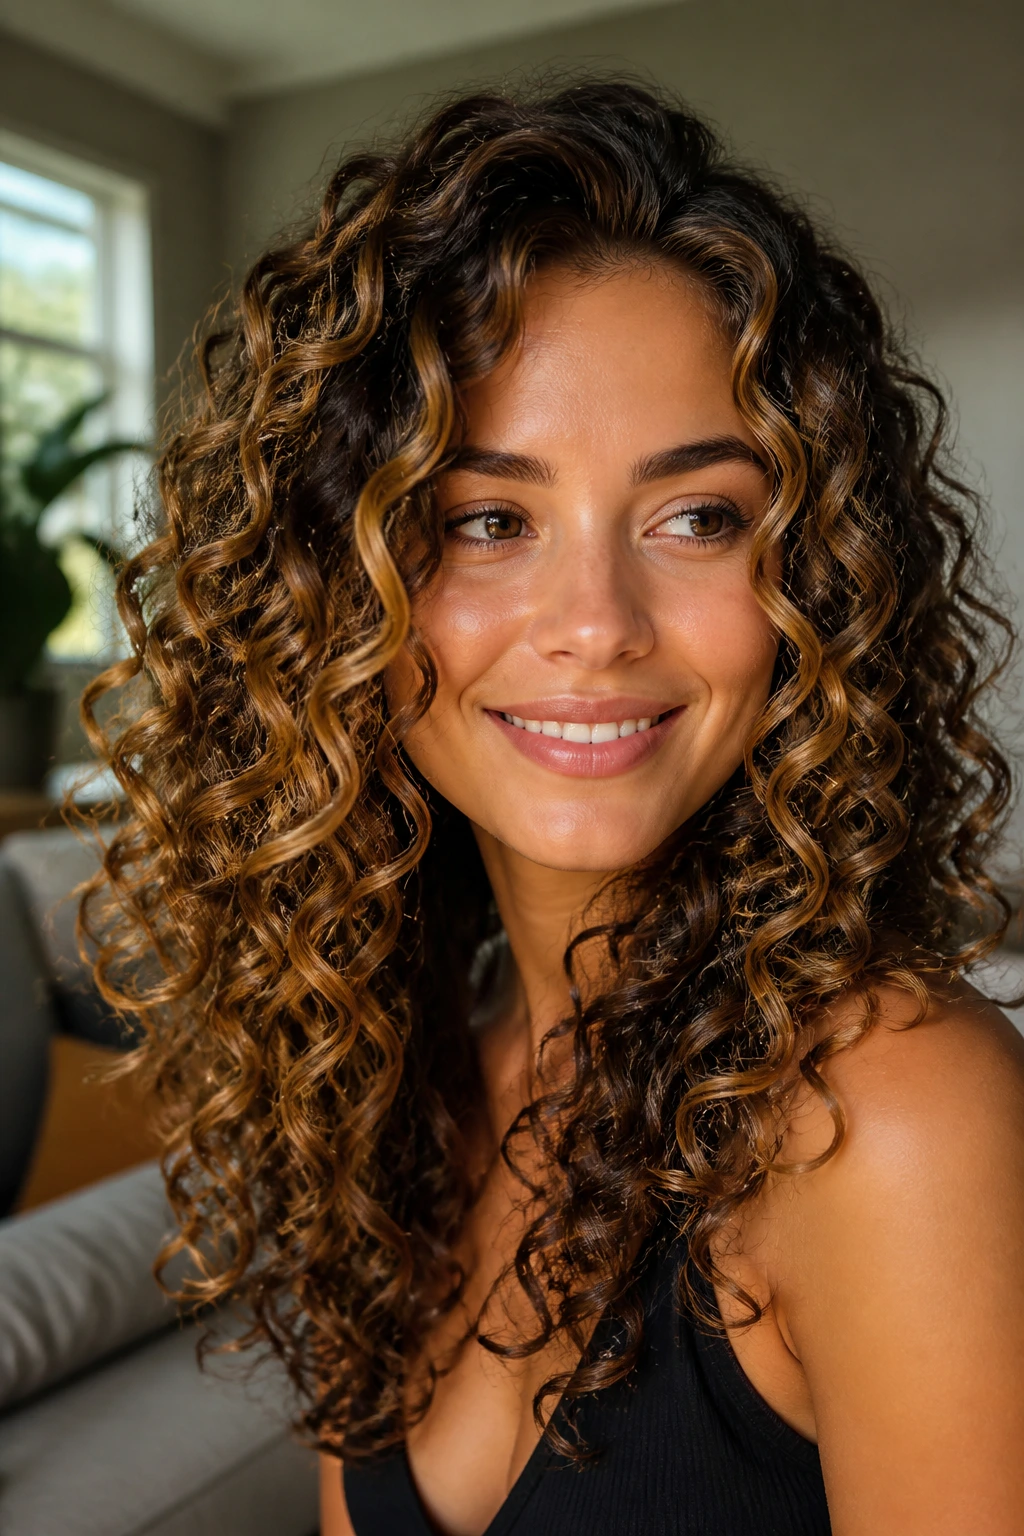
Curly brown hair handles honey balayage in a really satisfying way because the color lands on the outside of each curl and creates built-in dimension. The shape does half the work for you. That is why a good curly placement can look richer than a straight blowout.
The biggest mistake with curls is painting them like straight hair. Don’t do that. Color needs to follow the curl pattern, with the lightest honey pieces sitting on the outer curve of the ringlet and a little extra brightness around the top layers where the hair catches overhead light. If the hair is tightly curled, the stylist should work in stretched sections so the pattern doesn’t get hidden once the curls bounce back.
What to Watch For
- Honey should stay soft and golden, not bright yellow.
- The painted curls should be spaced unevenly so the pattern feels organic.
- A curl cream with slip helps the color reflect light instead of looking fuzzy.
- Diffusing on low heat keeps the curl shape intact and the color visible.
The best part is the texture. Curly hair makes honey balayage look alive. Every twist and bend shows a different tone.
8. Cool-Warm Honey Contrast on Mushroom Brown
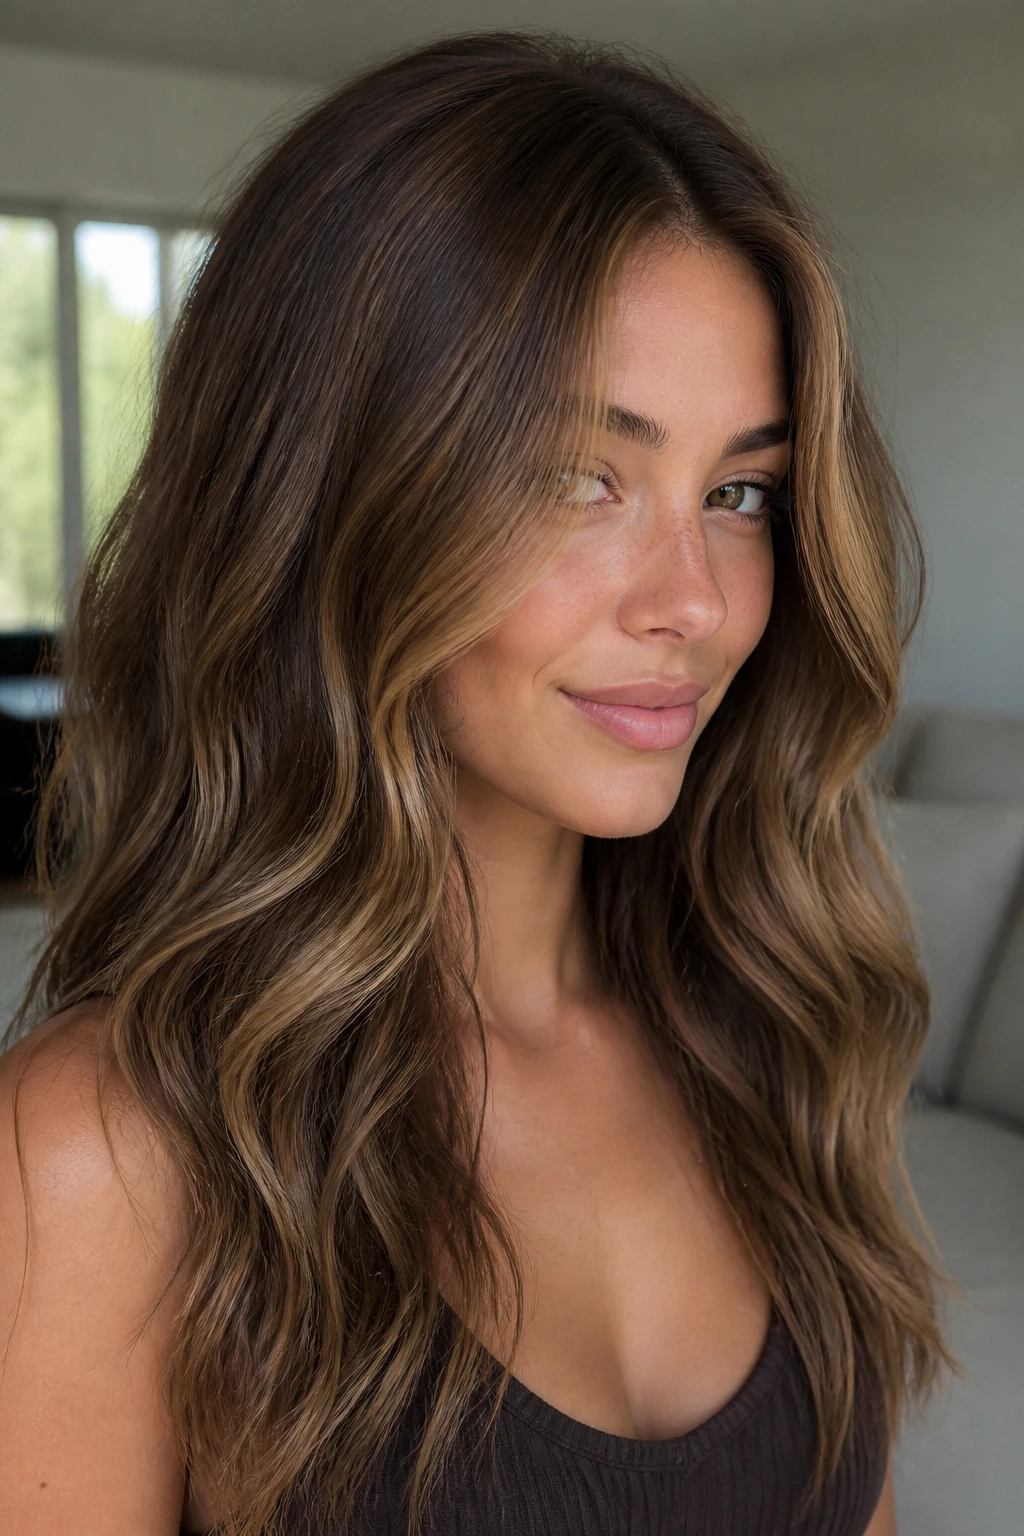
A cool brunette base does not need to stay cool all the way through. In fact, one of the prettiest ways to wear honey balayage on brown hair is to let warm ribbons break through a mushroom-brown foundation.
Mushroom brown has that smoky, slightly ash-colored quality that can look elegant but also a bit flat if the hair is one shade from roots to ends. Honey cuts through that. Not in a loud streaky way — more like a warm thread pulled through gray-brown fabric. The contrast is subtle, but it wakes the whole head up.
This works best when the honey pieces are not everywhere. A few well-placed strokes around the face, through the crown, and on the bend of the ends are enough. Too many warm pieces and the mushroom base loses its point. That balance is the whole game here.
I like this look for people who wear neutral makeup and cooler clothing shades because the hair gives them a little warmth without forcing a fully warm palette. It is one of those color choices that feels smarter than flashy. Quietly smart.
9. Honey Balayage on a Wavy Lob
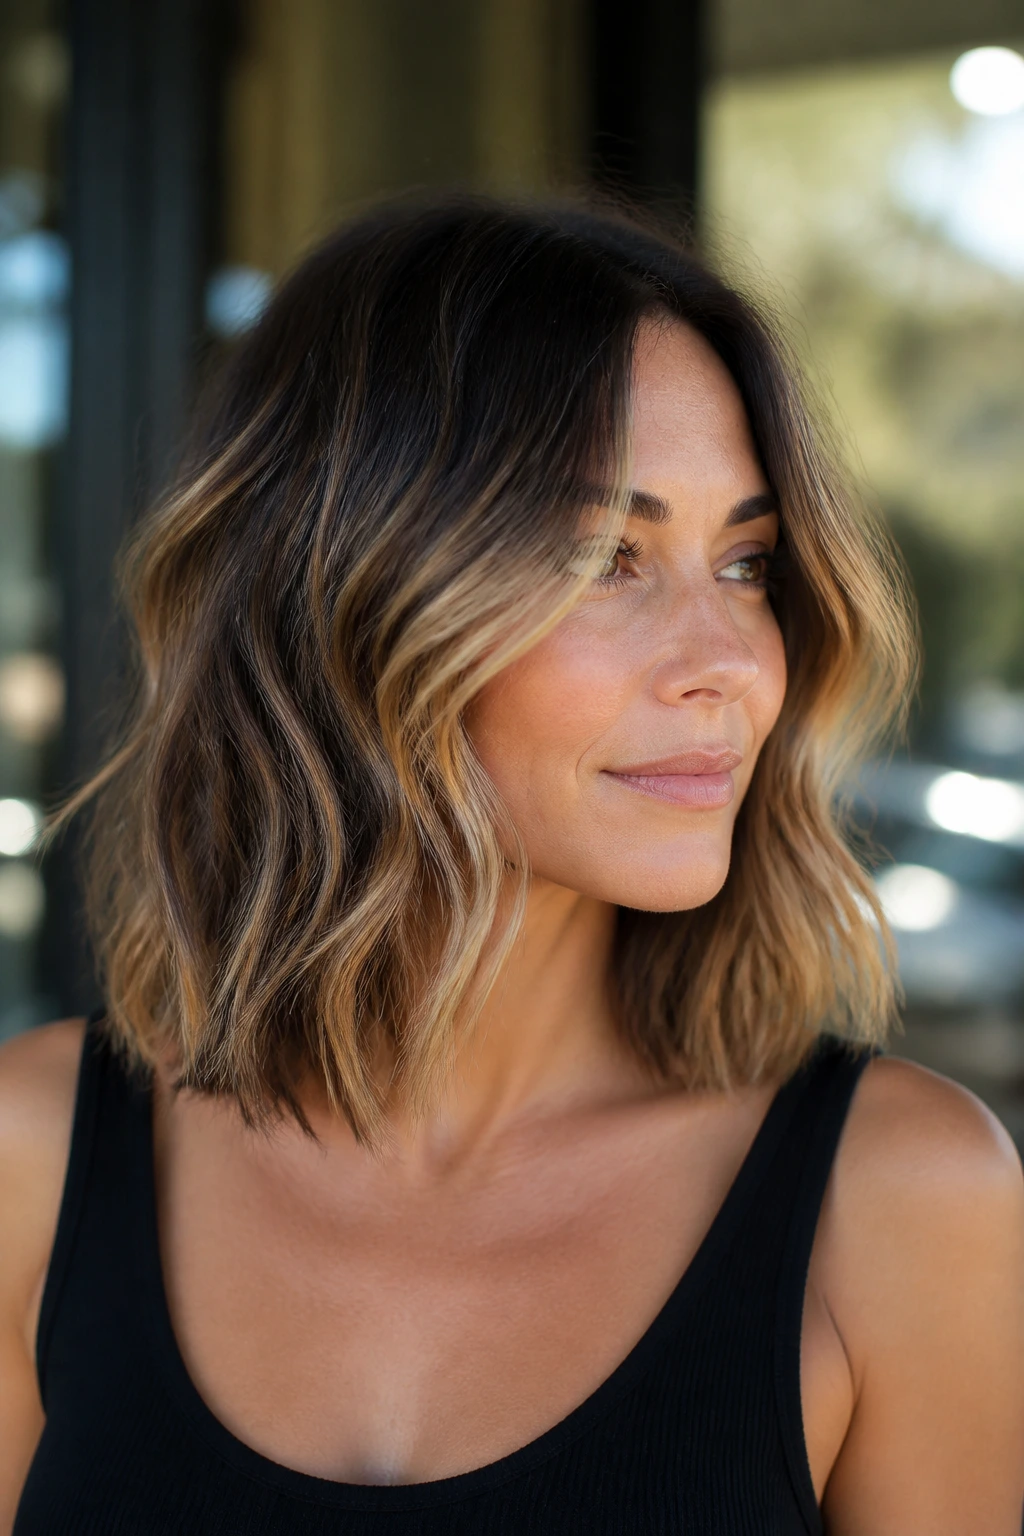
A lob between the chin and collarbone is basically made for honey balayage. The cut has enough surface area for the color to move, but not so much length that the warmth gets lost at the bottom.
The interesting thing about a wavy lob is that the color placement can be a little bolder than on long hair. The ends sit closer to the face and the shoulders, so even a few brighter honey ribbons make a visible difference. I like a slightly stronger front frame here, with the lightest pieces starting around the cheekbone and fading into softer ends below.
On a lob, the texture matters almost more than the shade. A flat iron bend or a loose wave turns the honey pieces into little flashes of color. Straight and sleek can work too, but it gives the look a cleaner, sharper edge. Both are good. They just say different things.
The maintenance is manageable, which is part of the appeal. Since the cut itself already feels current and tidy, the color can stay relaxed. If the grow-out is soft, the whole style keeps its shape even when you skip a salon visit for a bit.
10. Smoky Brown Base with Soft Honey Ends
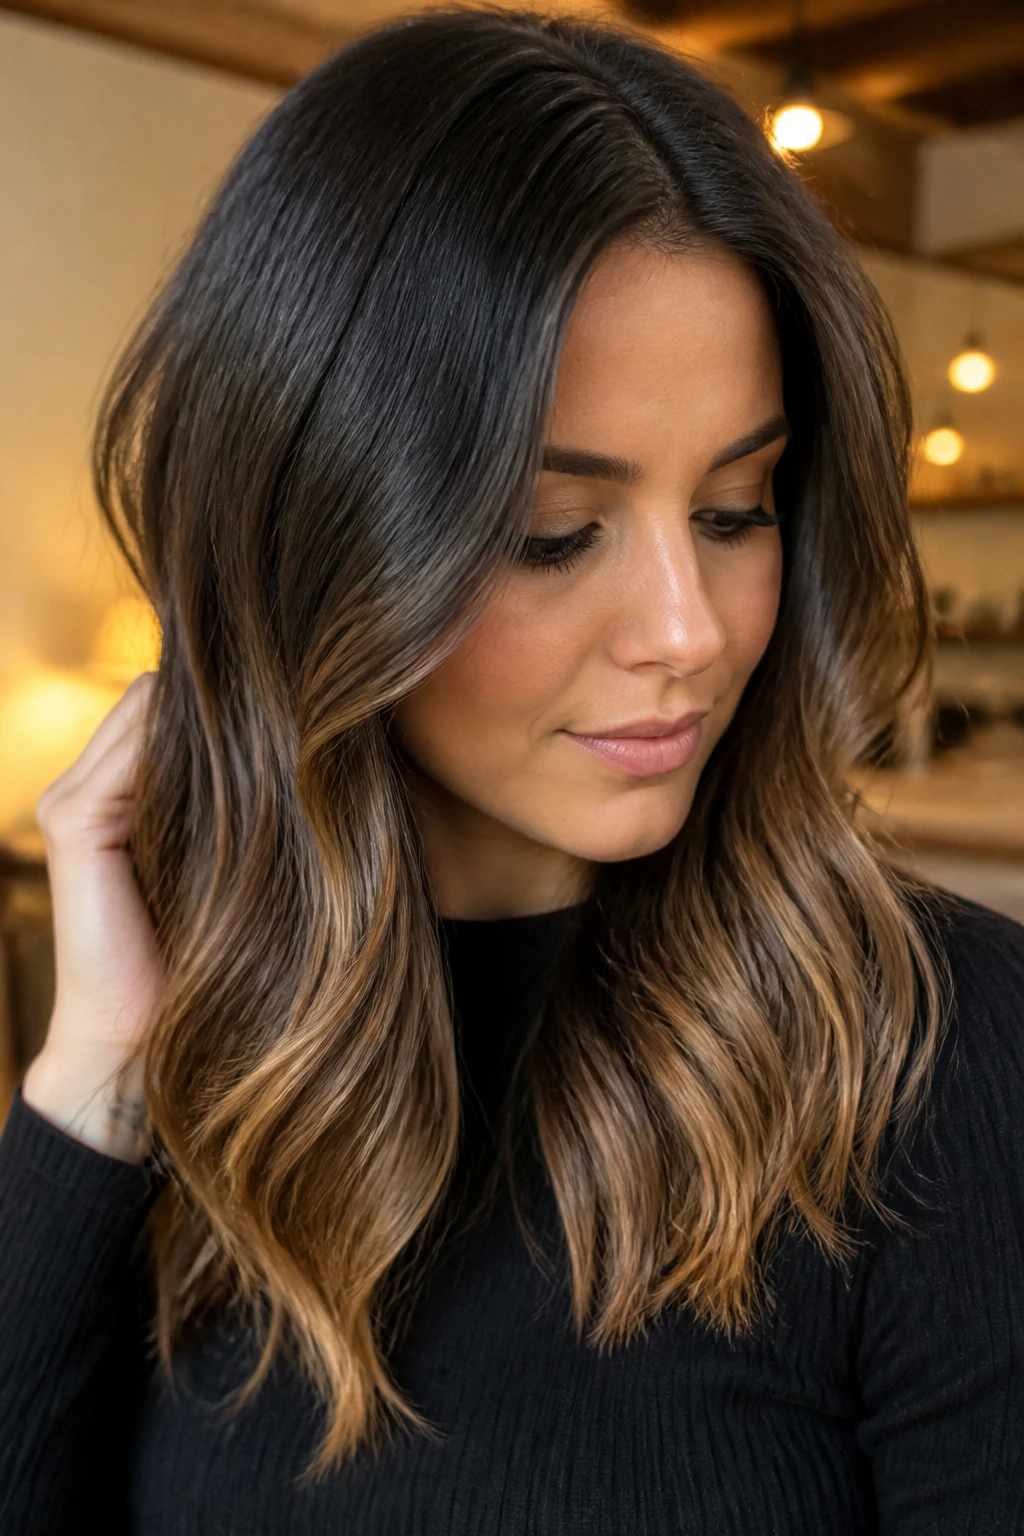
This version is for people who want the ends to feel brighter, but not blond. The smoky brown base keeps the root area moody and grounded, while the honey shows mostly from the mid-lengths down.
The trick is keeping the transition blurred. There should not be a hard stop where brown ends and gold begins. Instead, the color should drift from smoky brunette into tea-colored honey, then into a deeper amber at the very bottom. That layered fade looks especially good on medium-to-thick hair because the volume can hold the color transition without making it look thin.
A lot of people like this style when they wear their hair in a low ponytail or half-up knot, because the lighter ends still show. That means the color works even when the hair is not fully styled. Useful. Practical. Not every hair color needs to be a blowout-only situation.
Best detail to ask for: a root area that stays one to two shades darker than the mids, so the blonde effect never takes over.
11. High-Contrast Honey Streaks for Deep Brown Hair
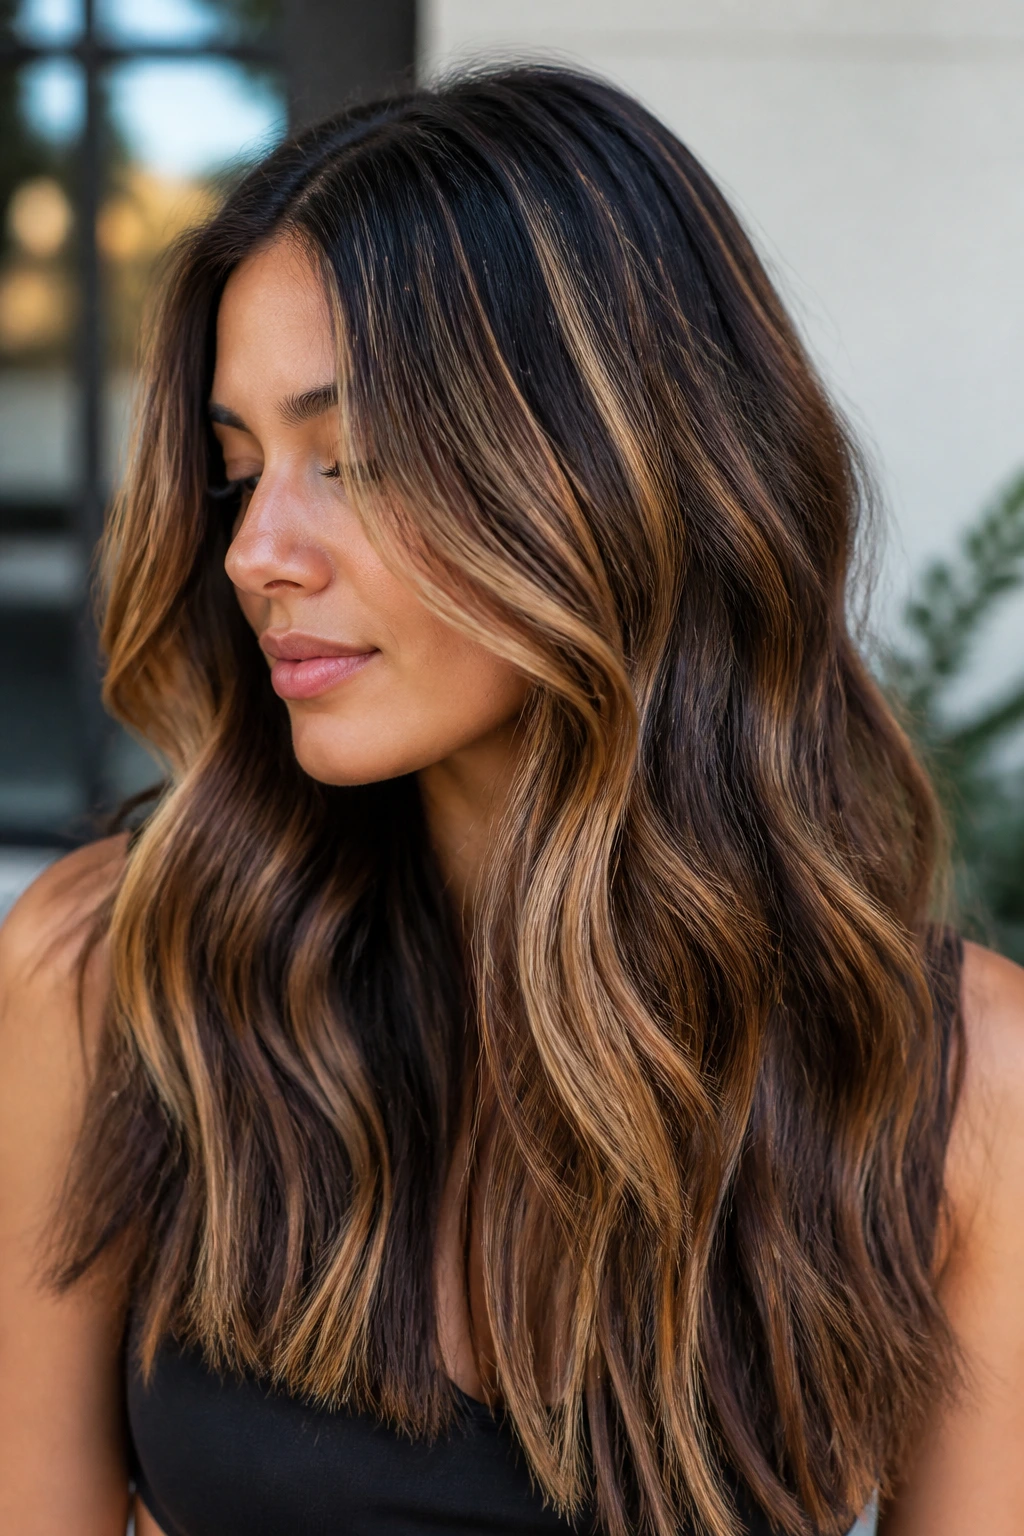
Do you want the brightness to show even when the hair is braided, pinned back, or tucked behind the ears? Then this is the look. Deep brown hair can carry a stronger honey contrast than people expect, especially when the ribbons are placed with intention.
The key is width. The streaks should be visible enough to read from a few feet away, but still soft at the edges. Think hand-painted sections that are slightly broader than the ones used for a subtle brunette glow. If the lift reaches about level 8 at the lightest pieces, the honey can pop without looking bleached out.
This approach works best when the base is a true dark brown, not black-brown. On very deep hair, the contrast can shift too hard if the lightening is pushed too high. A slightly golden honey — not pale yellow — helps the streaks blend back into the dark base more gracefully.
I like this version on layered cuts, because the contrast gives the shape more movement. It is bolder, yes. But it still belongs in the brunette family.
12. Honey and Cinnamon Dimension for Shoulder-Length Cuts
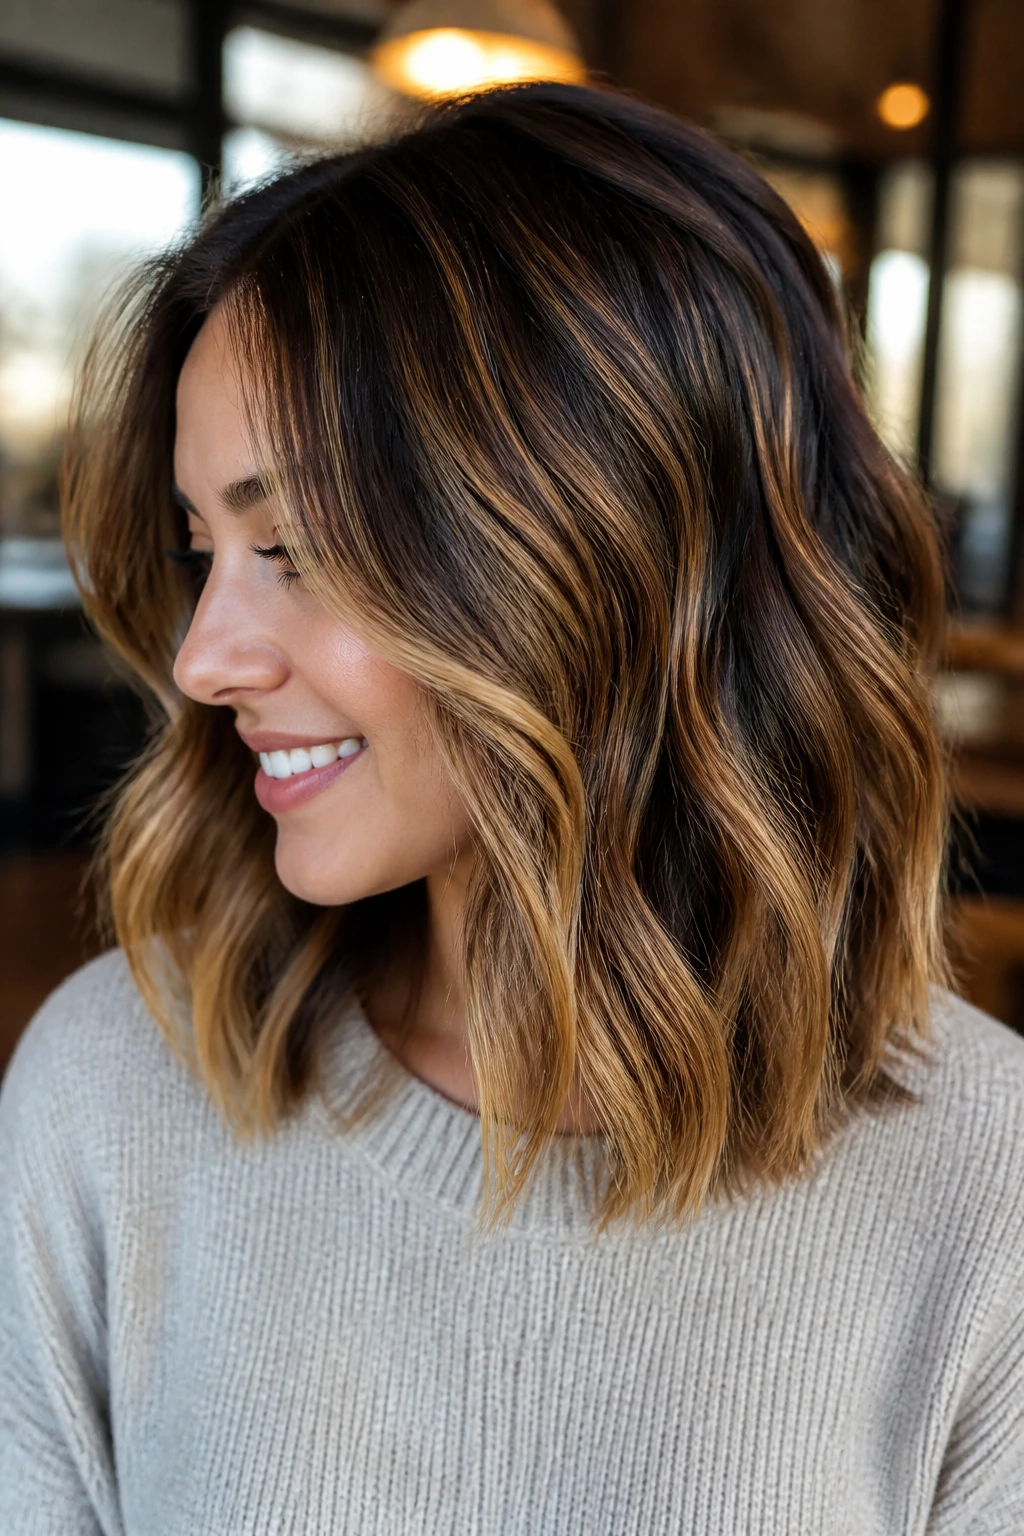
Shoulder-length hair can look a little boxy if the color is too uniform. Honey and cinnamon together fix that by adding both warmth and depth in the same haircut.
The cinnamon pieces do a job people overlook: they fill in the spaces between the honey ribbons so the color does not look sliced apart. That makes the overall finish richer, especially on brunettes with reddish undertones. The honey brightens, the cinnamon grounds, and the shoulder-length cut gets more shape than it had before.
Where to Place the Color
- Put cinnamon lowlights underneath the top layer to create depth.
- Keep honey pieces around the front and the outer curve of the haircut.
- Add a few lighter ends through the back so the silhouette does not look heavy.
- Use a soft wave to show the contrast between warm and deeper tones.
This is a good option if your hair tends to puff out at the shoulders. A mix of warm tones can make the outline feel more fluid. It is a small visual trick, but it works.
13. Sunlit Honey Balayage with Curtain Bangs
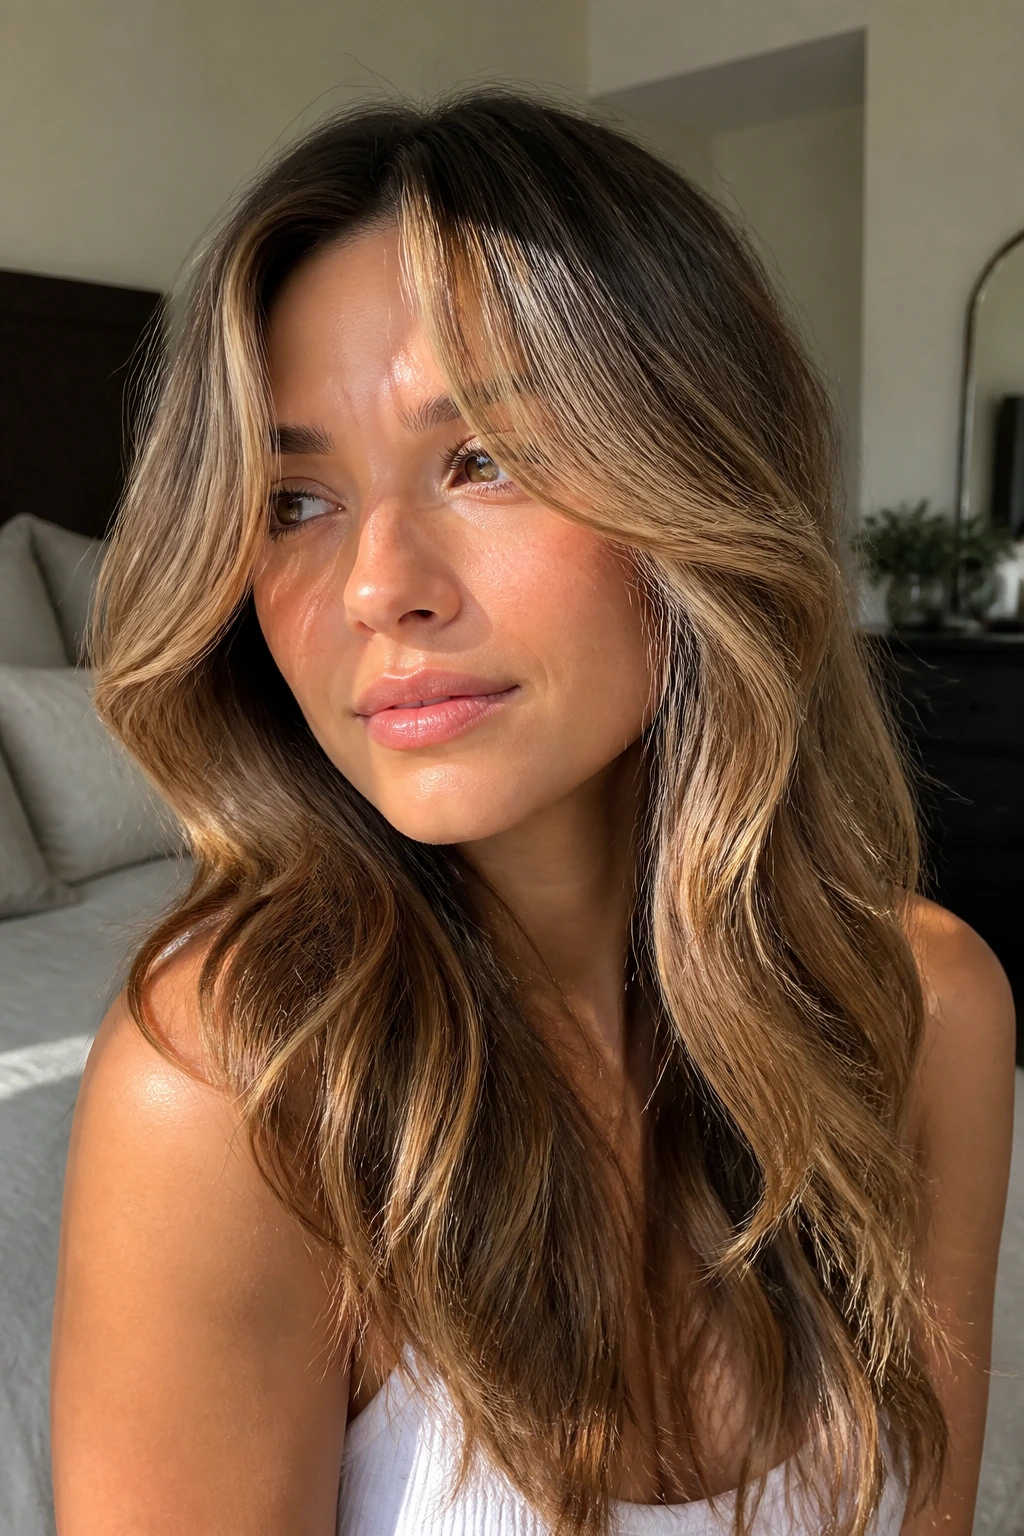
Curtain bangs and honey balayage are one of those pairings that make sense the second you see them together. The bangs give the face a frame, and the honey pieces carry that brightness down into the rest of the hair so the front never feels isolated.
The front sections should be a touch lighter than the rest, but not so much that the bangs look disconnected. I like a softer lift around the fringe and a gradual fade through the lengths. That way, when the hair is parted down the middle, the color looks like it belongs there. If the bangs are cut with a little cheekbone sweep, even better. The light catches the bend naturally.
Styling matters more here than people think. A quick round-brush pass or a blow-dry with a medium nozzle can keep the curtain bangs from splitting too sharply, which helps the honey framing read as polished. Air-drying can work too, but the pieces around the face may need a bit of finger shaping.
This one feels flattering on almost anyone who wears a soft part and wants the color to do part of the facial framing for them.
14. Honey-Glaze Balayage for Fine Brown Hair
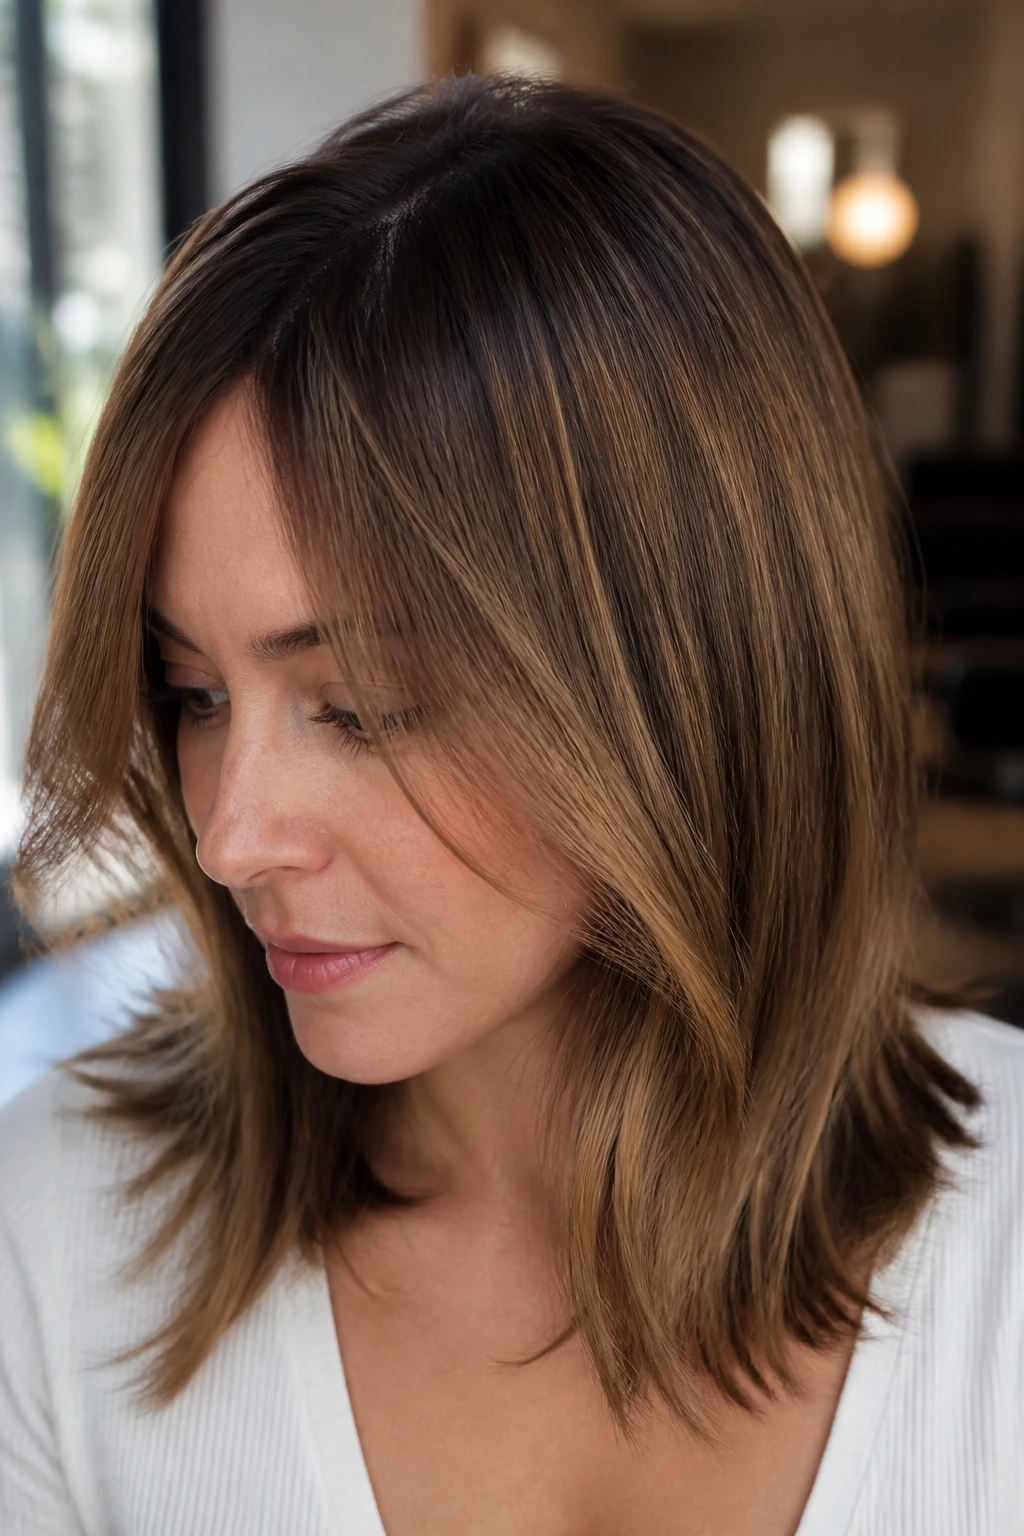
Fine hair needs restraint. Heavy highlights can make it look sparse, and chunky ribbons often expose more scalp than anyone wants. Honey-glaze balayage solves that by using a lighter, more transparent hand.
The color should be painted in thin layers, with extra care around the crown so the top does not look stripped. The honey itself should stay close to a glazed gold-beige, almost like a wash of color rather than a bold stripe. On fine brown hair, that approach keeps the strands from looking chopped up. The hair still looks full because the brightness is spread out instead of clumped together.
I’d avoid very high contrast at the ends unless the cut has enough density to support it. A little brightness goes a long way when the individual strands are small. That is the part people miss. Fine hair usually looks better when the color is a touch softer than the inspiration photo on the stylist’s screen.
A lightweight shine spray can help here too. Not too much. Just enough to give the honey a glassy finish without weighing the hair down.
15. Warm Honey Cascade on Thick Long Hair
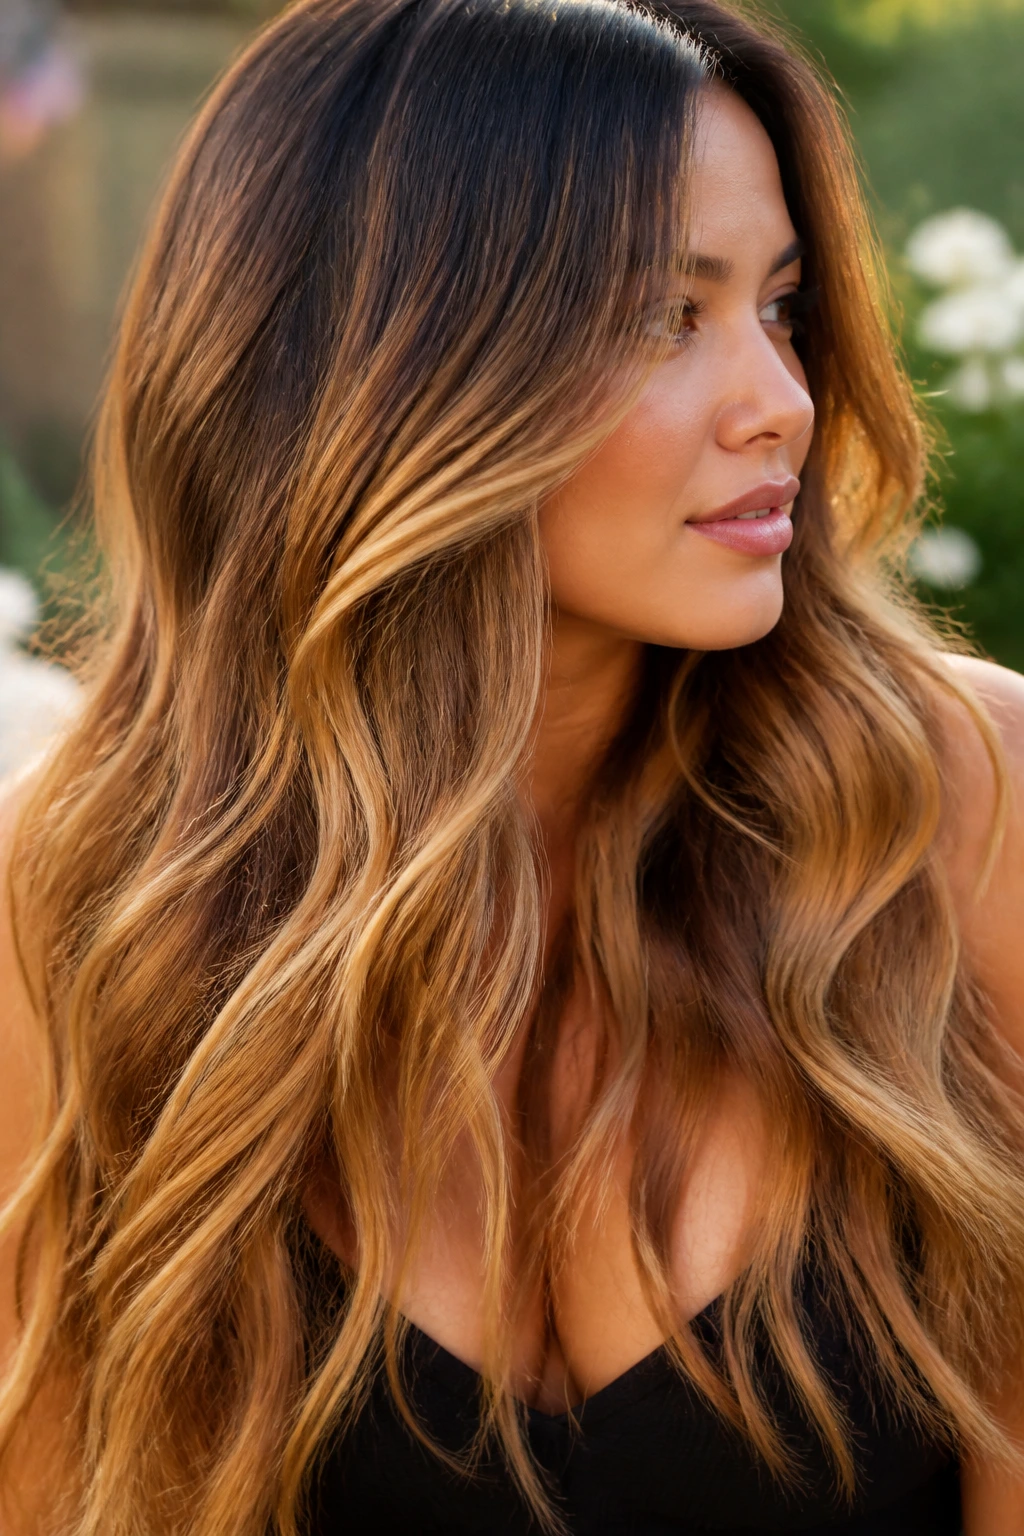
Thick long hair can handle a lot, which is both a blessing and a trap. If the color is too subtle, it disappears into the bulk. If it is too bright, the whole head starts to look busy. A warm honey cascade sits in the useful middle.
The easiest way to make it work is by layering the brightness. The top sections should stay a little deeper so the hair keeps its shape, while the lower lengths and ends open up into richer honey. Interior brightness helps too. If the color only lives on the surface, thick hair can look flat from the back. Hidden ribbons underneath give the movement some surprise.
This style loves soft waves because the waves separate the layers and show the different tones. Straight hair can wear it, but then the color should be more precise. A little extra brightness around the front pieces helps keep the look from sinking into the length.
There is a reason long-haired brunettes come back to this version. It feels lush without looking overprocessed. That matters when you are carrying a lot of hair.
16. Hand-Painted Honey Tips on Layered Shag
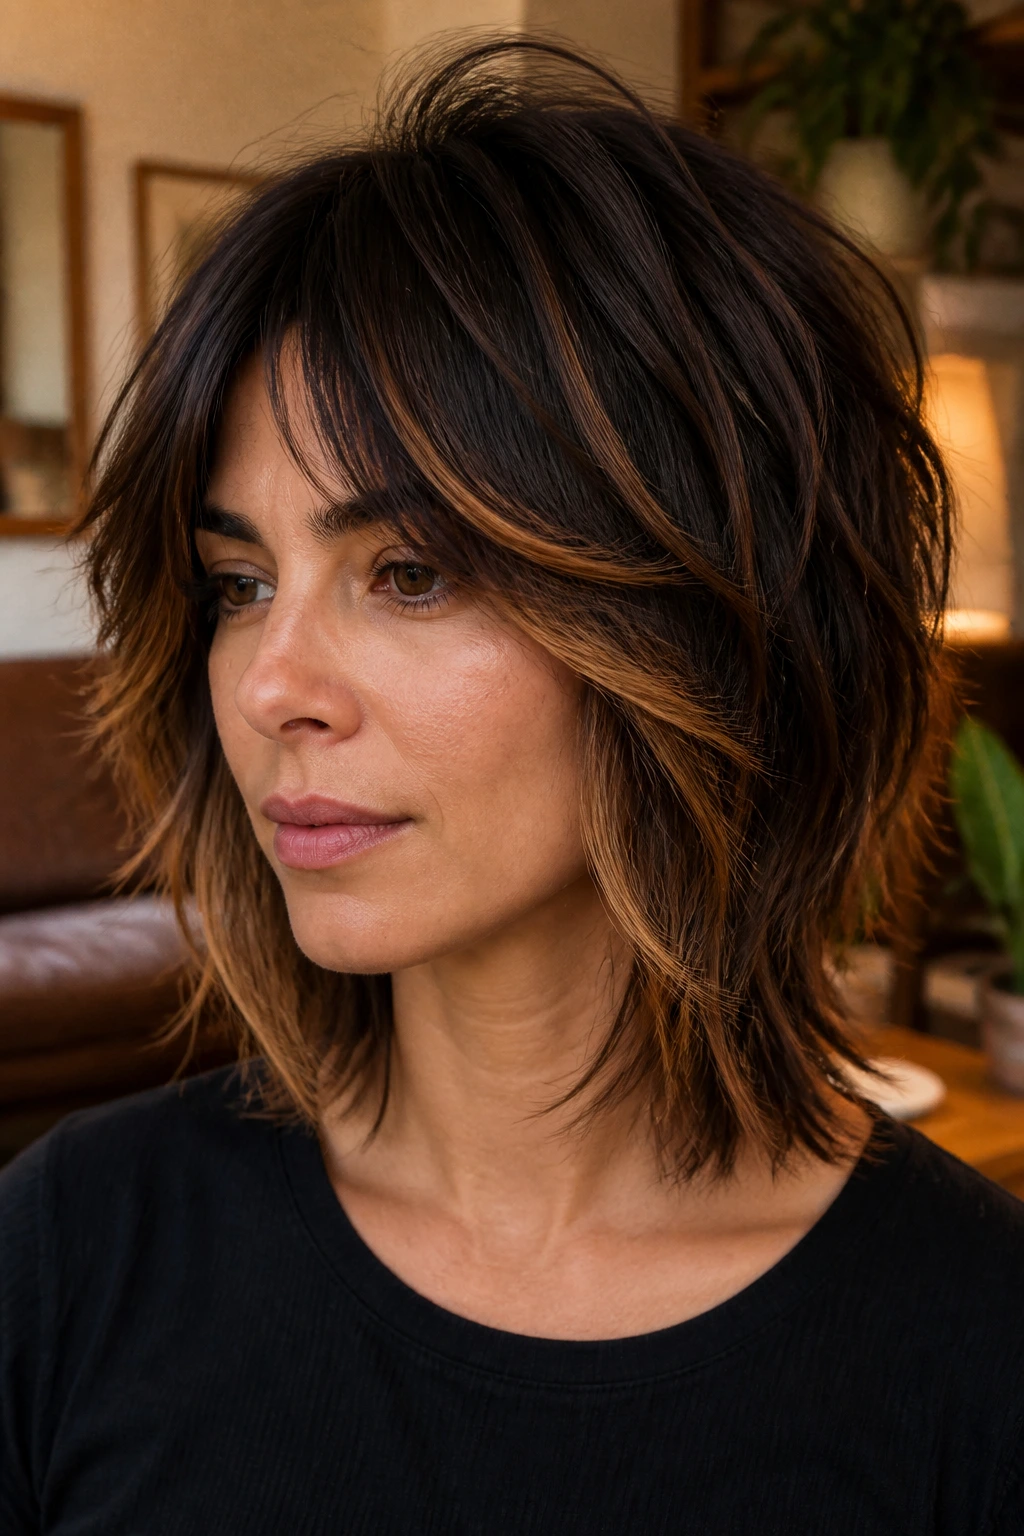
A shag cut does not want tidy color. It wants energy. Hand-painted honey tips are a smart fit because they echo the broken, piecey shape of the layers instead of fighting it.
The color should land on the outer edges of the shag — the ends of the fringe, the flipped-out layers, the wispy pieces around the cheek and jaw. You do not need the entire head lightened evenly. In fact, that would flatten the cut. A shag looks better when the honey is a little irregular and uneven in the right way. That is the personality of the haircut.
What Makes It Different
Unlike smooth balayage on long waves, shag color can be a bit more choppy. The pieces can sit at different heights, and the tips can be lighter than the interior lengths. That gives the haircut a lived-in feel without making it look neglected.
A matte texture paste or a light cream helps define the piecey ends. If the hair is too polished, the shag loses its attitude. Slightly messy is fine. Better than fine, actually.
17. Rooty Honey Balayage with a Soft Shadow Root
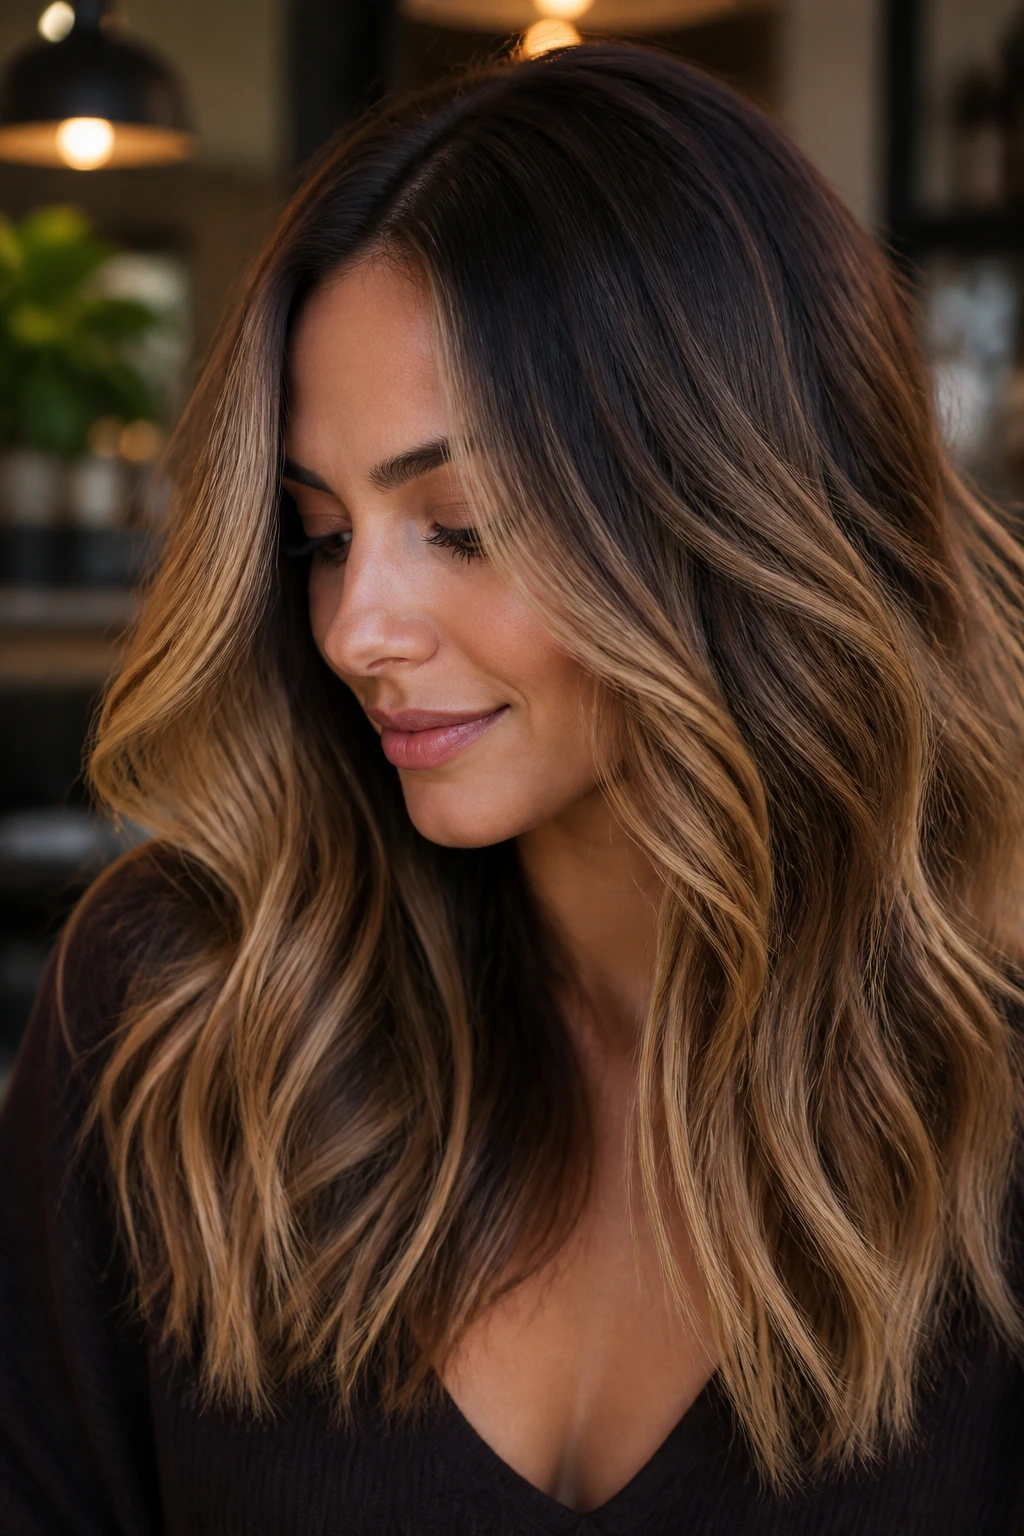
If you want your color to grow out for months without looking abandoned, the soft shadow root is the move. It keeps the top darker, then lets honey bloom underneath in a way that feels deliberate from the start.
The root shade should not be a harsh band. It needs to be a blur, usually just deep enough to preserve the natural brunette base for about 1.5 to 2 inches before the lighter pieces begin. That makes the honey look more dimensional and gives the stylist a cleaner transition point. On straight hair, this is especially useful because there is nowhere for color to hide.
The best part is the maintenance. The root can stretch a little without ruining the shape, which makes this one practical for anyone who does not want to be in the salon constantly. If you like polished hair but hate obvious regrowth, this has your name on it.
I also like it for people with darker eyebrows, because the rooted top keeps the hair and face in the same visual family. That sounds like a tiny detail. It isn’t.
18. Honey Tones on Natural Curls and Coils
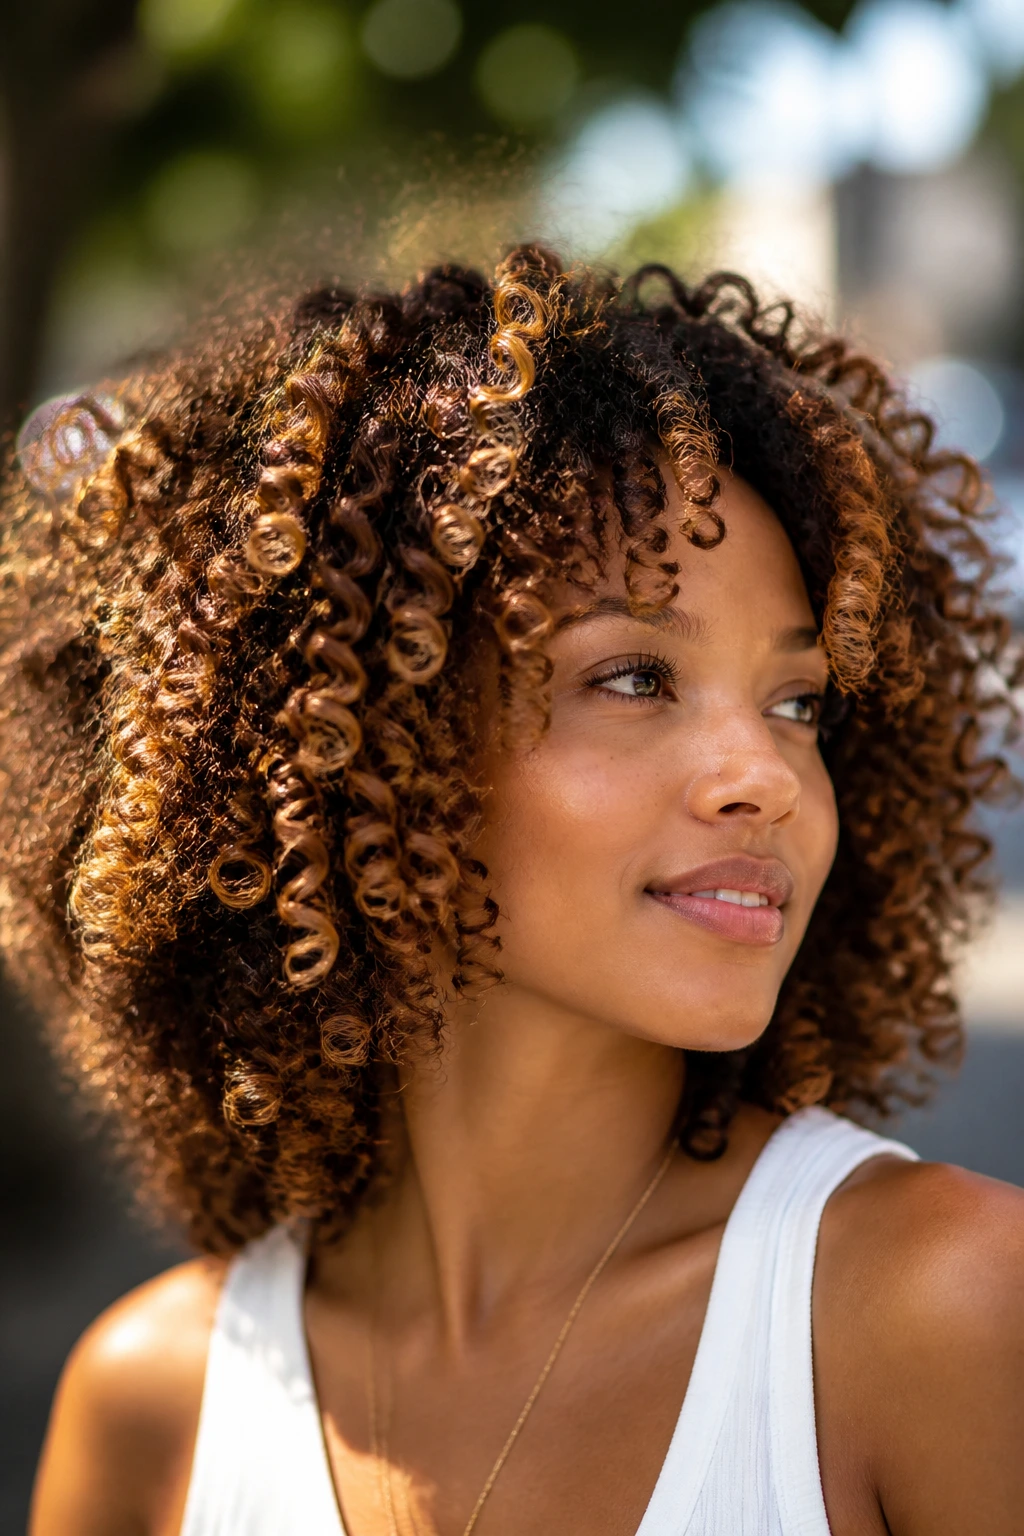
Natural curls and coils need a different kind of honey balayage because the pattern shrinks and expands as the hair dries. A placement that looks balanced when wet can look uneven once the curl snaps back. So the painting has to respect the curl pattern from the start.
The brightest pieces should sit where the curls naturally separate — around the outer curve, the crown, and the front curls that frame the face. For tighter textures, a stylist often stretches small sections before painting so the lightener lands where the curl will live, not just where it sits wet. That one detail makes a huge difference.
Honey on curls should stay warm and soft. Too pale, and the tone can look disconnected from the base. A golden-brown honey, almost like warm tea with a touch of amber, tends to blend better with natural texture. A sheen spray or curl cream with shine helps the color show through the pattern without making the hair stiff.
This look is lovely when the curl shape is healthy and defined. If the ends are dry, fix that first. Color can wait.
19. Toffee-Honey Blend for a Glossy Finish
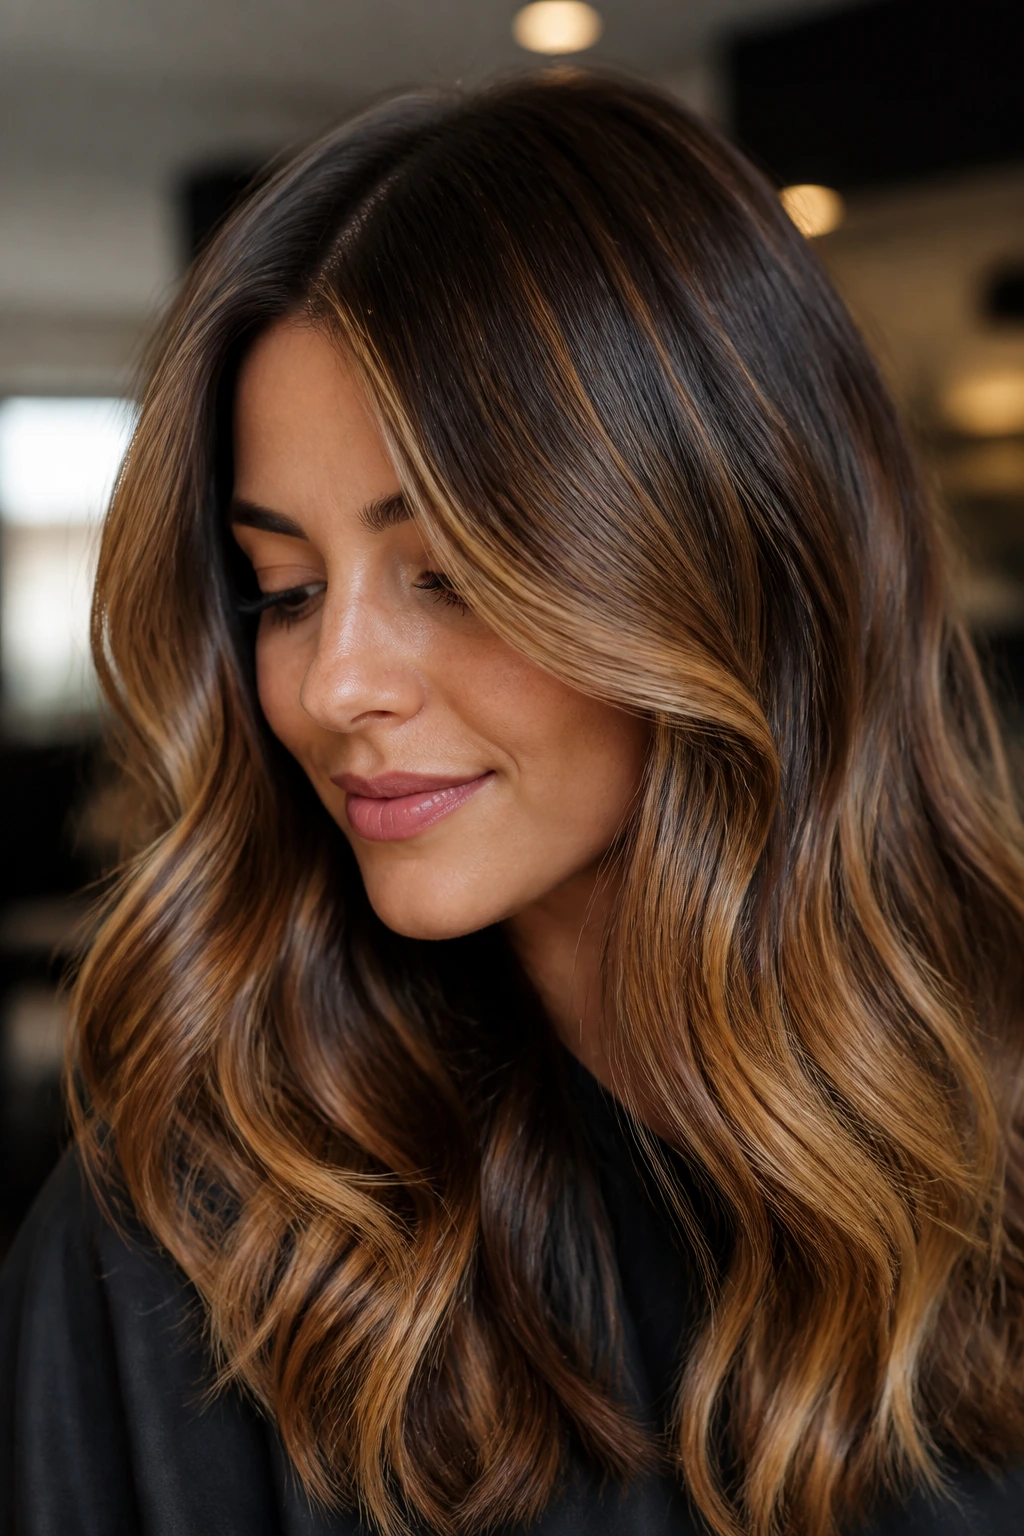
Toffee and honey together give brown hair a richer, almost syrupy finish. The color sits deeper than a bright gold balayage, which makes it a good pick for brunettes who want warmth but still like their hair to look anchored.
What I love about this blend is how the toffee tone keeps the honey from going too light. On medium or dark brown hair, that matters. A pure honey ribbon can look a little thin against a dense base, while toffee adds body in the middle of the color story. The result feels fuller and more expensive-looking, for lack of a better phrase.
A gloss afterward is non-negotiable here. The shine is half the look. The hair should read smooth, not dry or dusty, and the warm tones should move from root to end without a hard stop. If the stylist uses too much lightener, the toffee disappears and the color loses its depth. That is the whole danger with warm brunettes.
Best on hair that is worn down often, especially if you like soft curls or a brushed-out wave. The gloss catches the bends beautifully. Or rather, it should — if the color is done right, you barely need to work for the effect.
20. Soft Grow-Out Honey Balayage for Low Maintenance
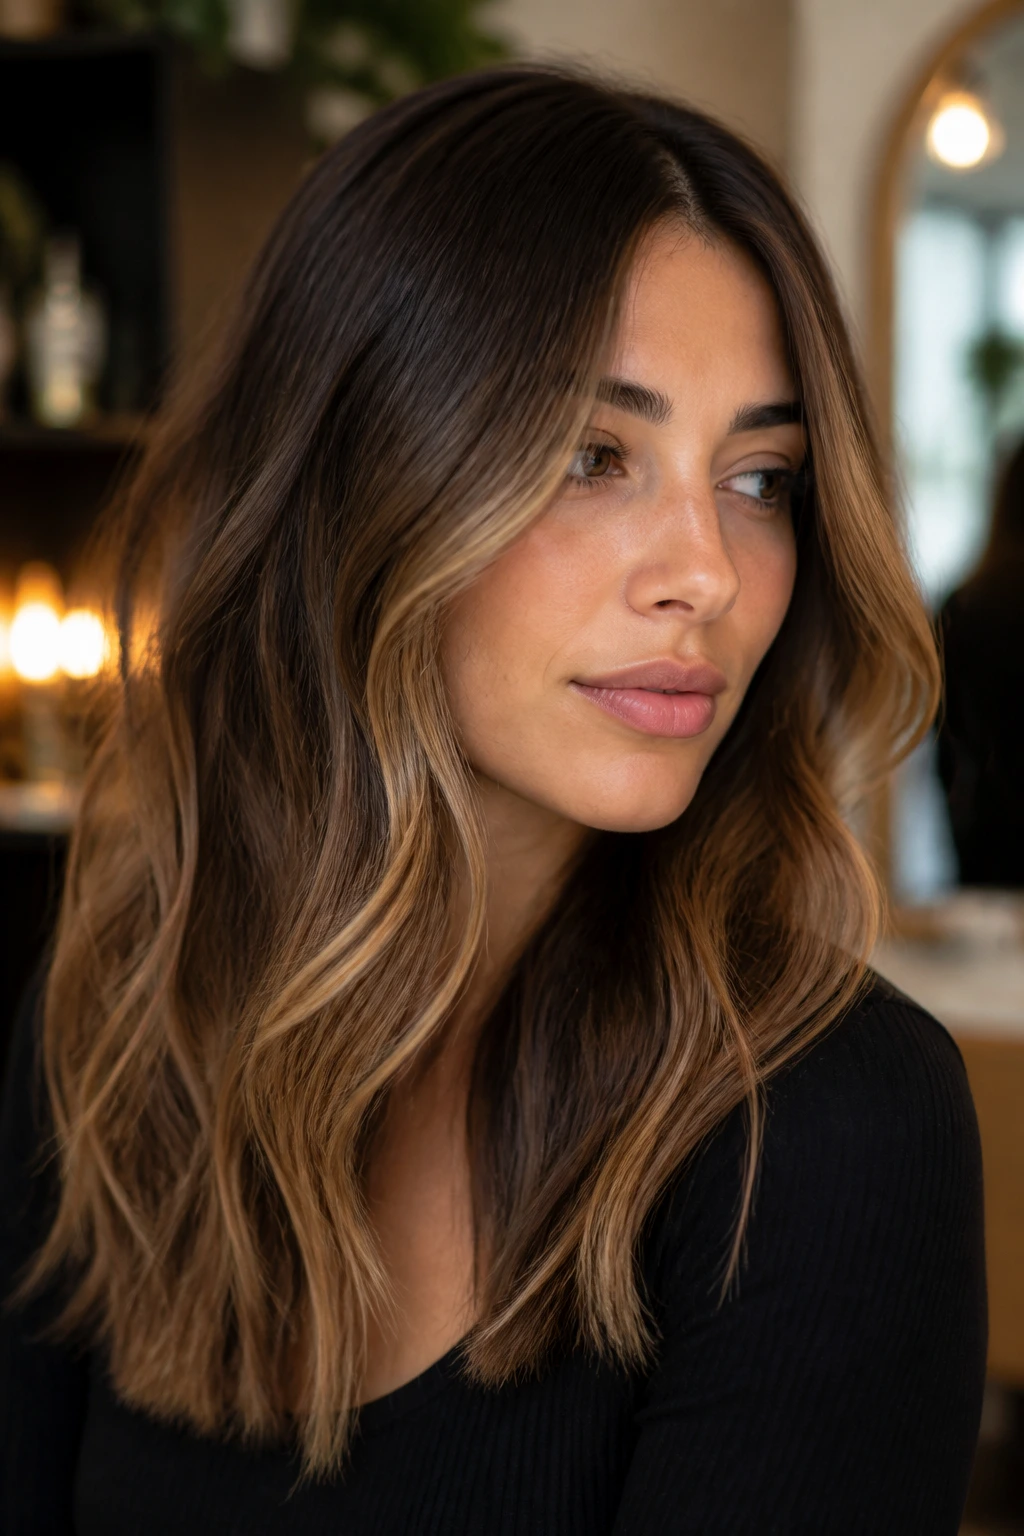
Some honey balayage looks are built for the salon chair. This one is built for real life. The color stays near the natural brown root, opens gently through the mids, and brightens enough at the ends to give the hair some life without demanding constant touch-ups.
The grow-out works because the transition is blurred from the start. A root area that stays close to your own shade means you can go longer between appointments without the color line looking obvious. The honey pieces should be softest around the crown and most visible through the lower half of the hair, where they can still be seen when the hair is tied back or tucked behind a coat collar. Useful details, those.
I like this version for anyone who wants the feel of lighter brunette hair but not the upkeep of a strict blonde routine. It works across straight, wavy, and loosely curled textures, and it is one of the few honey balayage choices that looks better the longer it settles in. The warm tones soften over time in a way that flatters brown bases.
If you want one look that can survive a busy schedule, a few skipped salon visits, and a quick air-dry, this is the one I’d hand you first.
