



Short natural hair is often misunderstood as a “difficult” length, but anyone who has spent time with coils, kinks, and tight curls knows better. It’s an incredibly versatile canvas, provided you have the right technique and a good jar of edge control. The mohawk braid, in particular, is a masterclass in transformation. It offers the edgy aesthetic of an undercut without you needing to pick up a pair of clippers or commit to the maintenance of shaved sides. By sweeping the sides up toward the center, you create the illusion of height and volume, which is exactly why this style works so well for shorter lengths where traditional flowing braids might not have enough material to work with.
When you are working with shorter natural hair, the secret isn’t just the braid; it is the prep. You are fighting shrinkage, and you are trying to keep flyaways from creating a messy perimeter. You need a slick, hold-focused gel or pomade that dries clear and doesn’t flake, because there is nothing worse than finishing a style only to see white residue drying on your roots. Whether you want a style that lasts for a week or something you can rock for a weekend, the structural integrity of your mohawk depends on your ability to gather that hair tightly at the base and feed it into the upward braid. Let’s look at the best ways to pull this off, from simple twists to intricate patterns that make the most of every inch you have.
1. The Classic Cornrow Mohawk
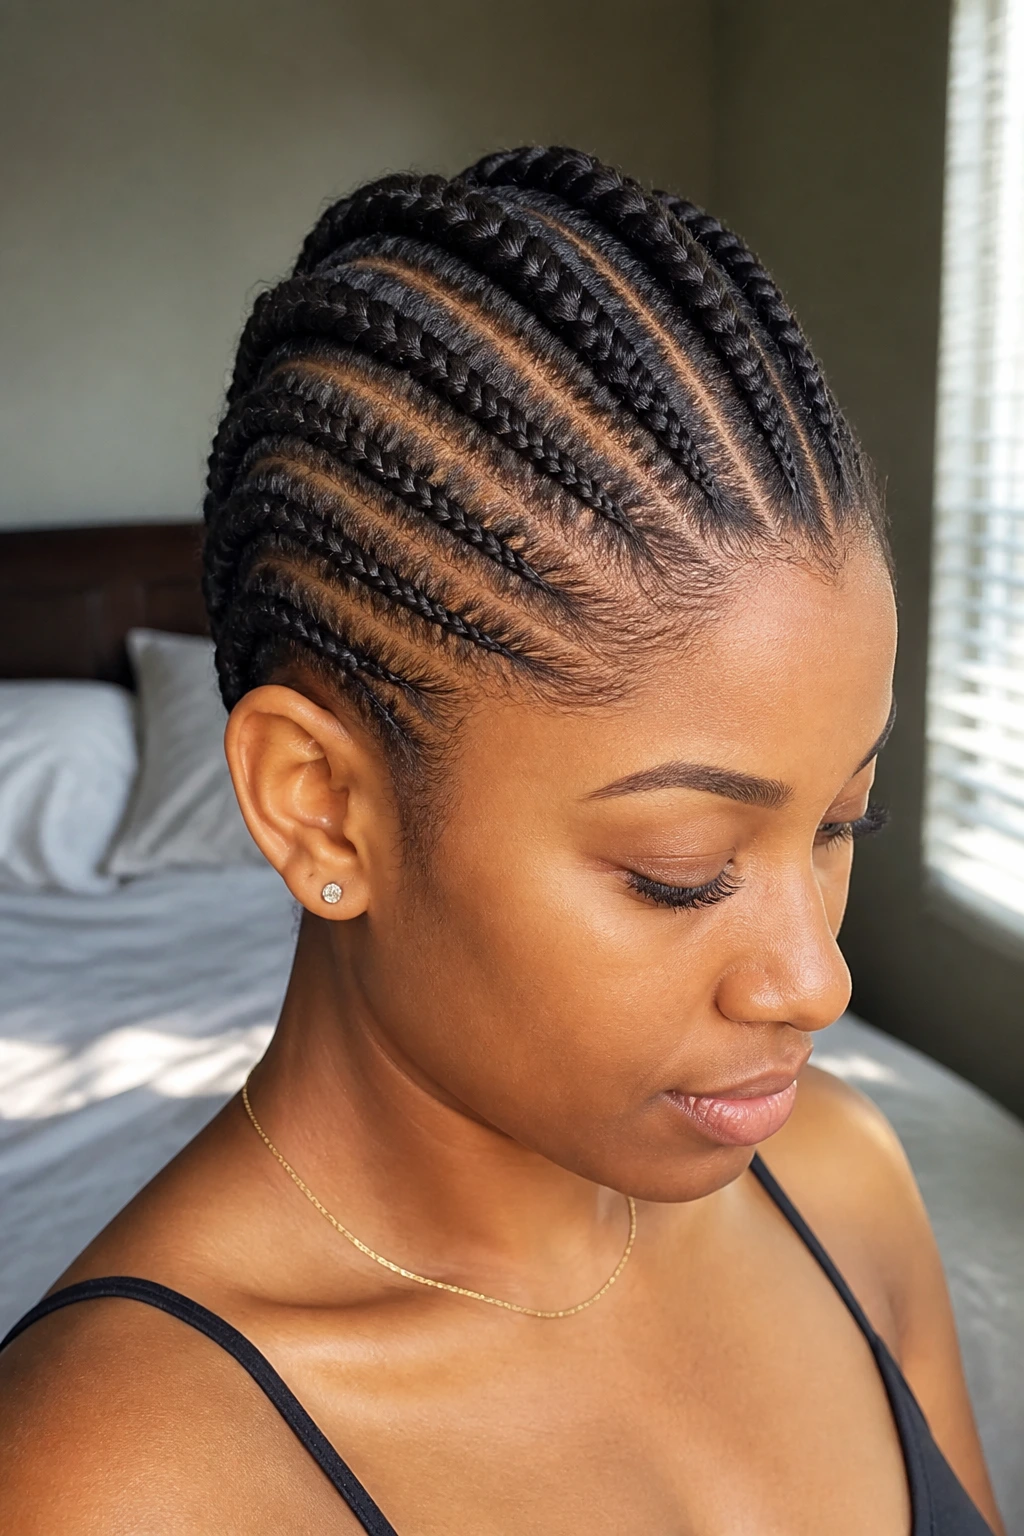
This is the bread and butter of the mohawk braid world. If you can cornrow, you can do this style in your sleep. It creates a sleek, clean line down the center of your scalp, which is ideal if you want a look that stays tucked away and protected for several days.
Why It Works for Short Hair
When your hair is short, the cornrows provide the necessary tension to hold the hair in place. You aren’t relying on the weight of the hair to keep the style down; you are using the cornrows to secure the roots. This style is the best foundation because it keeps the hair close to the scalp, minimizing the chance of shrinkage ruining the silhouette of your mohawk.
Getting the Look
- Start with clean, detangled, and stretched hair.
- Part your hair in three sections: the mohawk center and the two side panels.
- Cornrow the side panels upward, moving toward the center crown.
- Use a firm hold gel like a wax stick or a honey-based edge control.
- Join the ends of the side cornrows into the center mohawk braid or tuck them under.
Pro tip: Use small rubber bands at the ends of your cornrows if they are too short to tuck under; this prevents the braids from unravelling while you sleep.
2. Flat Twist Mohawk
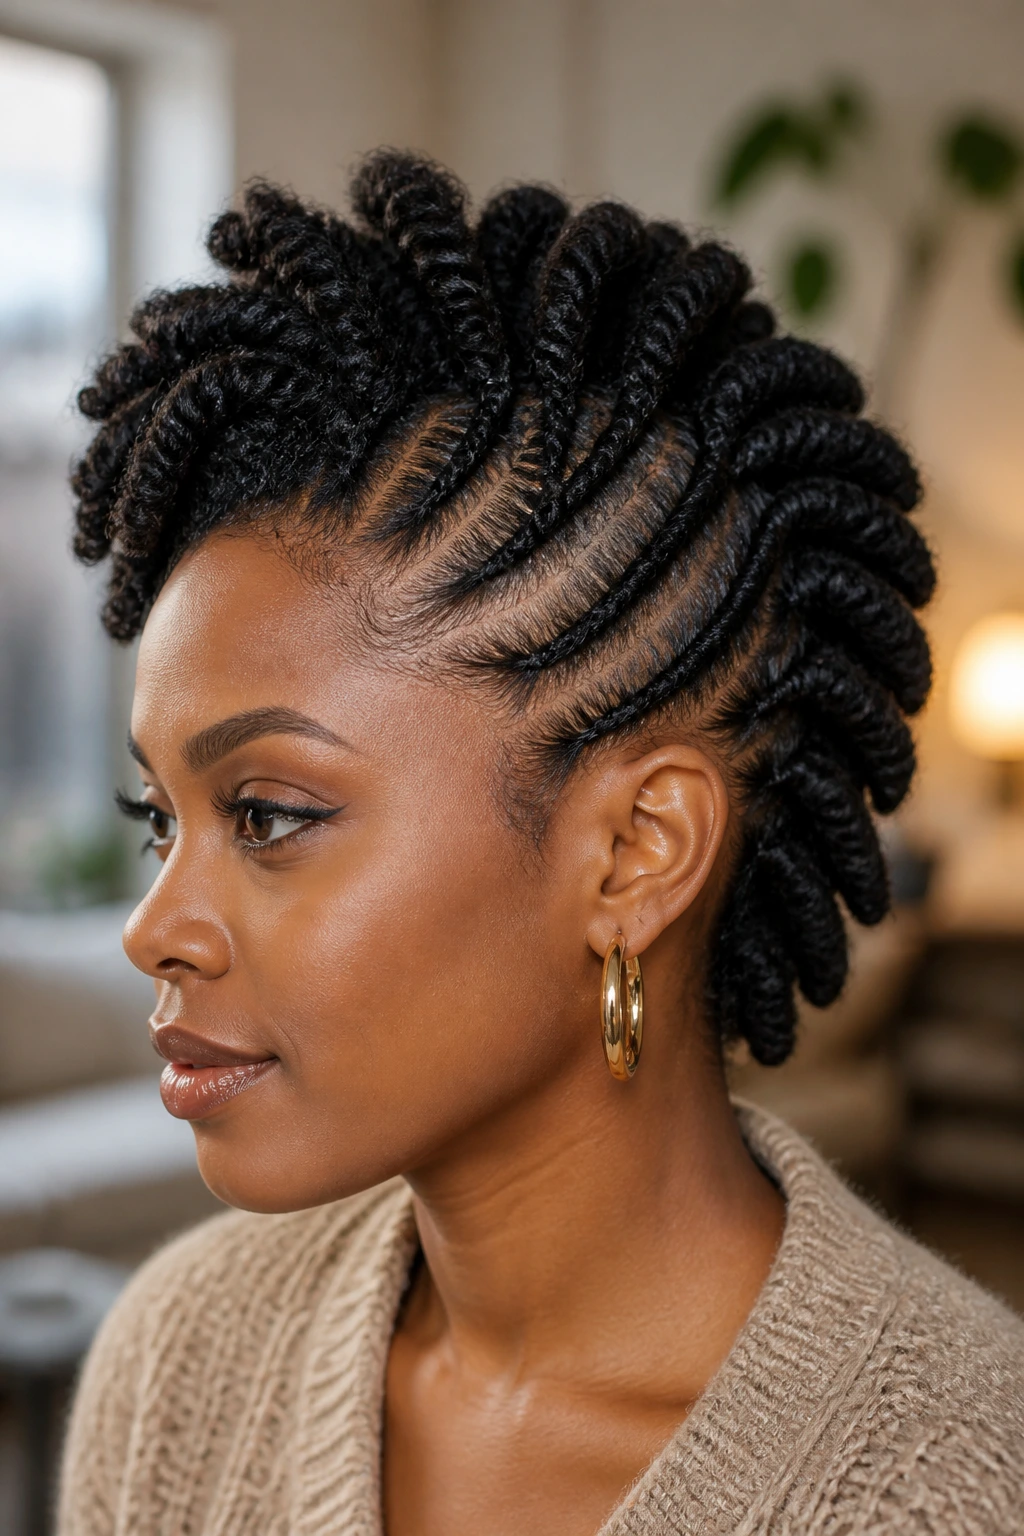
If you are not comfortable with cornrowing or if your fingers get tired quickly, flat twists are your best friend. They offer a slightly softer, more voluminous look compared to the tightness of a cornrow, which can actually be a benefit if you want your hair to look a bit thicker than it is.
The Mechanics of the Twist
Flat twisting involves taking two strands of hair and twisting them over each other as you gather hair along the scalp. It is less abrasive than cornrowing, making it a fantastic protective style for those who suffer from tension alopecia or who just have a sensitive scalp. Because you are using two strands instead of three, you have more control over the tension.
Maintenance and Longevity
These twists can be susceptible to frizz faster than cornrows. To keep this style looking sharp for more than a couple of days, you must tie it down with a silk scarf at night. If you notice fuzziness near the roots, do not re-twist the whole thing. Just apply a tiny dab of styling foam and smooth the hair back with your fingers or a soft brush.
3. Box Braid Mohawk
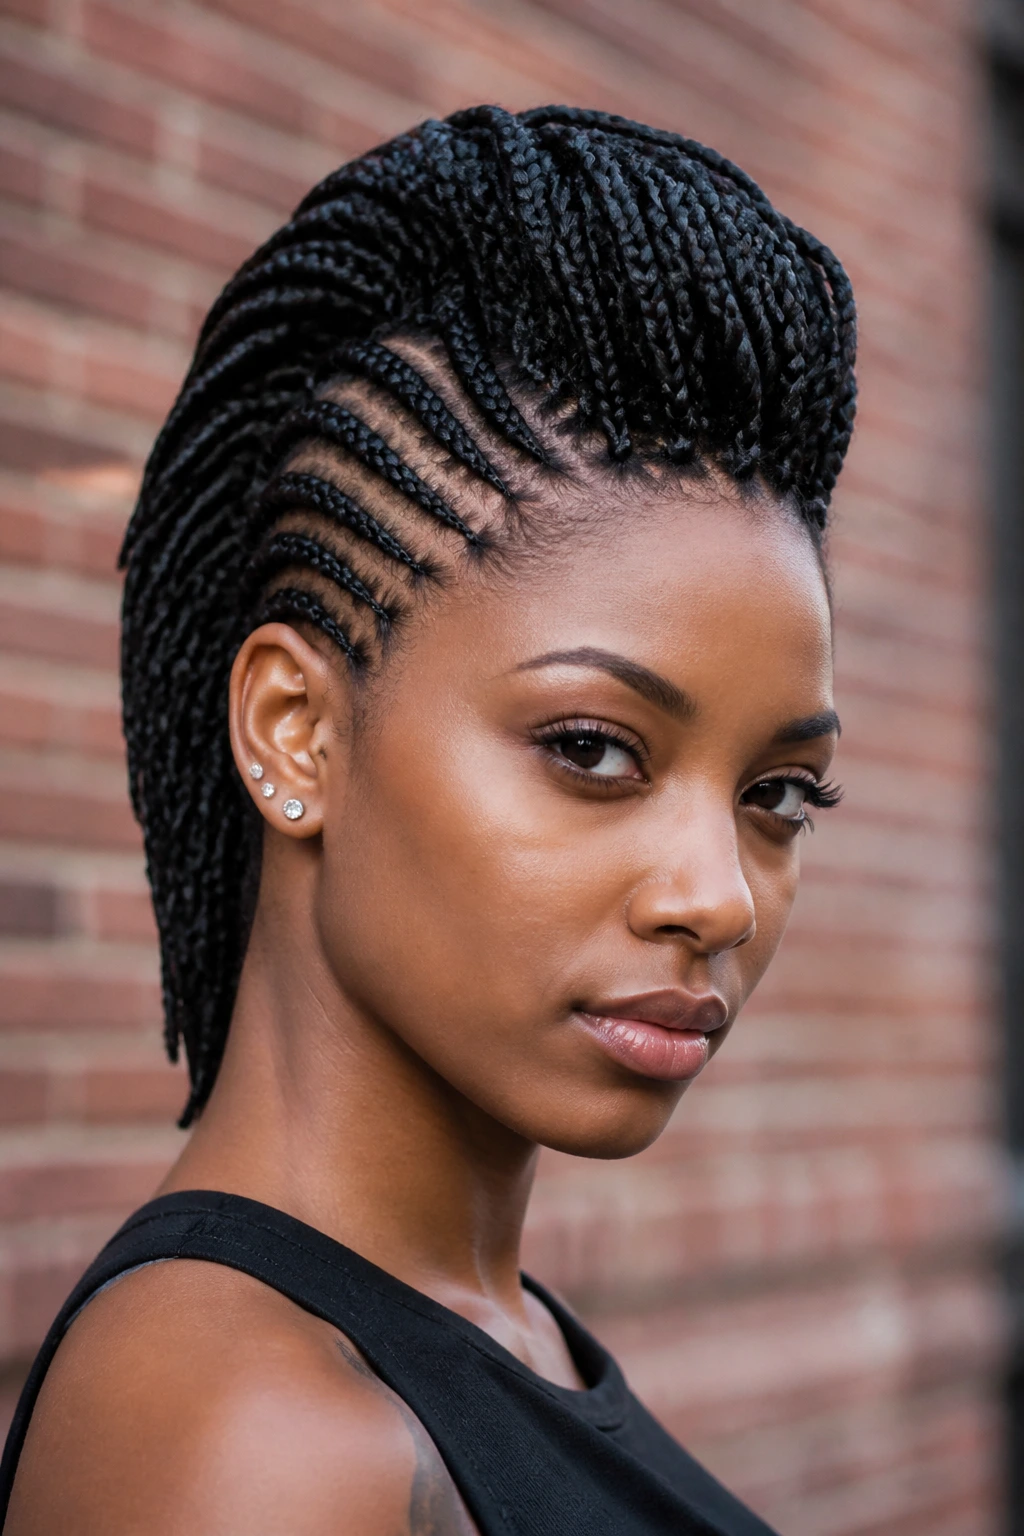
Adding length to a mohawk is the oldest trick in the book, and using box braids allows you to play with texture and color without dyeing your own hair. For short natural hair, this is a lifesaver because the synthetic hair provides the structure that your own hair might lack.
Managing the Tension
The danger with box braids on short hair is the weight. Synthetic braiding hair can be heavy, and if your natural hair is only a few inches long, that extra weight can pull on your roots. The solution is to make smaller, more numerous box braids rather than a few jumbo ones. More braids mean the weight is distributed more evenly across your scalp, which is much safer for your hairline.
Styling the Mohawk
Once you have the box braids installed, you don’t just let them hang. Sweep them all toward the center. Use a large decorative hair tie or even a few bobby pins to pull the braids up into a gathered crest. You can leave a few framing the face, but the bulk of the weight should sit right on the crown of your head.
4. Goddess Braid Mohawk
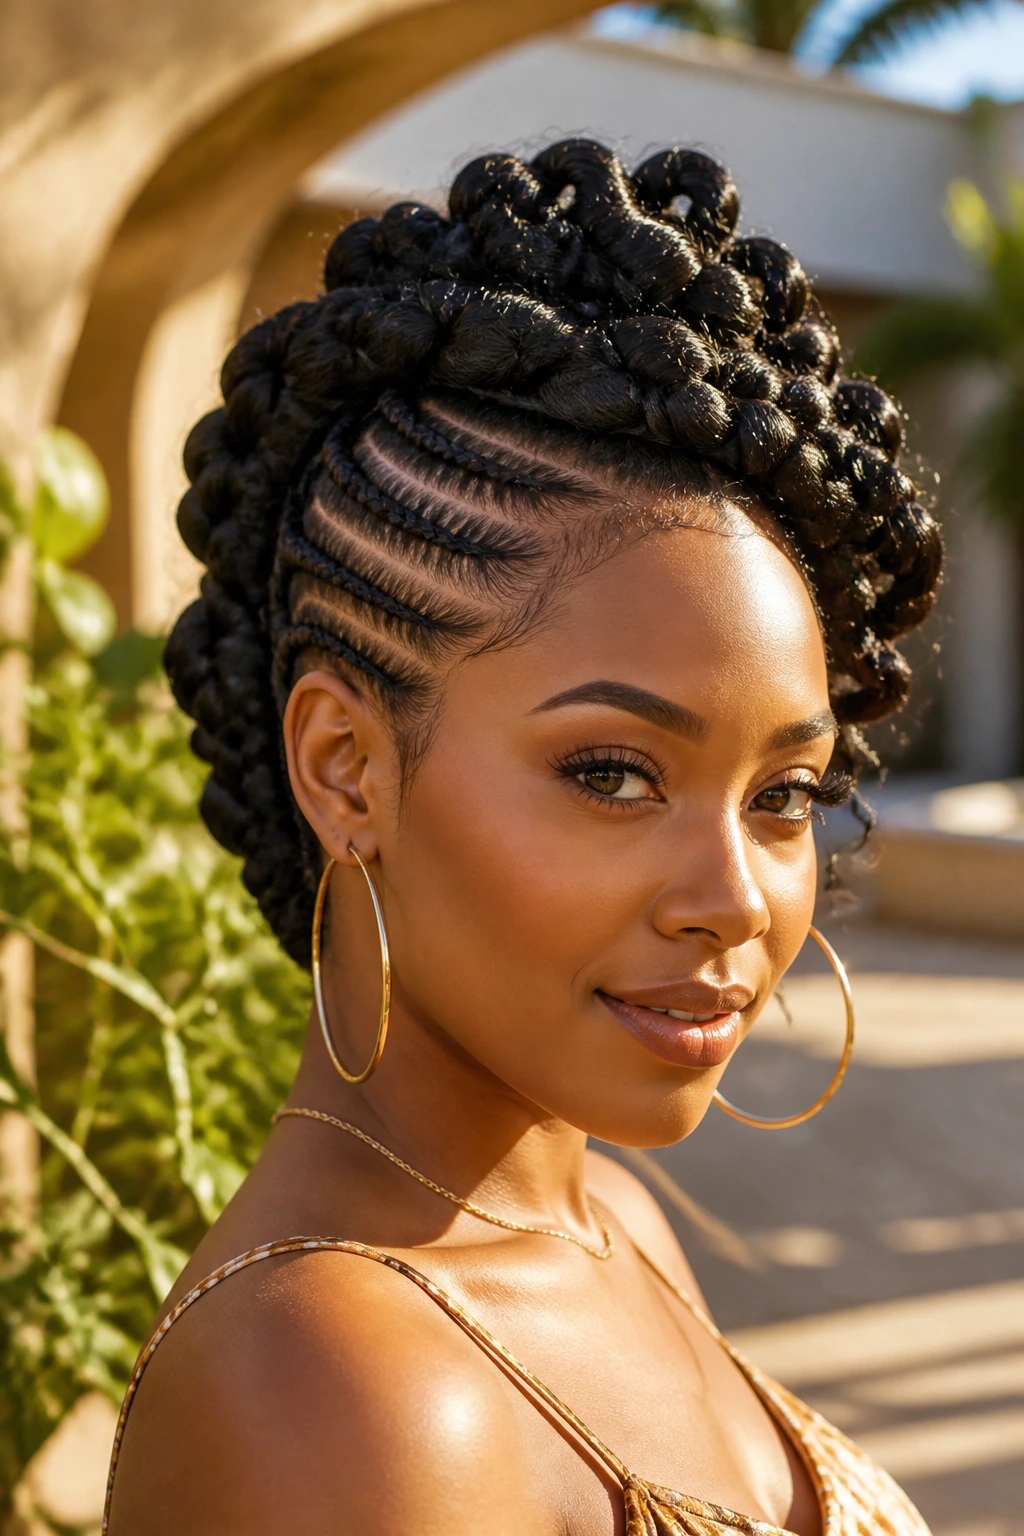
Goddess braids are just larger, thicker cornrows, often with curly ends left out. This style is incredibly feminine and looks especially striking on shorter hair because it creates a bold, graphic look that feels intentional and high-fashion rather than just a quick protective style.
Why It’s a Standout
The beauty of the goddess mohawk is the contrast. You get the slick, tight cornrow base along the sides and back, and then you get the soft, romantic curls at the end of the braid that sits on top. It gives you the best of both worlds: the structure of a braid and the softness of loose hair.
The Application
When braiding, you want to feed in a bit of synthetic hair to give the braids that “goddess” thickness. If your natural hair is very short, feed-in hair is practically mandatory to keep the braid from fraying. Make sure to curl the ends of the synthetic hair using boiling water (be careful!) or flexi rods if you are using pre-curled synthetic braiding hair.
5. Tribal-Inspired Mohawk Braid
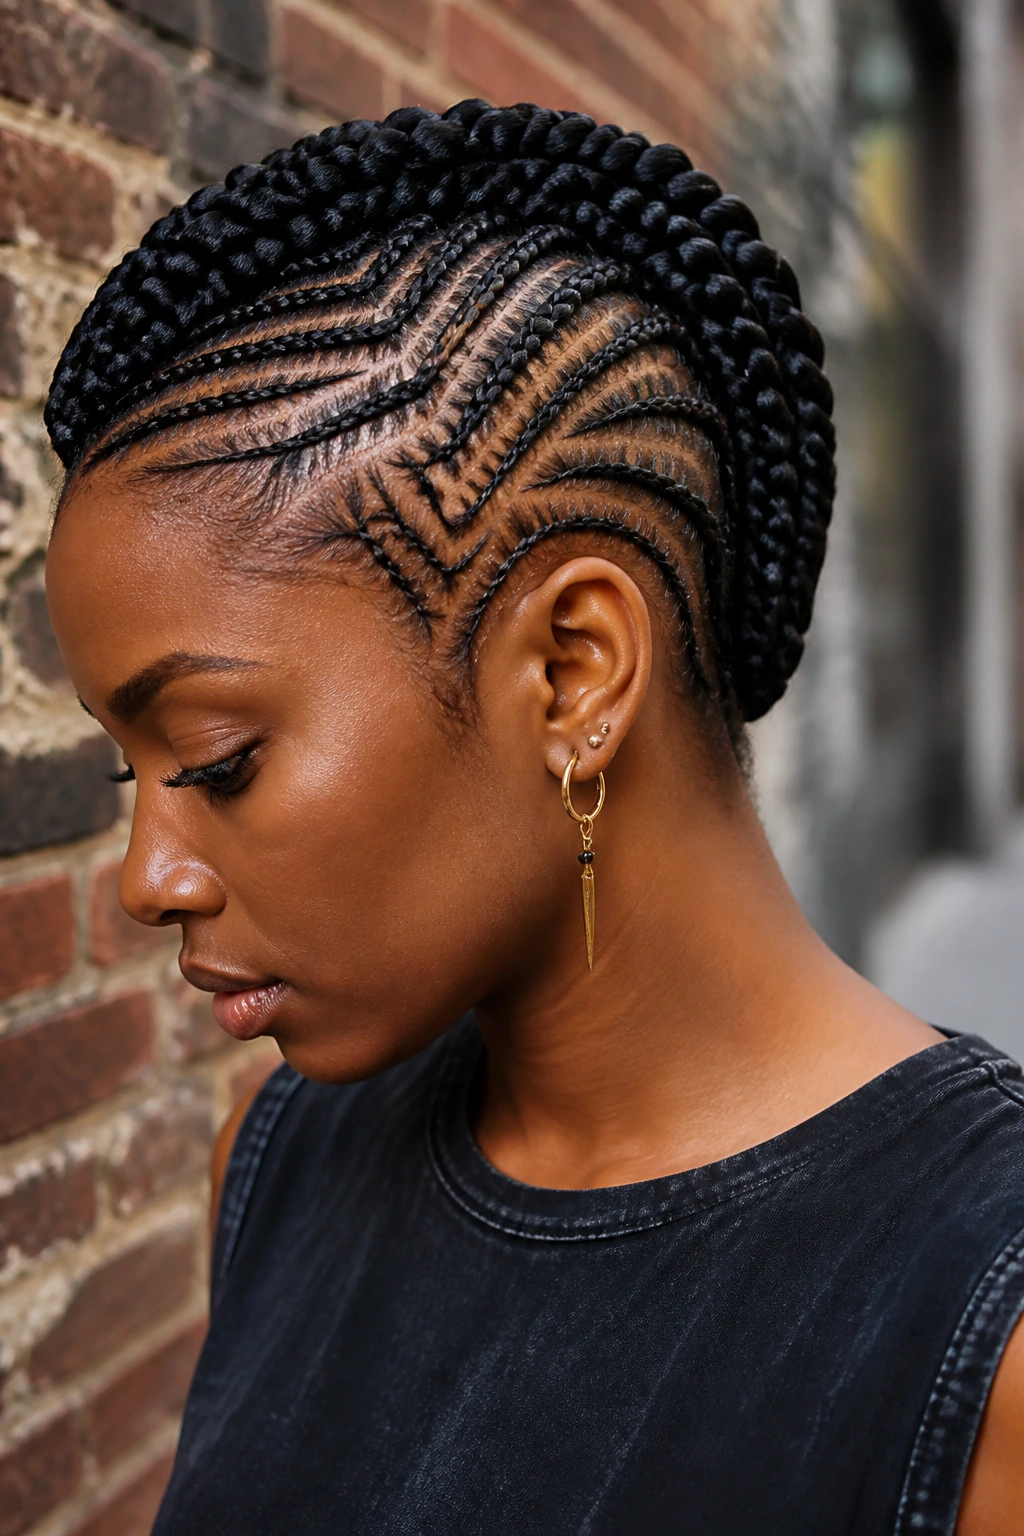
Tribal braiding patterns are known for their intricate parts and unique, often asymmetrical designs. Taking these patterns and directing them all into a central mohawk creates a look that is deeply artistic and very secure.
The Geometry of the Style
Unlike a standard cornrow mohawk, a tribal-inspired look focuses on the parts. Think of lightning bolt parts, curved lines, or even diamond shapes cut into the side panels. Because your hair is short, these intricate parts stay crisp longer. If you have the patience—or a friend who has the patience—to part your hair into these specific shapes, the final result is always worth the effort.
Essential Tools
- A rat-tail comb with a metal tip (for precise parting).
- A mirror to see the back.
- A light oil to keep the scalp hydrated.
- Clips to keep the sections you aren’t working on out of the way.
Warning: Do not rush the parting phase. If your parts are messy, the whole look loses its “tribal” aesthetic and just looks like an unkempt head of hair. Take your time.
6. Mohawk with Bantu Knot Accents
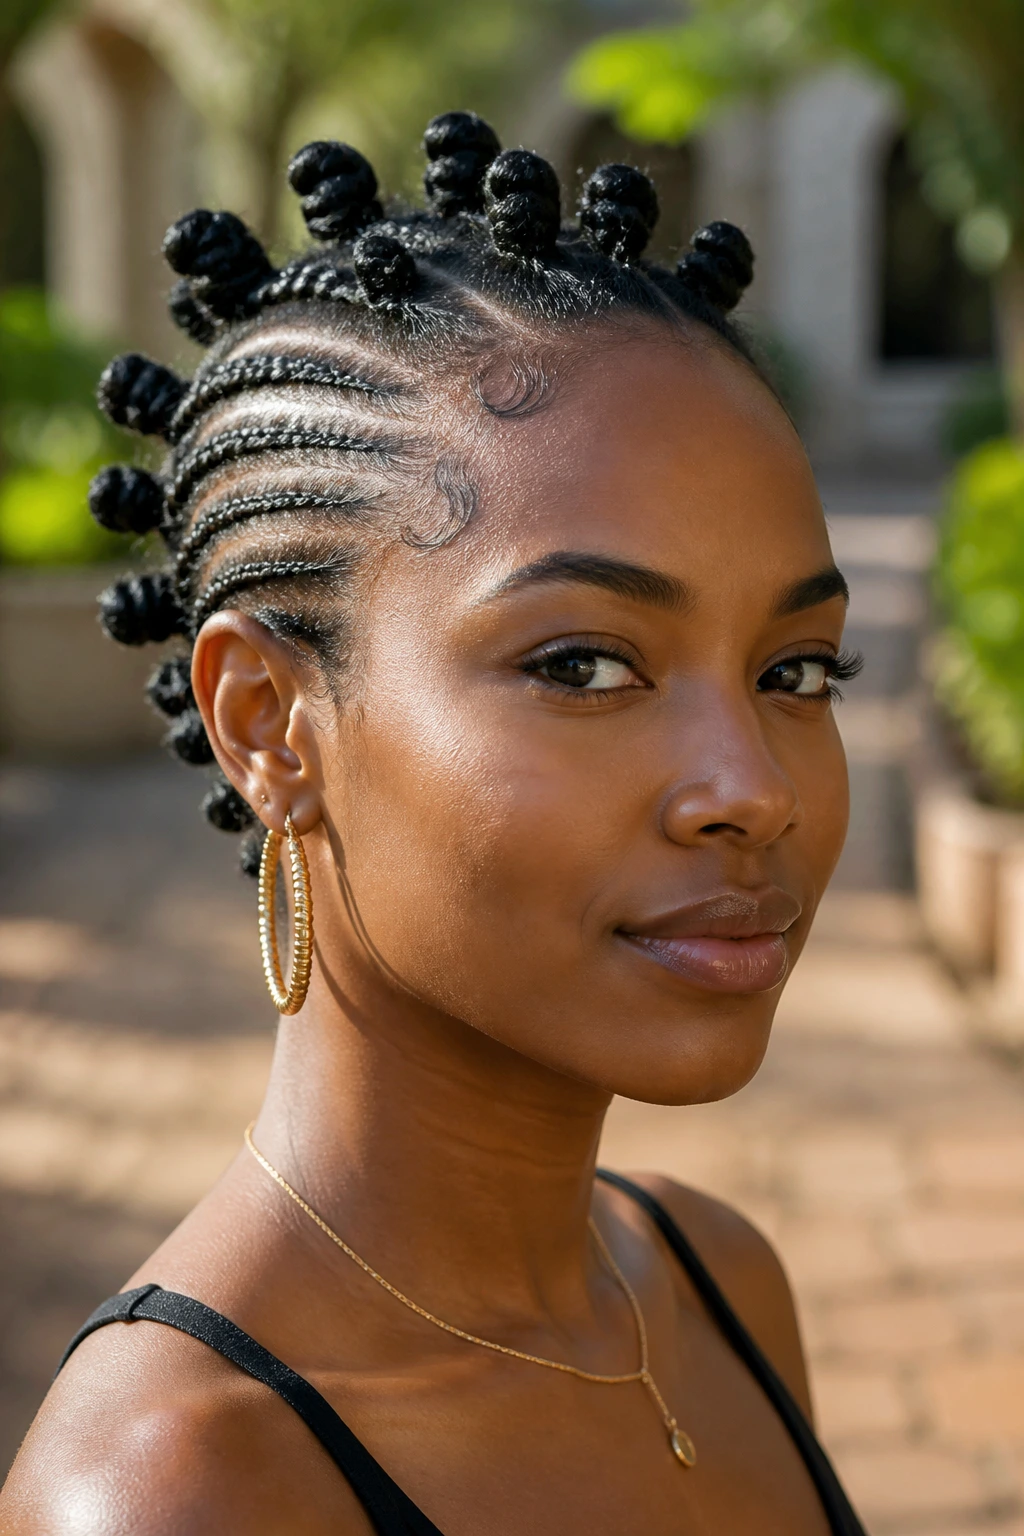
This is a playful, fusion style that bridges the gap between traditional African-inspired protective styles. You essentially create the mohawk shape, but instead of finishing with a braid, you turn the ends into small Bantu knots.
How to Execute the Knots
Once you have gathered your hair into the mohawk position, you can either braid the ends or twist them. If you twist them, coil that twist around itself until it sits flat against the scalp. You can do this with just your natural hair if it is long enough to coil, or you can add synthetic hair to create larger, more uniform knots.
Why This Works for Short Hair
Bantu knots are excellent for disguising the transition from short, natural hair to the style itself. If you find it hard to get a smooth, long braid at the end of your mohawk, turning it into a knot is a perfect way to “hide” the fact that you ran out of length. It looks like a design choice, not a limitation.
7. Feed-In Braid Mohawk
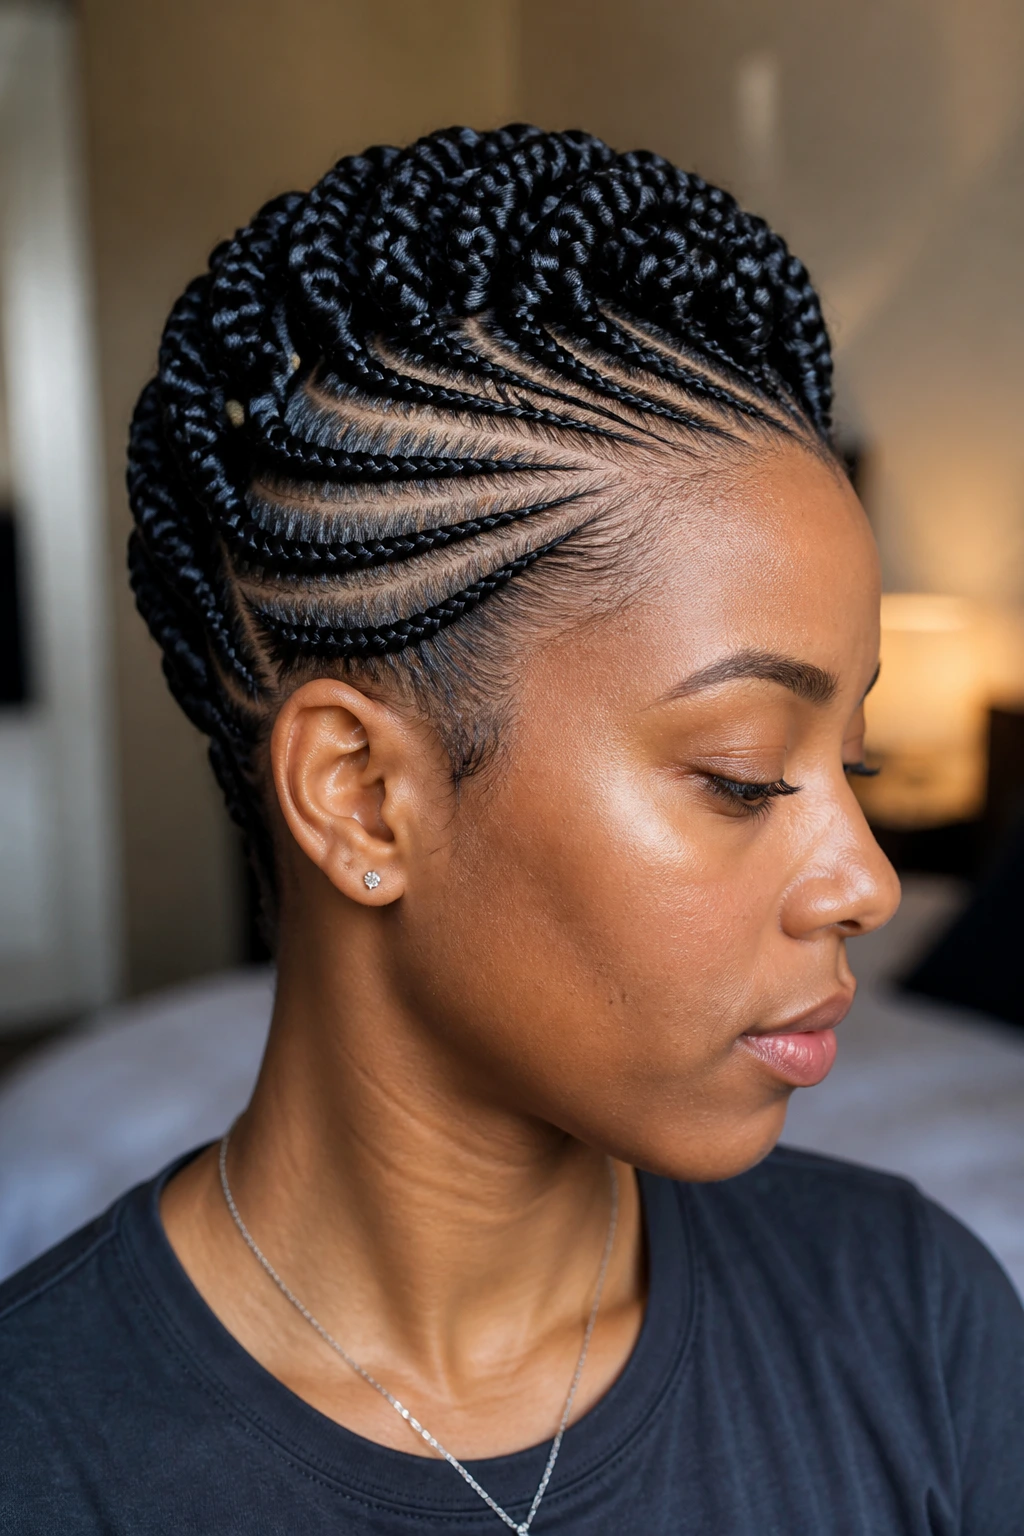
Feed-in braids are the gold standard for a natural hairline appearance. By starting the braid with your own natural hair and gradually adding synthetic strands as you go, you avoid that bulky knot at the front of your hairline.
The “Sleek” Factor
For short natural hair, this is the most critical style to master. When you start with your own hair, you ensure that the braids are tight and neat right at the edge. This prevents the “fuzzy” look that often happens when you try to start a braid with a thick clump of synthetic hair on very short natural strands.
The Technique
Start with a tiny bit of your natural hair. Braid it once, then pick up a small strand of synthetic hair and loop it in. Braid again, add more. Repeat. Do this until the braid is the desired thickness. It requires a gentle touch, but it produces the most professional-looking mohawk you can achieve at home.
8. Double Mohawk Braids
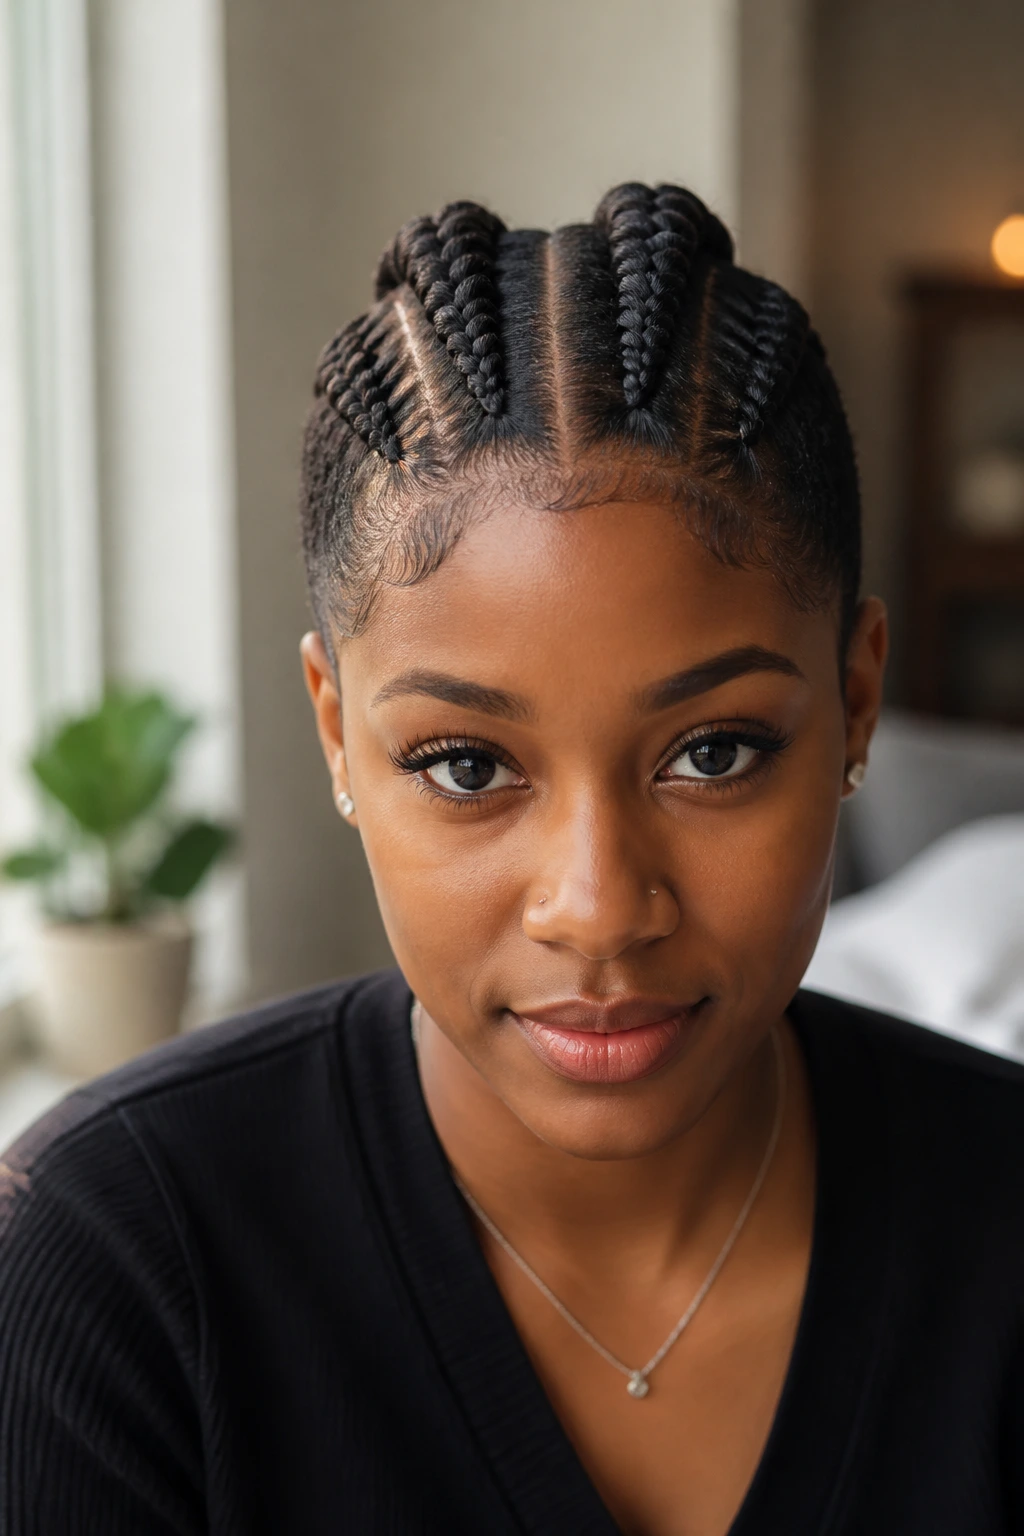
Why stop at one? Two mohawks running parallel down the center of your head create a unique, symmetrical look that is very popular for those who want a bit more “oomph” to their style. It essentially splits the mohawk into two smaller, defined crests.
Structural Requirements
You need to be very precise with your center part to make this work. If the part is crooked, the two braids will look like they are fighting each other. Once you have that center line, braid the hair on either side of the part toward the center, creating two distinct raised rows.
Styling Variation
You can braid the two rows all the way down, or you can stop halfway and let the remaining hair fall loose into two mini-puffs or coils. This variation is great if you have a bit of length and want to mix up the texture while still keeping the structure of the mohawk.
9. Mohawk with Curly Ends
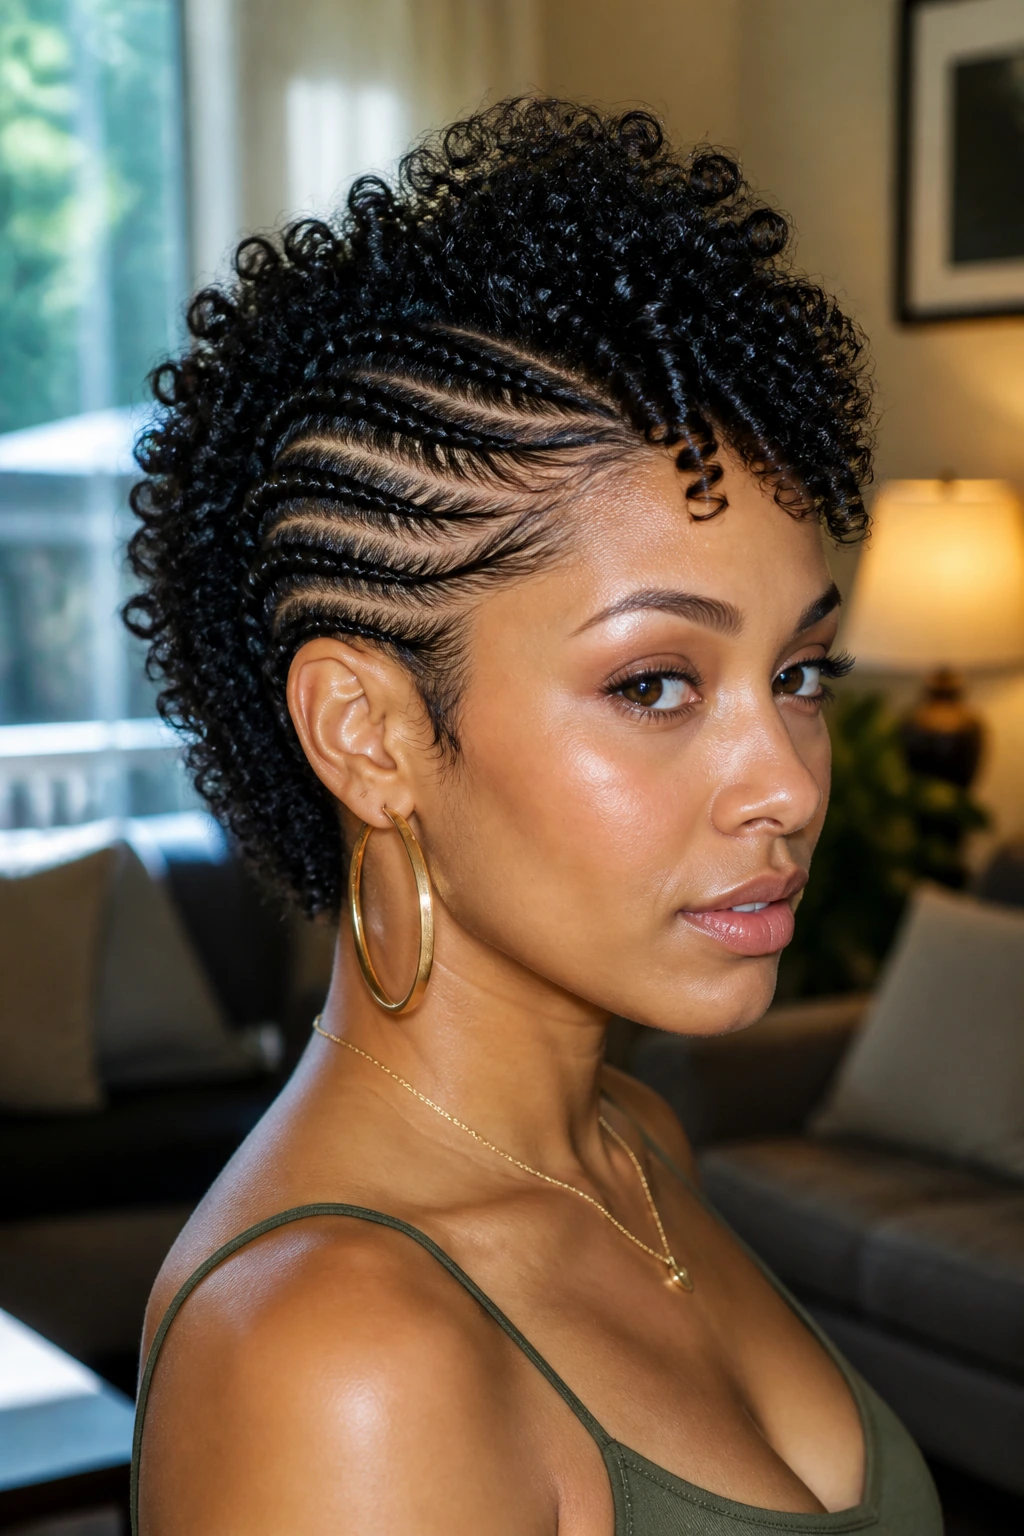
This style is about celebrating texture. You perform a classic cornrow mohawk, but instead of braiding to the very ends, you release the hair at the top, leaving it loose. This creates a “fro-hawk” effect but keeps the sides neat and controlled.
Managing the Loose Hair
The loose hair on top needs to be defined. You can’t just leave it to frizz. Use a curling custard or a strong-hold styling gel. Twist the loose sections into small coils or bantu knots while the hair is wet, let them dry, and then undo them to create a burst of curls right at the top.
Why It’s Great for Short Hair
This style gives you height without needing length. By placing the loose, curly texture at the highest point of your head, you create a visual illusion of a much larger, more voluminous hairstyle, even if your hair is only a few inches long.
10. Criss-Cross Part Mohawk
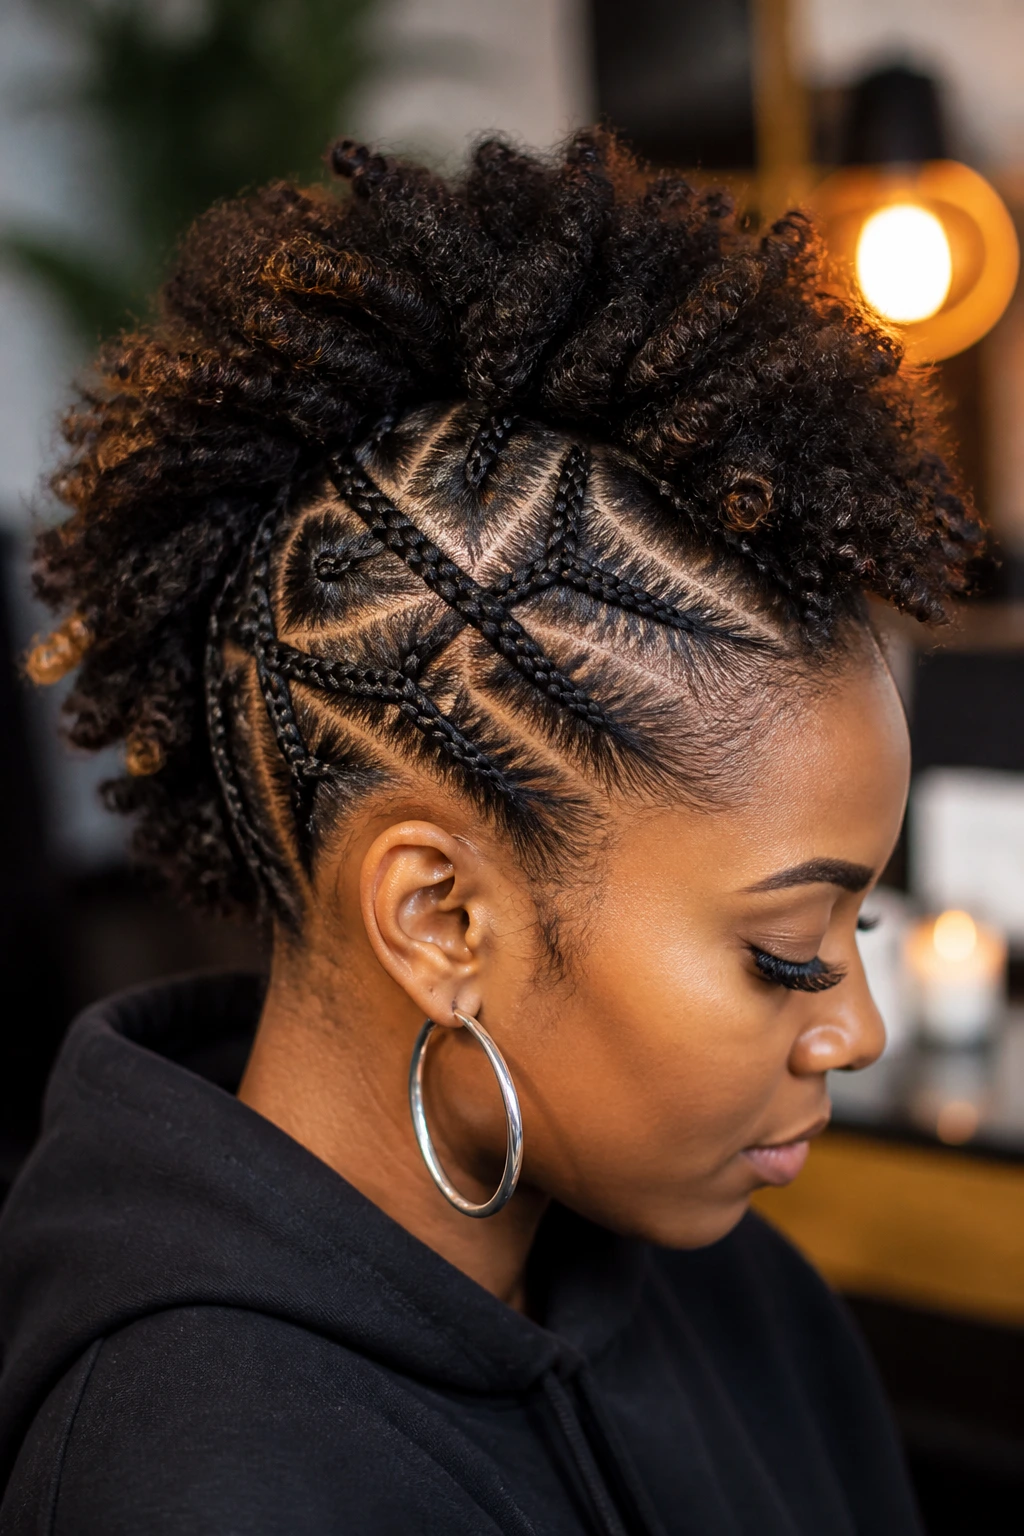
If you are tired of straight lines, this is your solution. You create the mohawk shape, but instead of straight cornrows on the sides, you incorporate a criss-cross pattern. It adds a layer of visual complexity that catches the eye and makes the style look much more complicated than it actually is.
Technique for the Cross
You do this by parting the side hair into small diamond or triangular shapes and crossing the braids over each other. It’s essentially a “box braid” pattern on the sides, but braided downward into the center. It requires a lot of rubber bands and patience, but the result is a secure, intricate style that stays put for days.
Tips for Success
- Use a mirror setup (one in front, one behind) to check your symmetry.
- Keep a bottle of braid sheen handy.
- Do not make the crosses too tight, or you will end up with a headache by the end of the day.
11. Mohawk with Shaved Sides
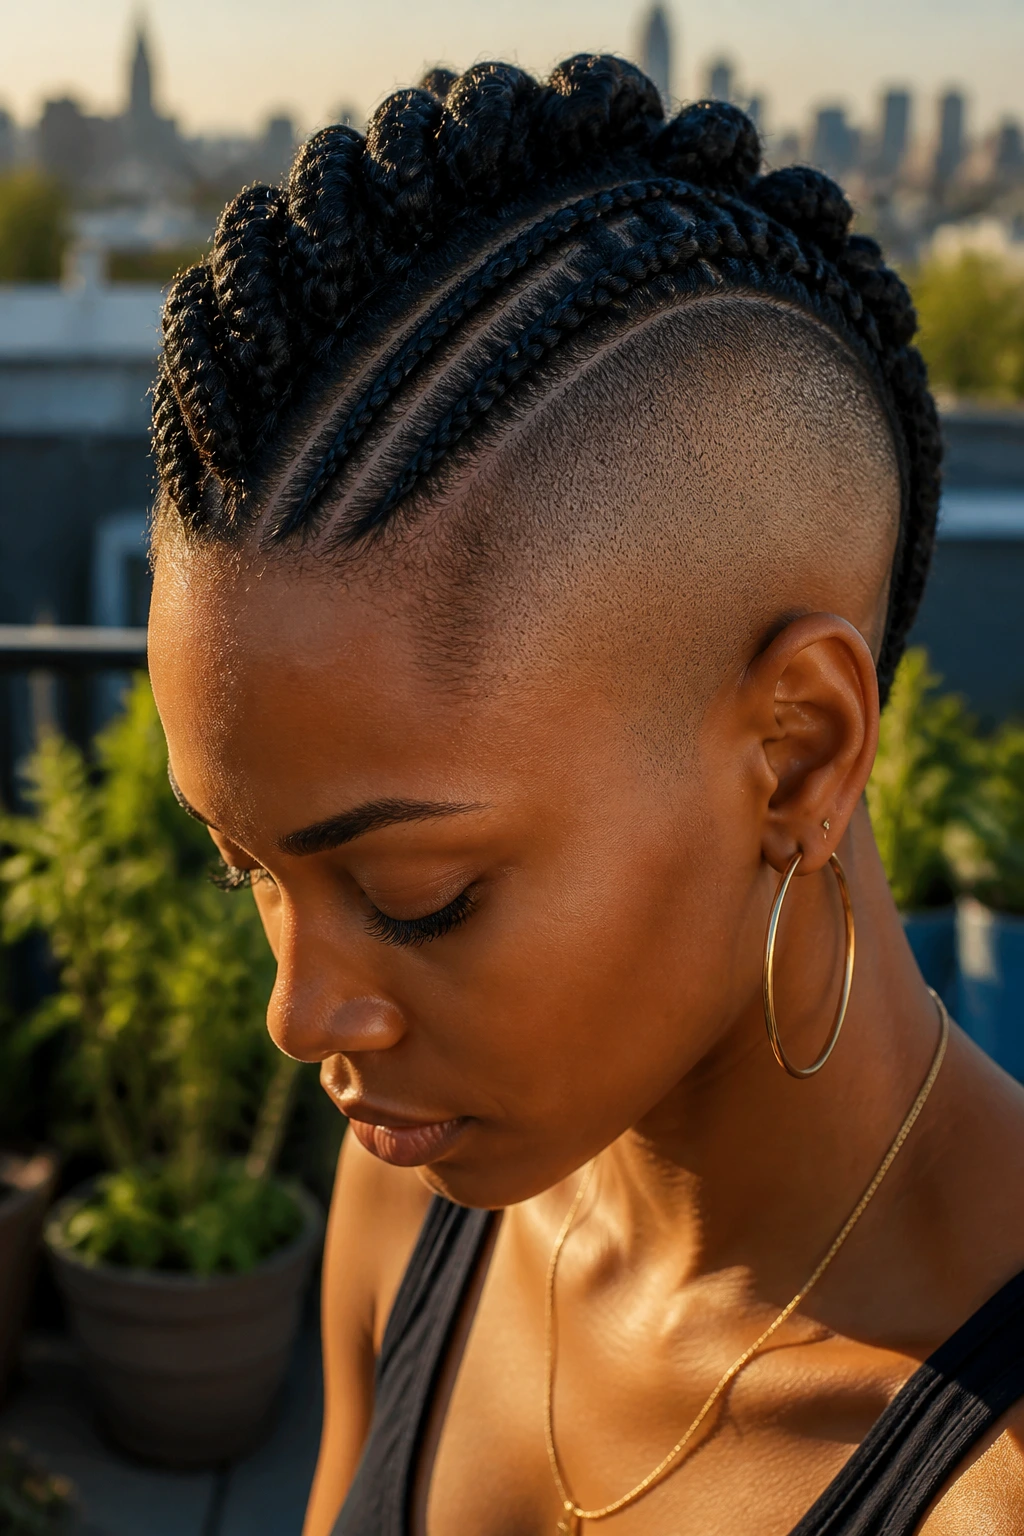
This is the permanent version of the style. If you are ready for a big change, shaving the sides of your head transforms the mohawk into a low-maintenance, high-impact style. You only have to worry about braiding the center strip.
The Upkeep
Shaving the sides means you have to be disciplined about maintenance. You will need to touch up the sides every week or two to keep that clean line. However, the styling part becomes much faster because you have significantly less hair to braid.
Who Should Try It
This is for the person who loves the look but hates the daily effort of trying to slick down the sides. It is a bold aesthetic, and it works with almost any hair type. Just be prepared for the growing-out process if you ever decide you want your full hair back—it takes a lot of patience.
12. Zig-Zag Part Mohawk
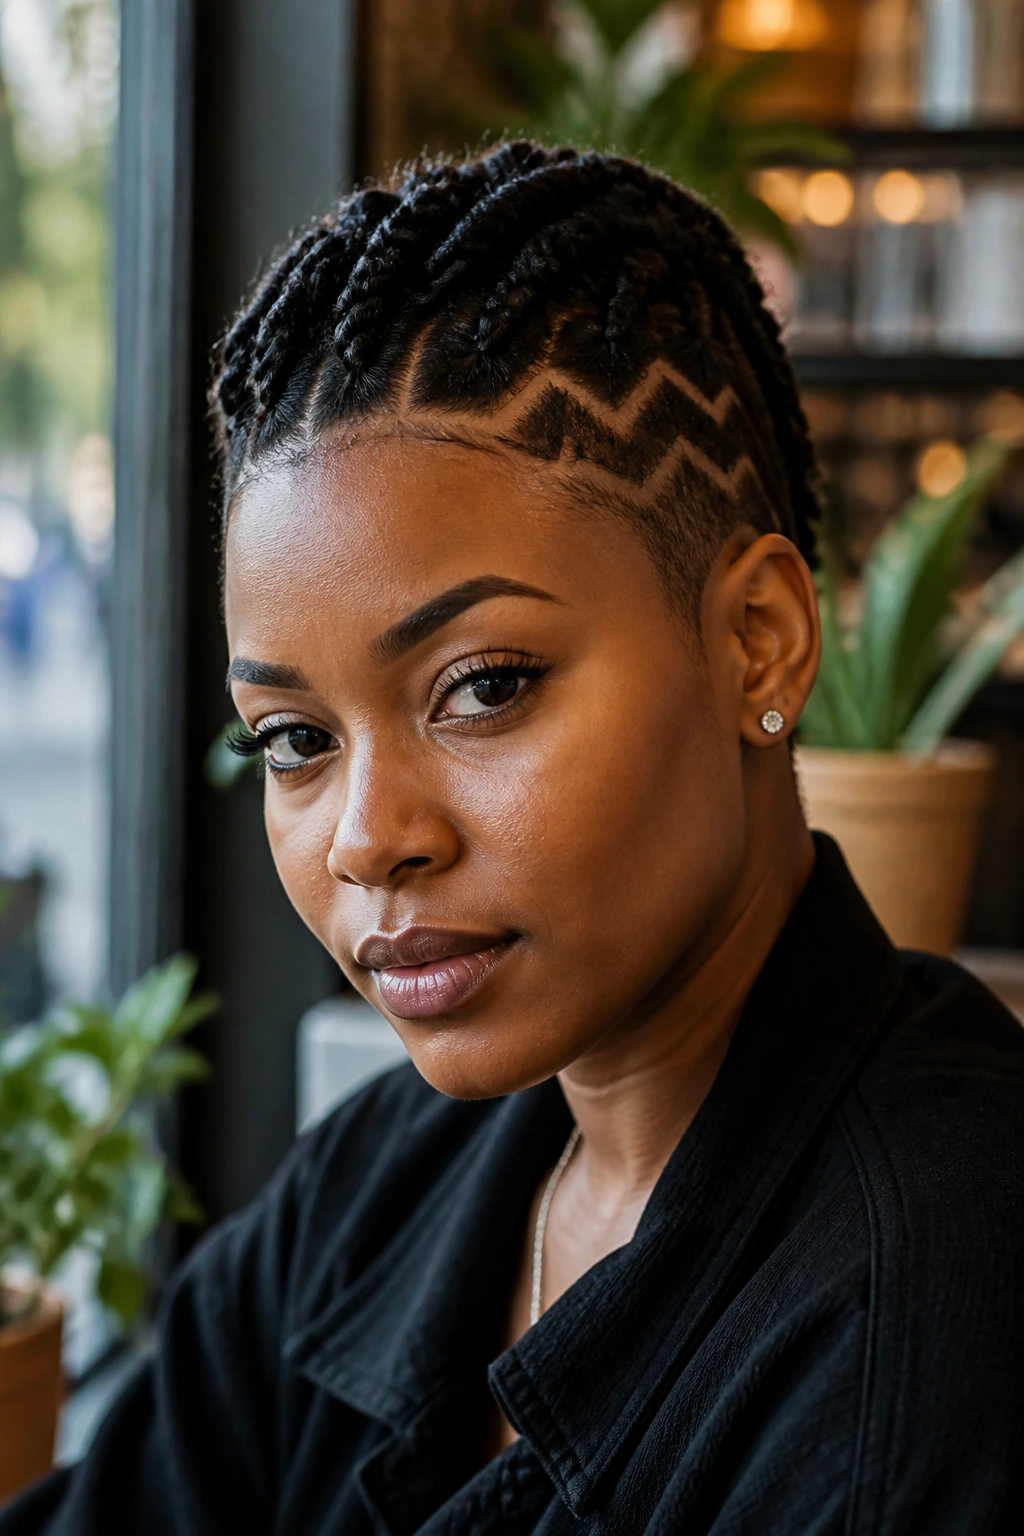
Zig-zags are the ultimate way to inject personality into a basic style. Instead of a straight line, your part—or the parting of your cornrows—takes a zig-zag turn. It turns a standard mohawk into something geometric and fun.
Achieving Precision
The secret here is the comb. You must use a metal-tipped rat-tail comb and follow a strict rhythm: up, over, down, across. If you lose the rhythm, your zig-zag will turn into a messy squiggle. Practice on a small section of hair before you commit to the whole head.
Aesthetic Appeal
This style looks incredible with colored hair. If you have any highlights or a semi-permanent dye job, the zig-zag patterns will make the colors pop by mixing the shades together in a unique way. It is a very visual style that makes the most of whatever color you currently have.
13. Mohawk with Beaded Details
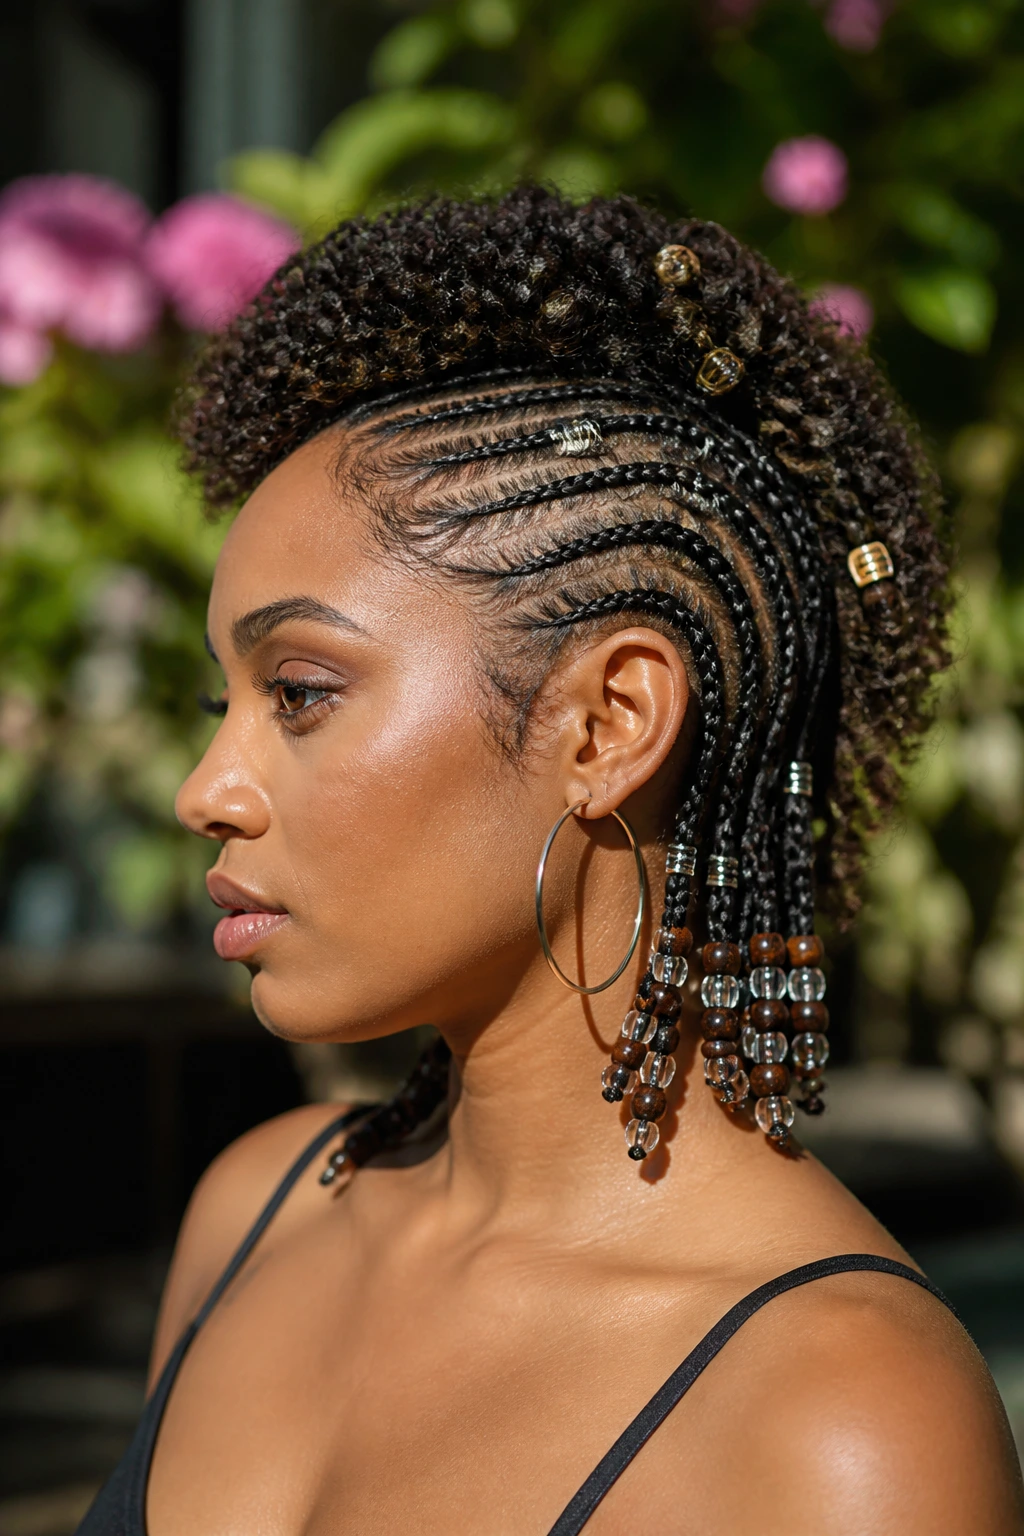
Never underestimate the power of accessories. You can do the simplest cornrow mohawk in the world, but if you add beads to the ends, you elevate it to an entirely different level. Beads add weight, sound, and a beautiful shine to the hair.
Choosing Your Beads
- Wood beads for an earthy, natural look.
- Clear or metallic beads for a modern, sleek vibe.
- Patterned glass beads for a pop of color and retro style.
Application Tips
Make sure your braid is tight at the end, or the beads will slide right off. You can use a bead threader to pull the hair through, and then secure the end of the braid with a tiny clear elastic band right underneath the bead. This keeps everything locked in place.
14. Half-Up Mohawk Braid
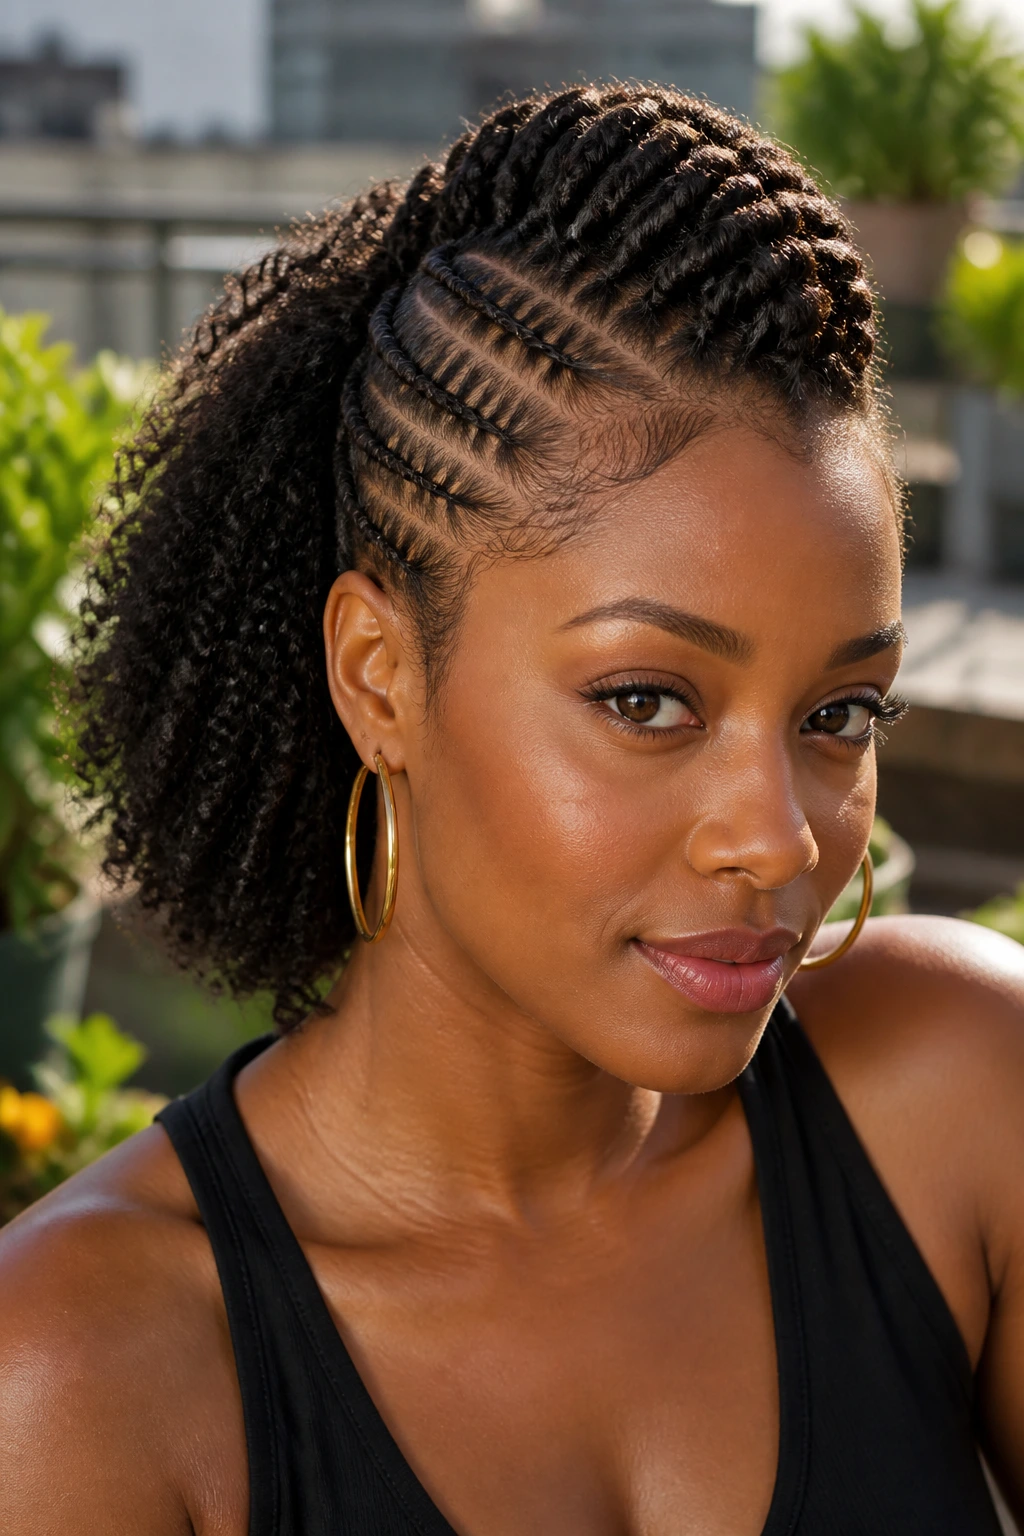
This is the style for those who want a mohawk but aren’t ready to commit to having all their hair pulled up. You braid the front section into a mohawk, but you let the back section hang loose, perhaps in a twist-out or a wash-and-go.
The Balancing Act
The key here is where you stop the mohawk. Usually, you stop at the crown of the head. This gives you that “mohawk” look at the front but allows you to have some length and volume in the back. It is a fantastic option if you have an uneven hair texture and want to hide the shorter parts while showing off the longer bits.
Styling the “Half”
Since the back is loose, you need to make sure it looks uniform with the braid. If your hair is straight in the back but braided in the front, it will look disjointed. Ensure the texture of the loose hair matches the vibe of the braid—perhaps by doing a twist-out to create a similar curl pattern to what might be in the braid.
15. Jumbo Mohawk Braid
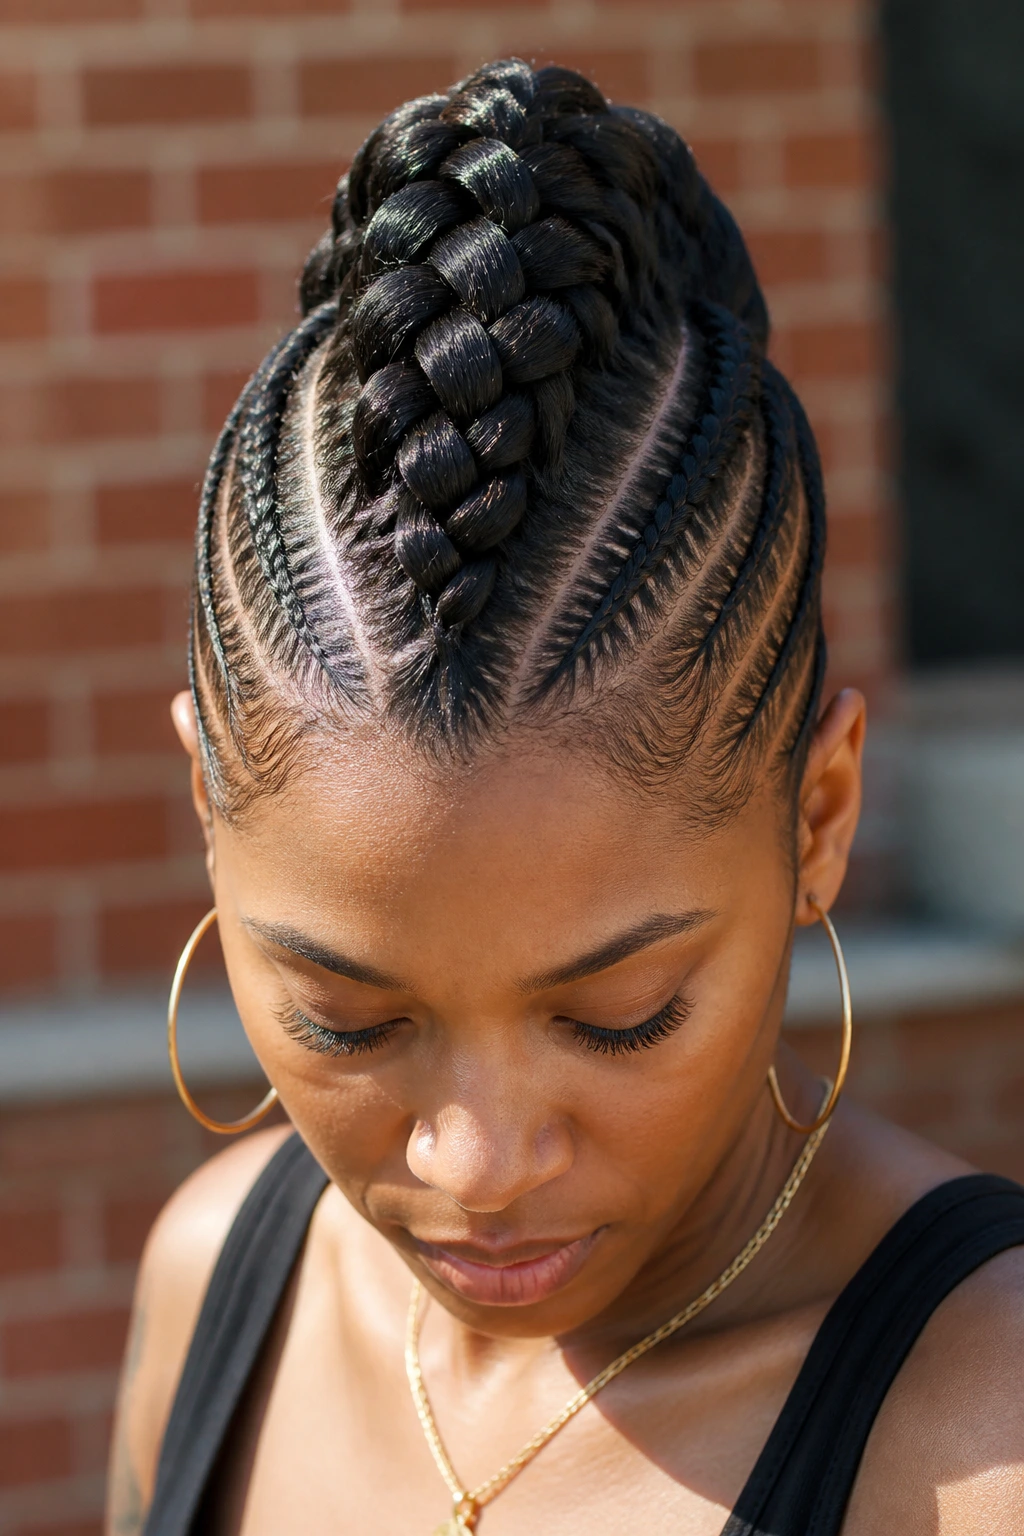
If you want a bold, dramatic statement, go jumbo. A single, large, thick braid running down the center of your head is the definition of a protective style power move. It is fast to install, easy to maintain, and looks expensive.
Creating Volume
To get that “jumbo” look on short hair, you have to use a significant amount of braiding hair. Feed it in aggressively to build that thickness. The bigger the braid, the fewer lines you have to deal with, and the less time you spend in the mirror.
Maintenance
Jumbo braids are great, but they can get frizzy if you aren’t careful. Sleep in a satin bonnet and use a light holding spray to keep the flyaways down. Because the braid is so thick, it can be a bit heavy, so consider using lighter, pre-stretched synthetic braiding hair to reduce the strain on your scalp.
Final Thoughts
The mohawk braid is one of those styles that truly defies the “short hair” narrative. It does not matter if your hair is two inches or six inches; the technique remains the same, and the impact is just as high. The key is to stop seeing your hair length as a barrier and start seeing it as a structural advantage. Because your hair is short, it is inherently easier to control; it doesn’t tangle as much, and it holds tight styles like cornrows and twists with a firmness that longer, heavier hair simply cannot maintain.
The most important takeaway for anyone attempting these styles is to prioritize the health of your scalp and edges. Do not over-tighten the braids. If you feel pain, you are doing it too tight. There is a fine line between a sleek, secure style and one that causes traction alopecia. Use your mirror, take your time, and don’t be afraid to use a little product to keep those edges laid. Whether you go for the classic cornrow or a complex, zig-zag part, the best mohawk is the one that makes you feel like you can walk into any room with your head held high. Practice, be patient with your hands, and enjoy the transformation.
