



Freshly washed curls can look like a dream for exactly twenty minutes. After that, the shape shifts, the roots start to collapse a little, and the style that looked effortless in the mirror suddenly needs a plan.
That is where natural hairstyles for hair earn their keep. The best ones do not fight the texture you already have. They work with shrinkage, density, and curl pattern so your hair still looks like itself — only neater, calmer, and easier to live with.
And that matters more than a lot of people admit. A style can be pretty and still be a headache if it pulls at the temples, flattens the crown, or dries out by lunchtime. The sweet spot is a look that holds shape, protects the ends, and still feels like you could go about your day without checking a mirror every ten minutes.
The styles below move from quick, low-effort looks to more sculpted options, so you can match your hair to the day instead of the other way around.
1. Defined Wash-and-Go Curls
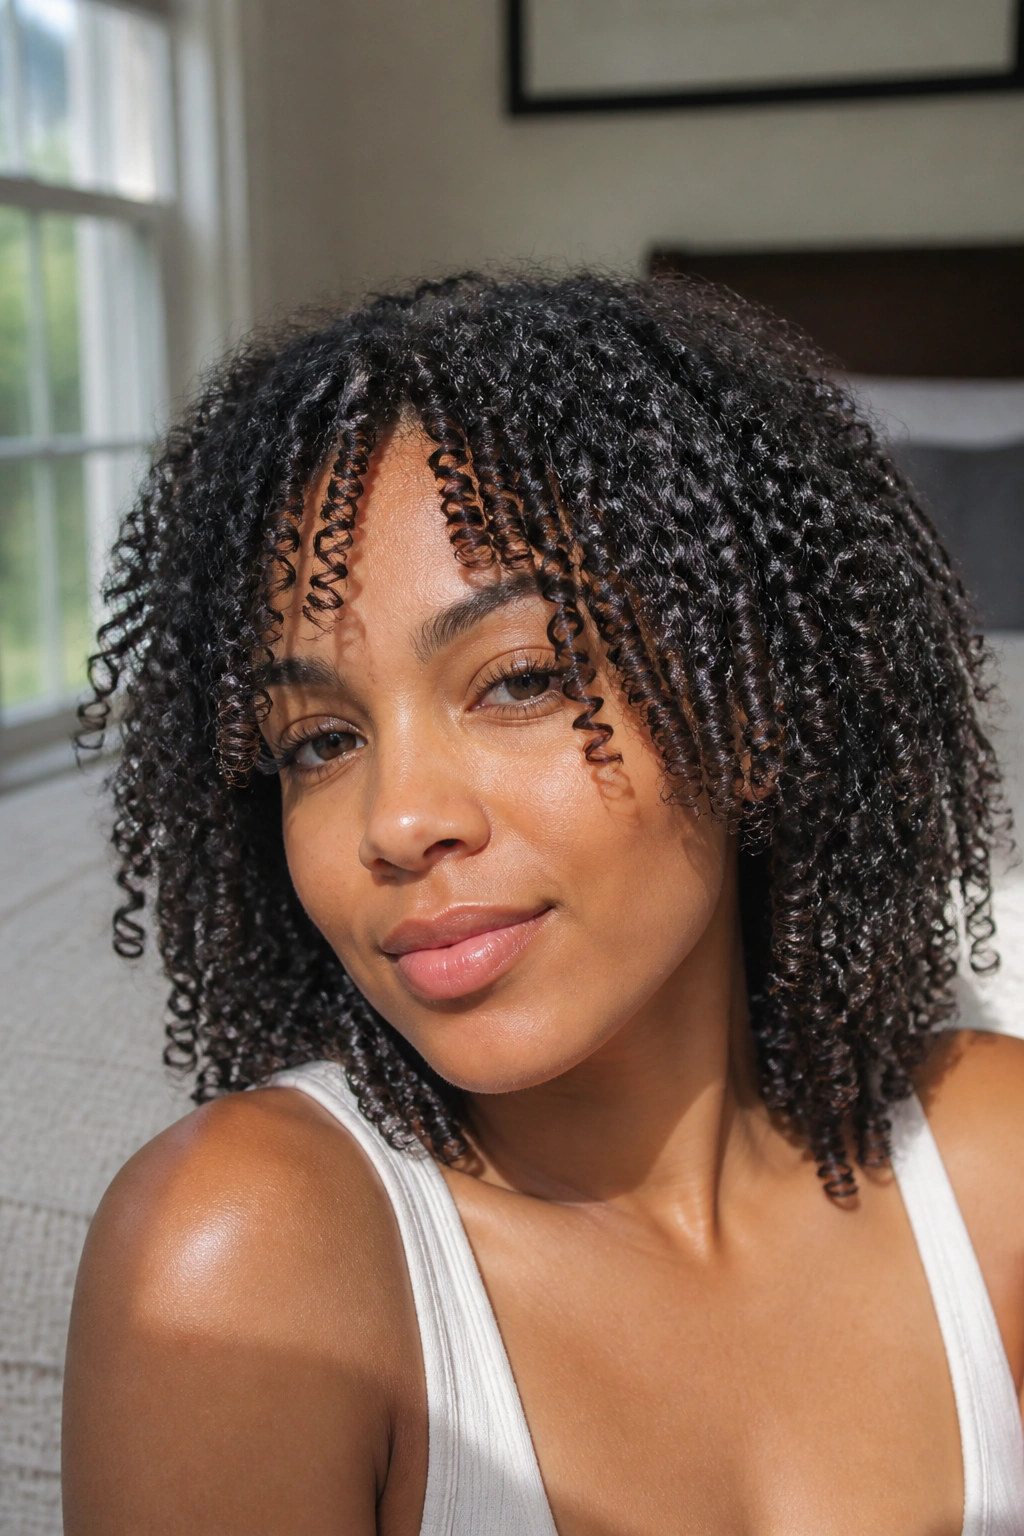
A good wash-and-go is the style that looks the least “done” and still takes the most discipline. You start with clean, damp hair, work in a leave-in and gel or curl cream, then leave the curls alone long enough to set into their own shape.
Why It Works
The whole trick is clumping. When the hair is wet enough and evenly coated, the curls group together instead of drying into a fuzzy halo. That’s why wash-and-go styles can look sharp on curly and coily hair when the product is applied in small sections.
Drying matters too. If you touch the hair too soon, the outside breaks apart before the inside has set. Wait until it feels dry and the hair has that light cast or stiffness from gel, then scrunch it out with clean hands or a touch of oil.
- Best on hair that likes moisture and holds a curl pattern well.
- Works especially well with a diffuser on low heat.
- Needs sectioning if you want even definition from root to tip.
- Looks fuller when you fluff the roots, not the ends.
Pro tip: apply products to soaking damp hair, not barely misted hair. The difference shows up in the finish.
2. Moisture-Rich Twist-Out
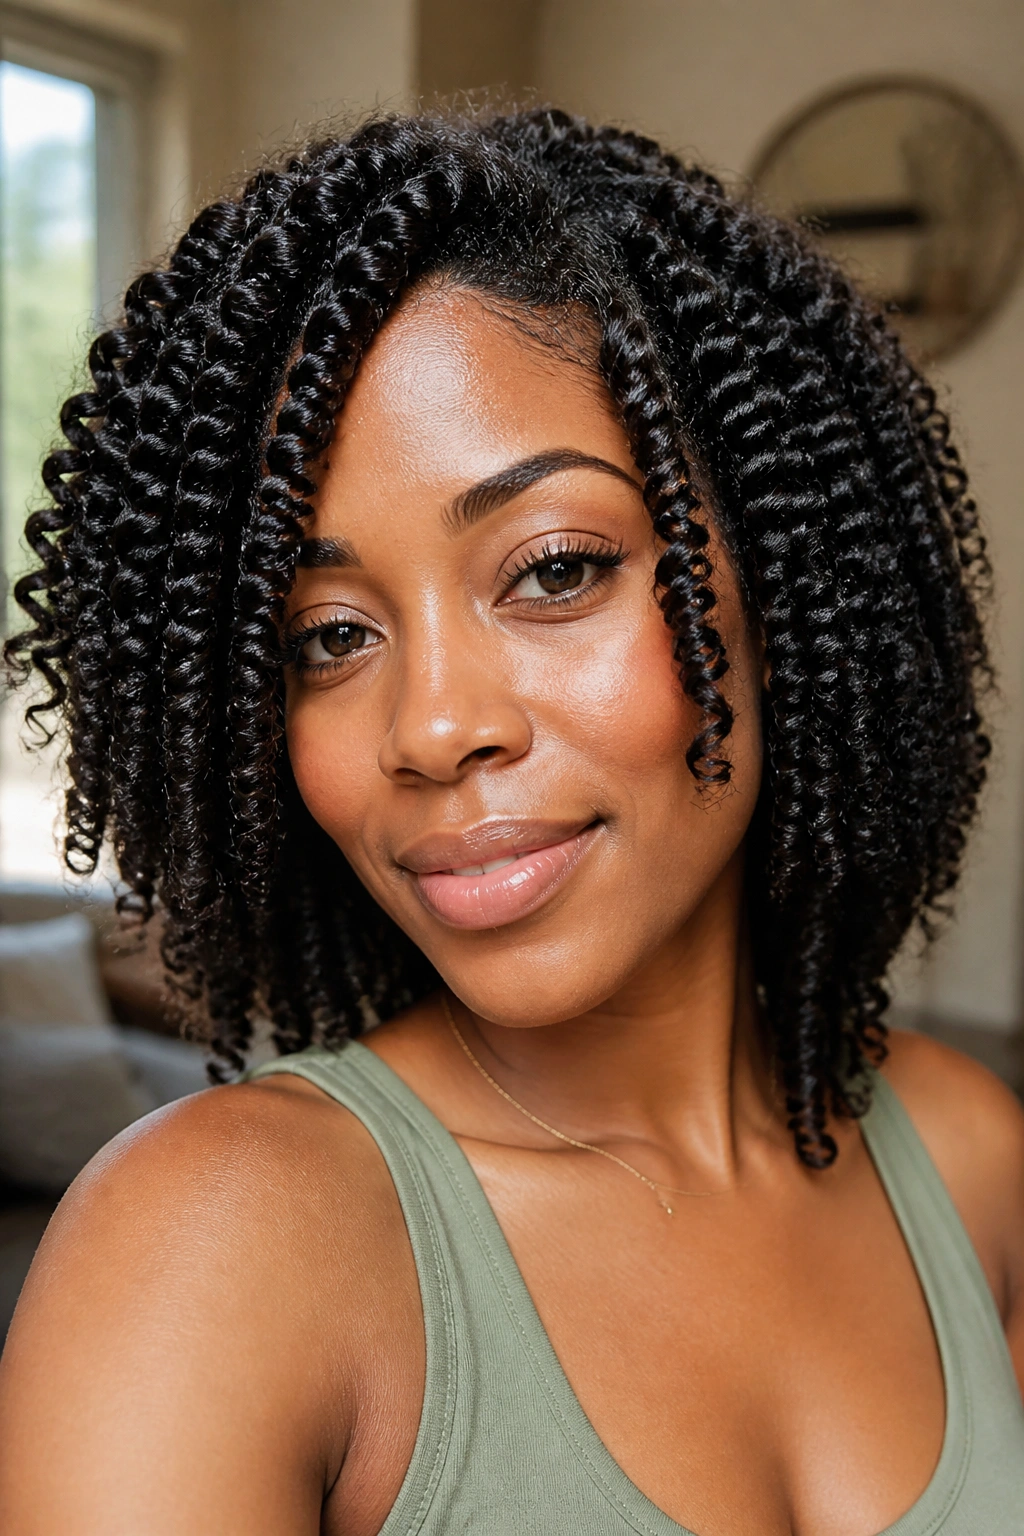
A twist-out can make shoulder-length natural hair look fuller than almost anything else. It gives you softness at the ends, stretch through the mid-lengths, and that slightly undone volume people always try to fake with a pick.
Start with two-strand twists on damp hair, not dripping hair. Use enough cream or mousse to coat each section, but do not soak the hair in heavy butter, or the twists will stay limp and slow to dry. Small twists give tighter definition. Bigger twists give a looser, fluffier finish.
Take the twists down only when the hair is completely dry. Not mostly dry. Completely dry. If the inside still feels cool, leave it alone. That one decision saves you from frizz, and frizz is what ruins the whole point.
A twist-out is a little like a shirt you actually ironed before wearing. Not fussy. Just finished.
3. Soft Braid-Out Waves
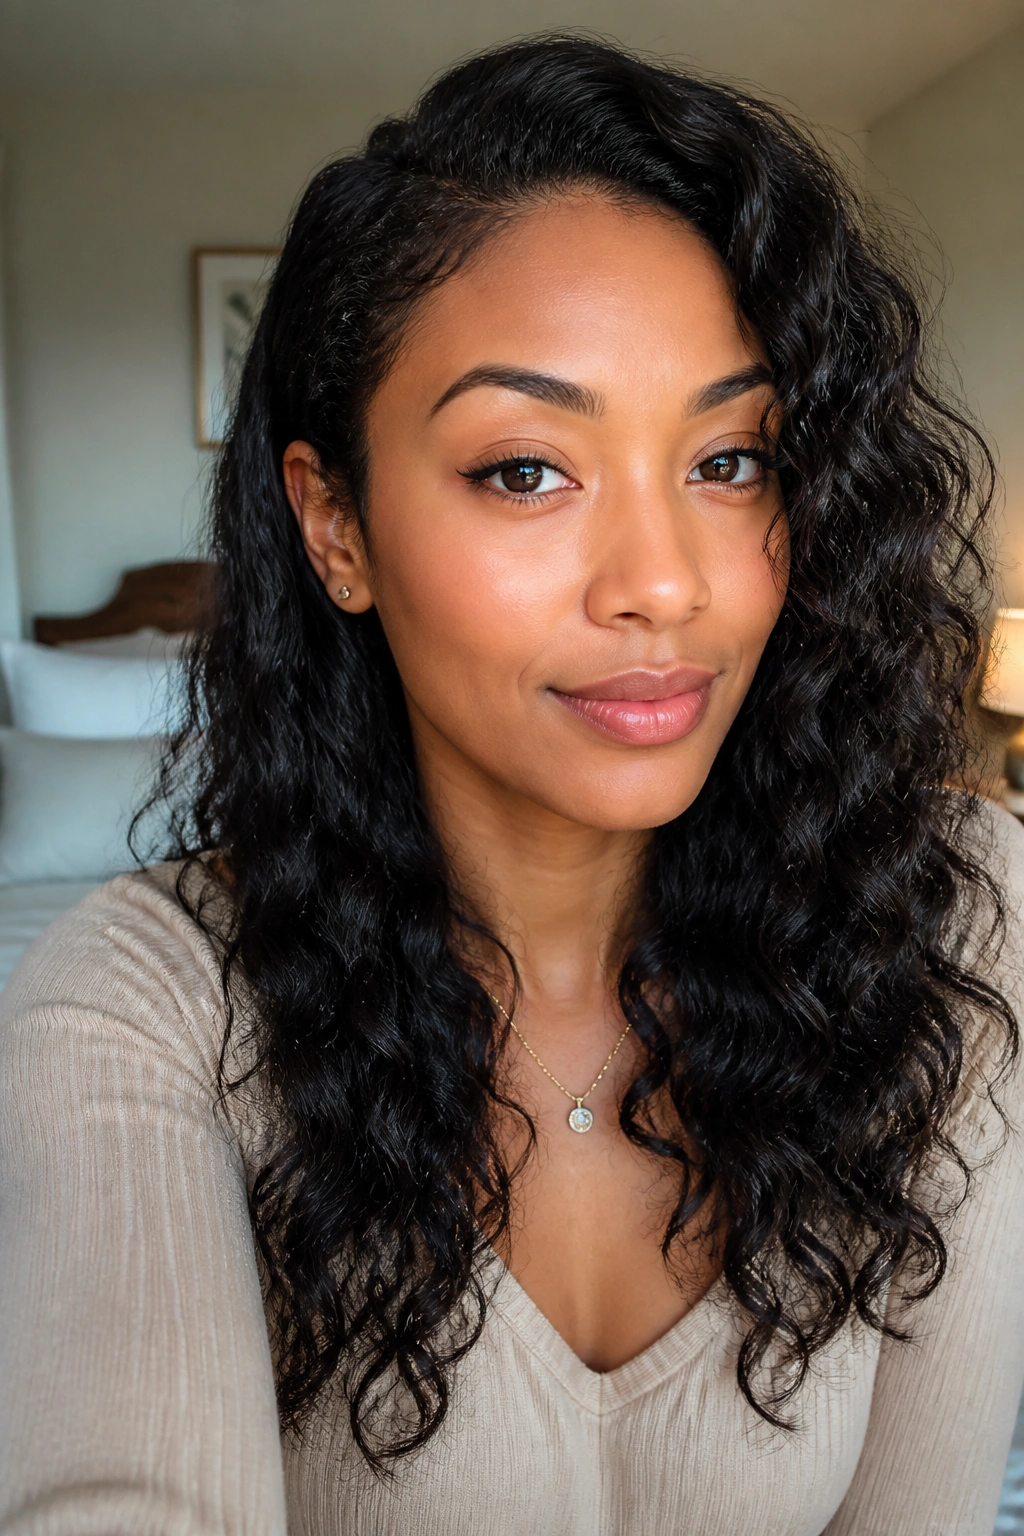
Why does a braid-out look different from a twist-out? Because a braid compresses the hair more tightly as it sets, which gives you a flatter, waved pattern instead of a rounded curl.
That makes braid-outs useful when your hair frizzes quickly or when you want more stretch at the roots. The result is usually a little smoother and a little more predictable than a twist-out, especially on tighter textures that want to shrink the second they dry.
If you braid on damp hair with a light cream or foam, the style usually comes down with more length than a twist-out. Keep the braids medium-sized if you want the waves to show without getting too zigzaggy. Tiny braids can look gorgeous, but they take forever to take down and separate.
How to Wear It
Wear a braid-out loose and fluffy for daytime, or pin one side back if you want more shape around the face. A little oil on the fingertips during takedown helps keep the strands from snagging. Go slowly. That part matters more than people think.
4. High Puff with a Clean Hairline
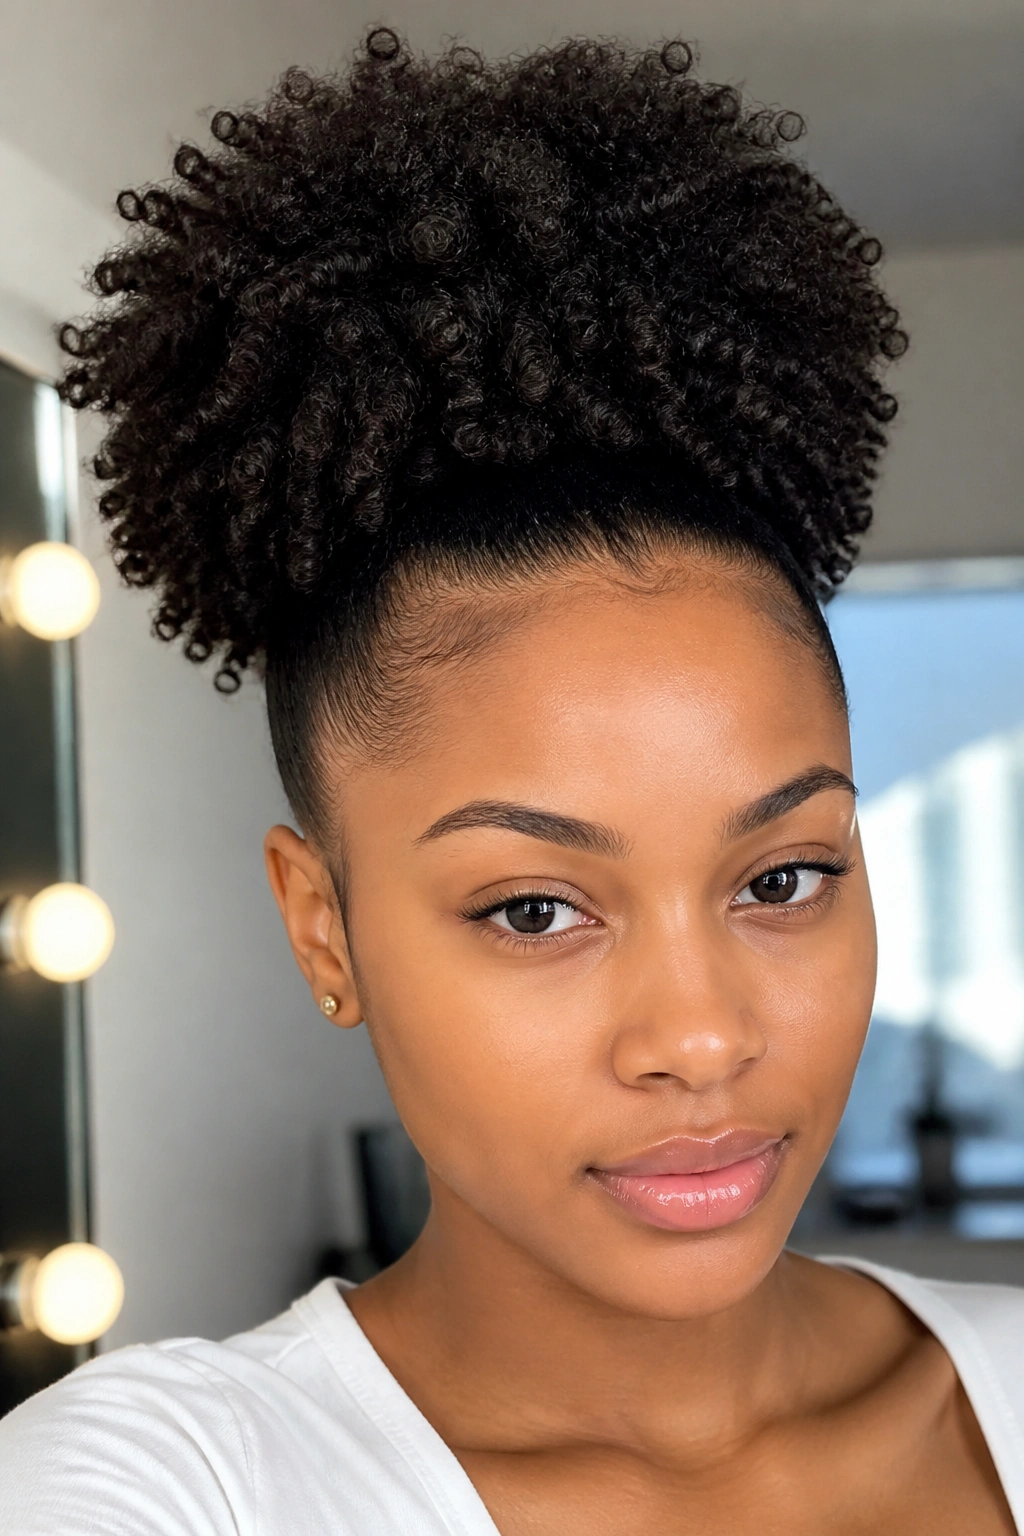
Third-day hair. A little flat at the roots, still decent through the ends, and no desire to spend forty minutes fixing it. That is high puff territory.
Pull the hair upward with a soft elastic or puff cuff, then let the curls fan out above the crown. The style works because it gives the top of the head height and keeps the sides off the neck. It also makes the face look open without asking the hair to do anything complicated.
A high puff looks best when the base is secure but not strangled. If the band leaves a dent that hurts, it’s too tight. If it slides down by lunchtime, it’s too loose. There is a middle ground, and that middle ground is worth finding.
- Stretch the roots lightly first if you want more lift.
- Smooth the edges only as much as needed.
- Keep a little fullness at the crown so it does not look flat from the front.
- Use a satin scrunchie if your hair breaks easily.
Small thing, big difference: place the puff where your head naturally curves, not where a photo looks best.
5. Low Puff at the Nape
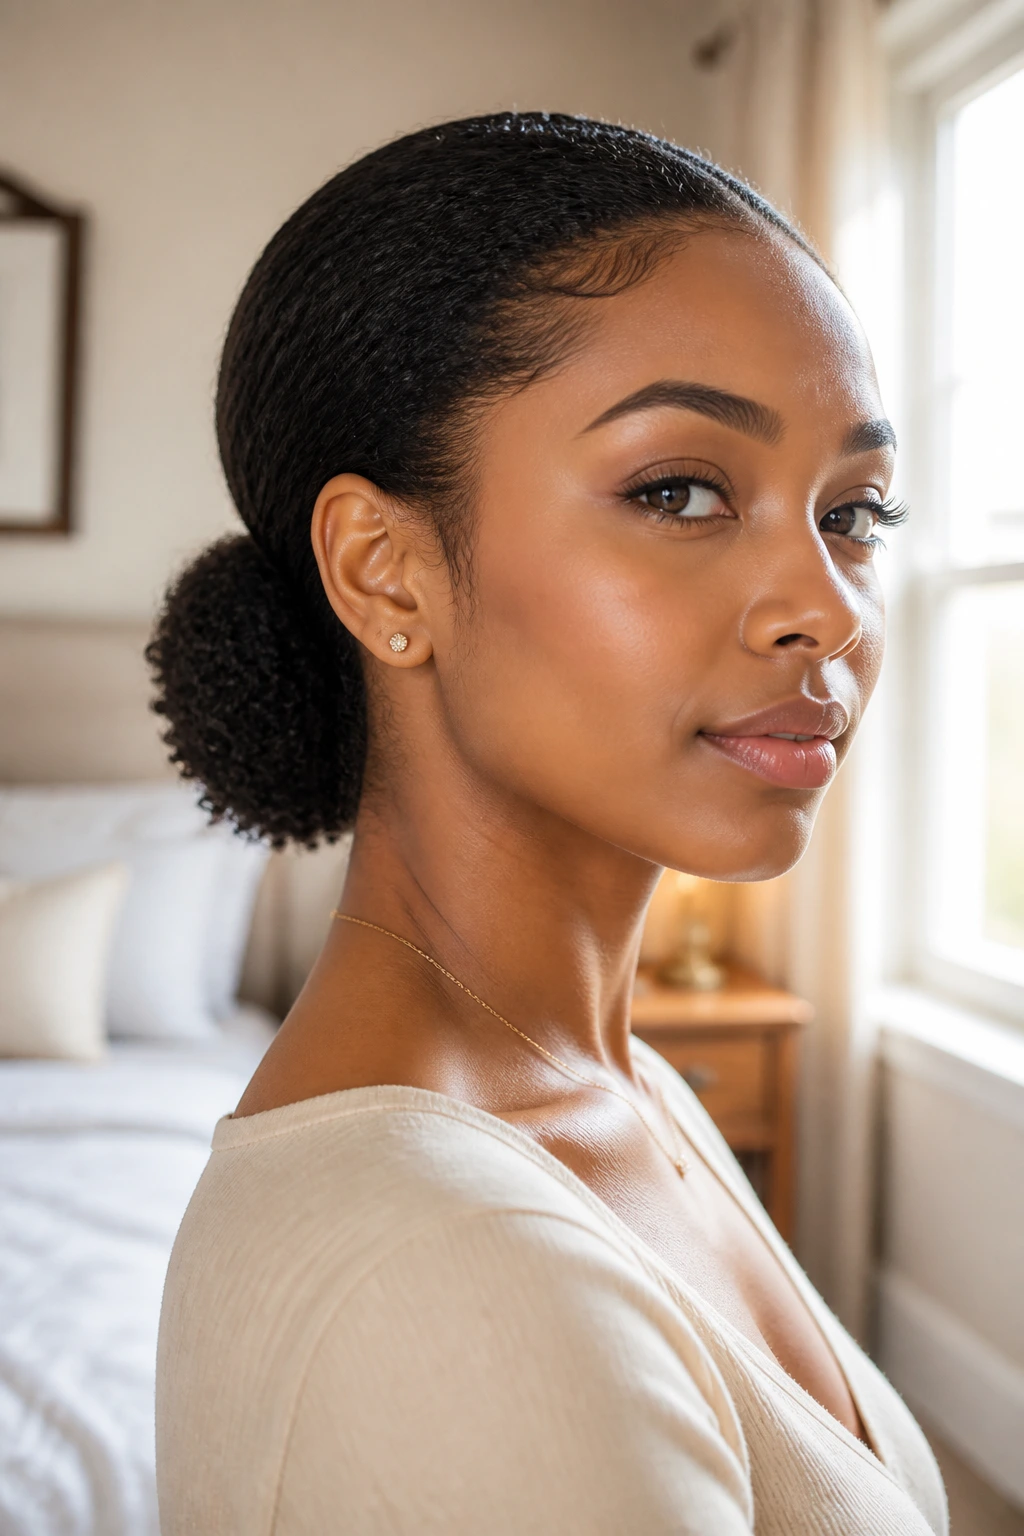
A low puff feels softer than a high puff, and that changes the whole mood of the style. Instead of pulling the hair upward, you gather it low at the back so the curls sit close to the nape and the crown stays calm.
I like this one when the hair has some volume but not enough patience for a full updo. The shape is gentle. The profile is tidy. And if you leave a little texture around the hairline, it still looks like hair, not a sculpture.
What makes it work is restraint. You do not need to slick the hair until it shines like glass. You just need the front and sides to sit neatly while the puff keeps its softness. A satin scrunchie or wide elastic helps a lot here, because tiny bands can leave dents that stay visible all day.
This is one of those styles that looks more put together than the effort it takes. That is the appeal. It does its job and gets out of the way.
6. Classic Two-Strand Twists
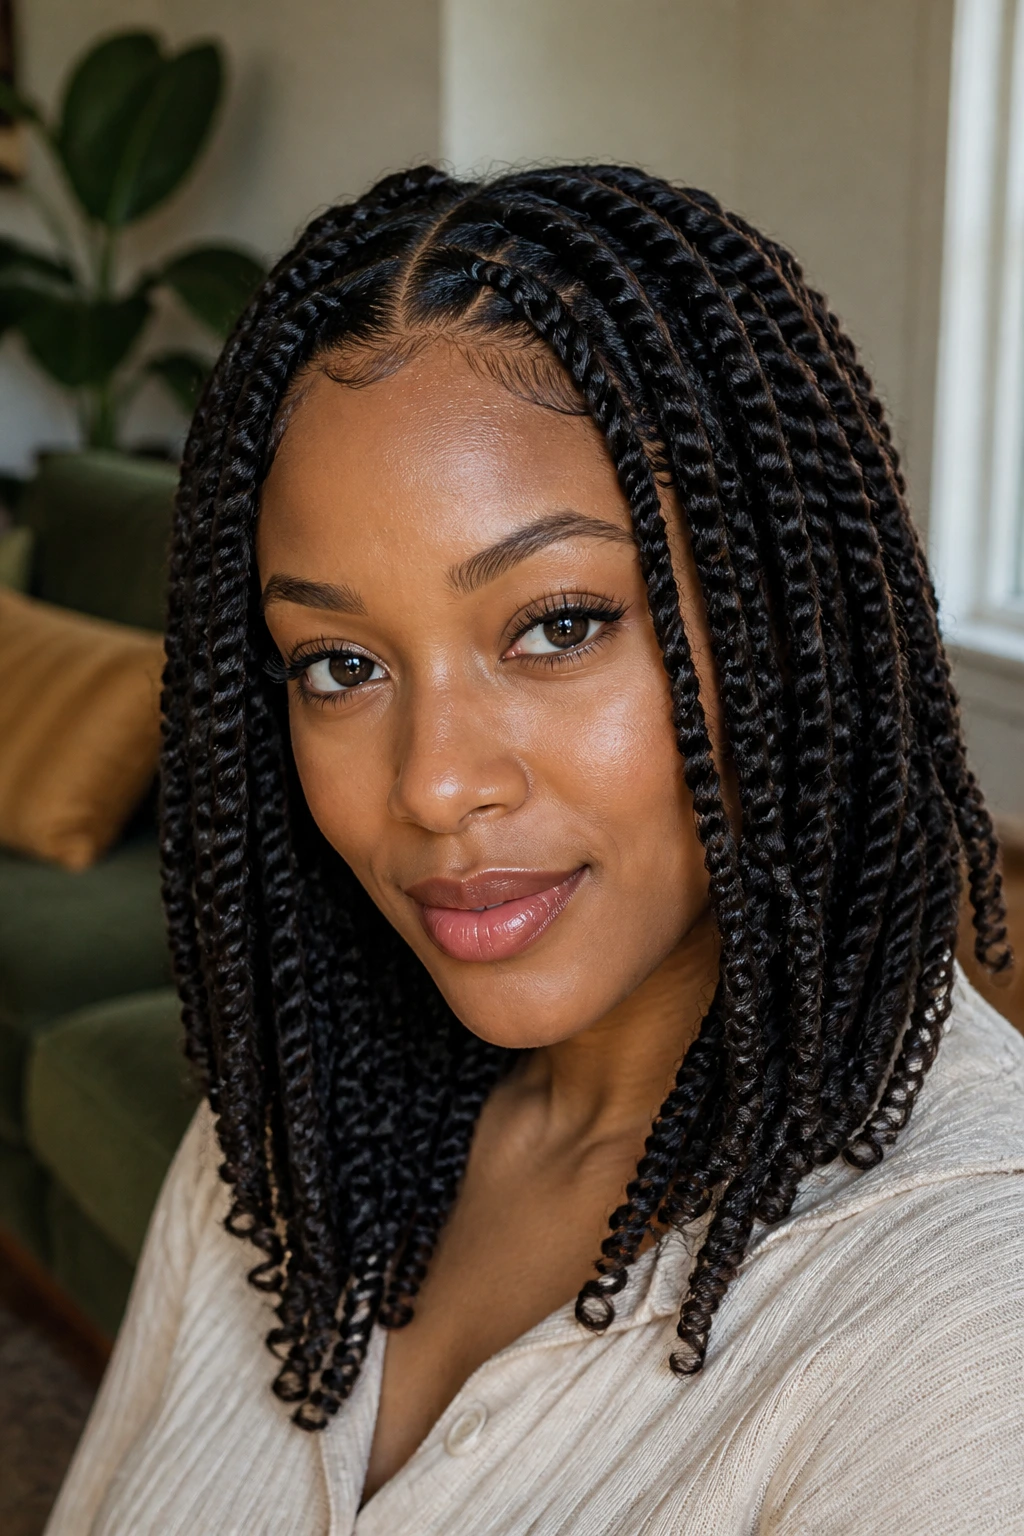
Compared with braids, two-strand twists are lighter and easier to take down. Compared with a loose wash-and-go, they last longer and give the hair more protection between styling days.
That balance is why I keep coming back to them. You can wear two-strand twists as a style on their own, or set them as the base for a later twist-out. Either way, they keep the hair stretched without making it feel trapped. That matters if your hair tangles fast or gets dry at the ends.
The size changes everything. Bigger twists read as casual and chunky. Smaller twists sit flatter and hold longer, but they take more time and more patience. Start on damp hair with a cream or leave-in that gives slip, then twist from root to tip so the ends stay sealed.
They’re a solid choice when you want something that looks neat without feeling stiff.
7. Long-Lasting Mini Twists
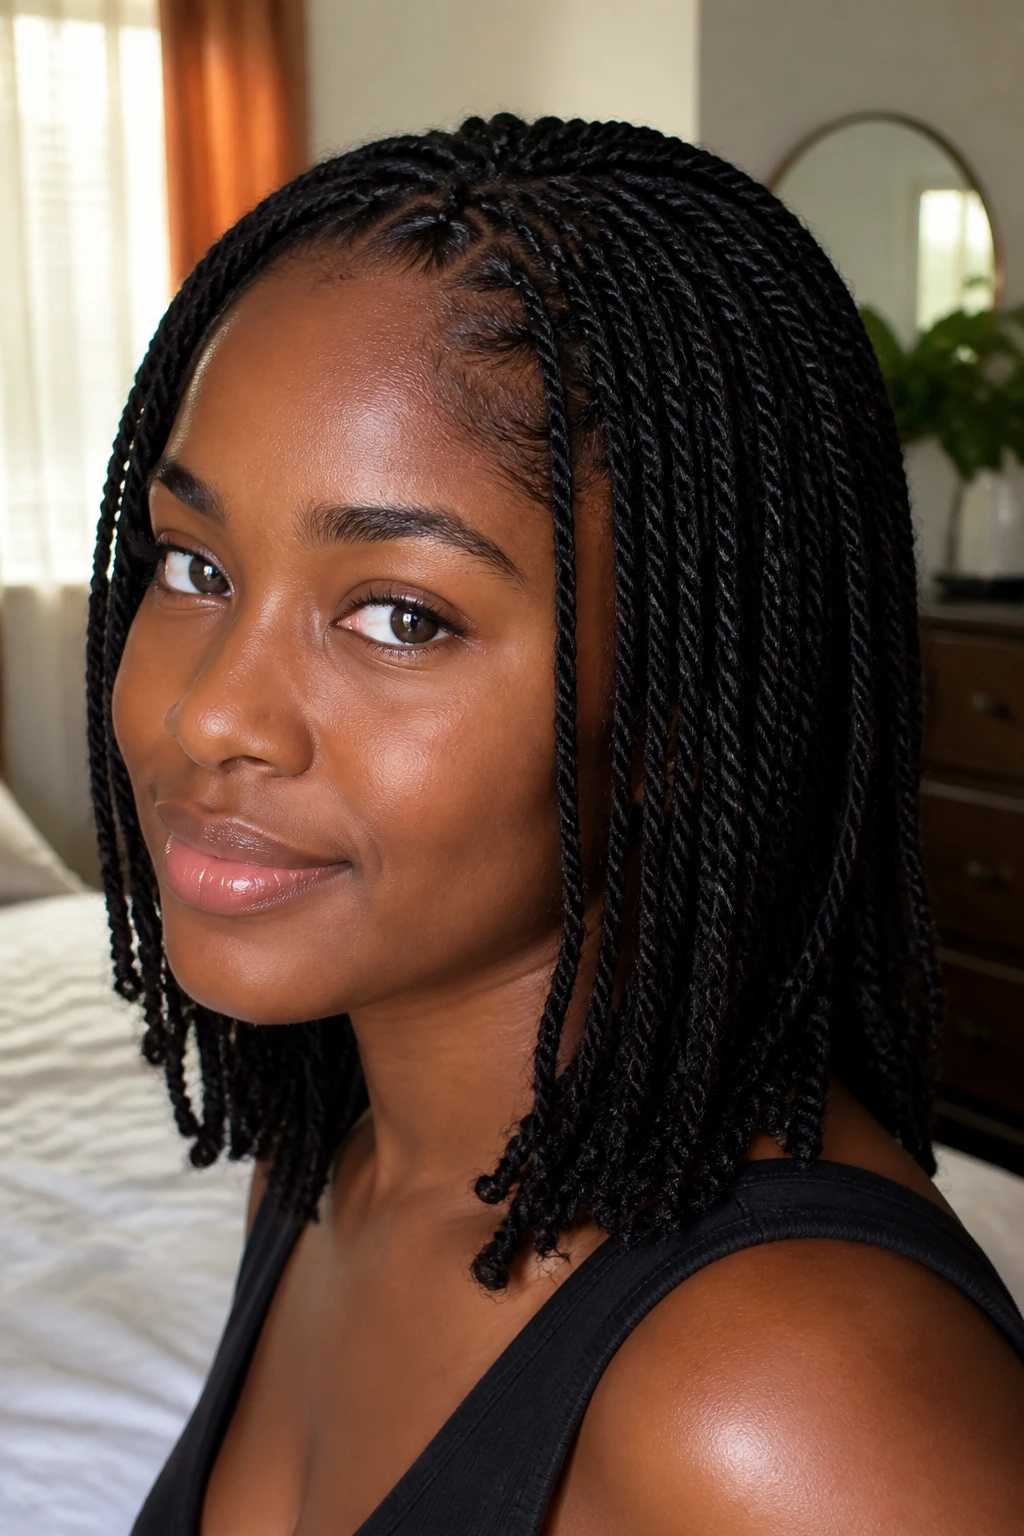
Mini twists are the style I recommend when someone wants low manipulation without giving up movement. They sit smaller than regular twists, which means they last longer and give the hair a more textured, fuller finish.
What Makes Mini Twists Worth the Time
They take time to install. No way around it. But once they’re in, they behave well. The hair stays tucked, the ends stay tucked, and you can refresh the roots without redoing the whole head.
The key is clean parting and consistent tension. If one section is tiny and the next is twice as wide, the style starts looking uneven before it even has a chance to settle. A rat-tail comb helps with neat parts, though finger-parted sections can look softer if you want less precision.
- Use small, even sections so the twists match in thickness.
- Start with damp hair and a light cream for slip.
- Keep the twist base snug, not tight.
- Sleep in a satin bonnet so the twists stay smooth.
Worth the extra time: mini twists give you more days between full restyling than bigger twists usually do.
8. Sleek Flat Twists
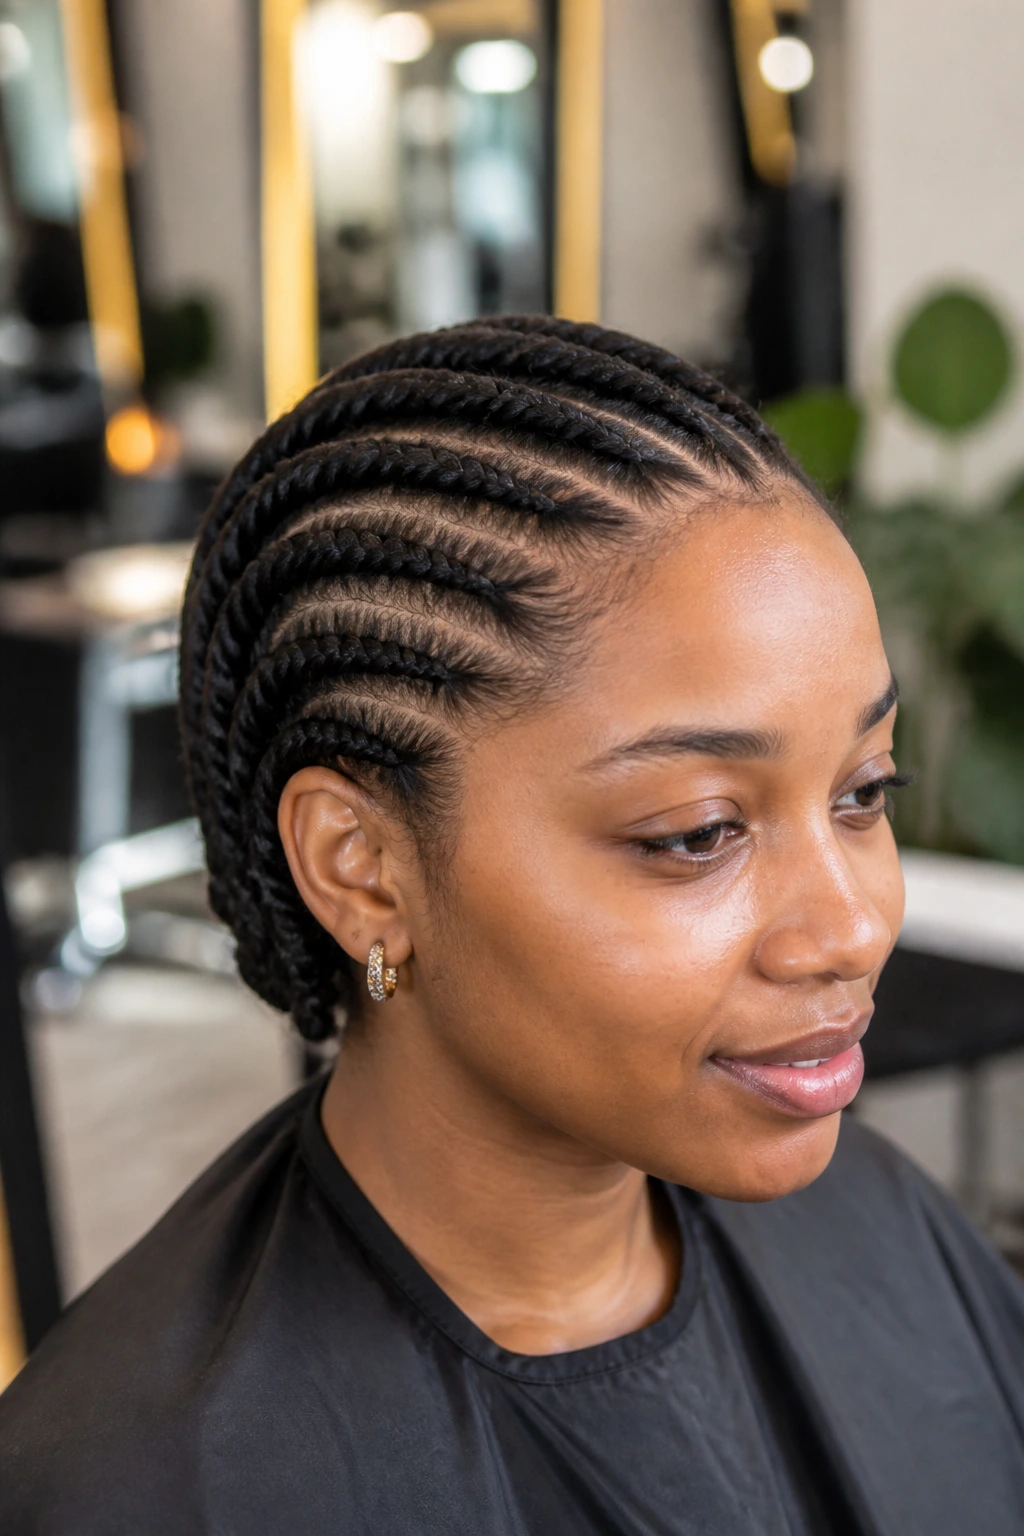
Flat twists are one of the cleanest ways to put natural hair away without pulling hard on the scalp. They lie close to the head, which gives the style a neat shape and makes it a smart option when you want less bulk.
They also work well when the roots need stretching. A flat twist pulls the hair down the head in a controlled way, so the set comes out smoother than loose twisting alone. That is part of why people use them as a base for other styles too, though they hold their own just fine.
Use a light cream or setting foam, then part the hair into even sections and twist them flat against the scalp. If the parts wander, the style loses its sharp lines. If the tension gets too high, the scalp starts to complain. Neither is useful.
You want the twist to hug the head, not clamp it. That difference shows up fast.
9. Flat-Twist Crown
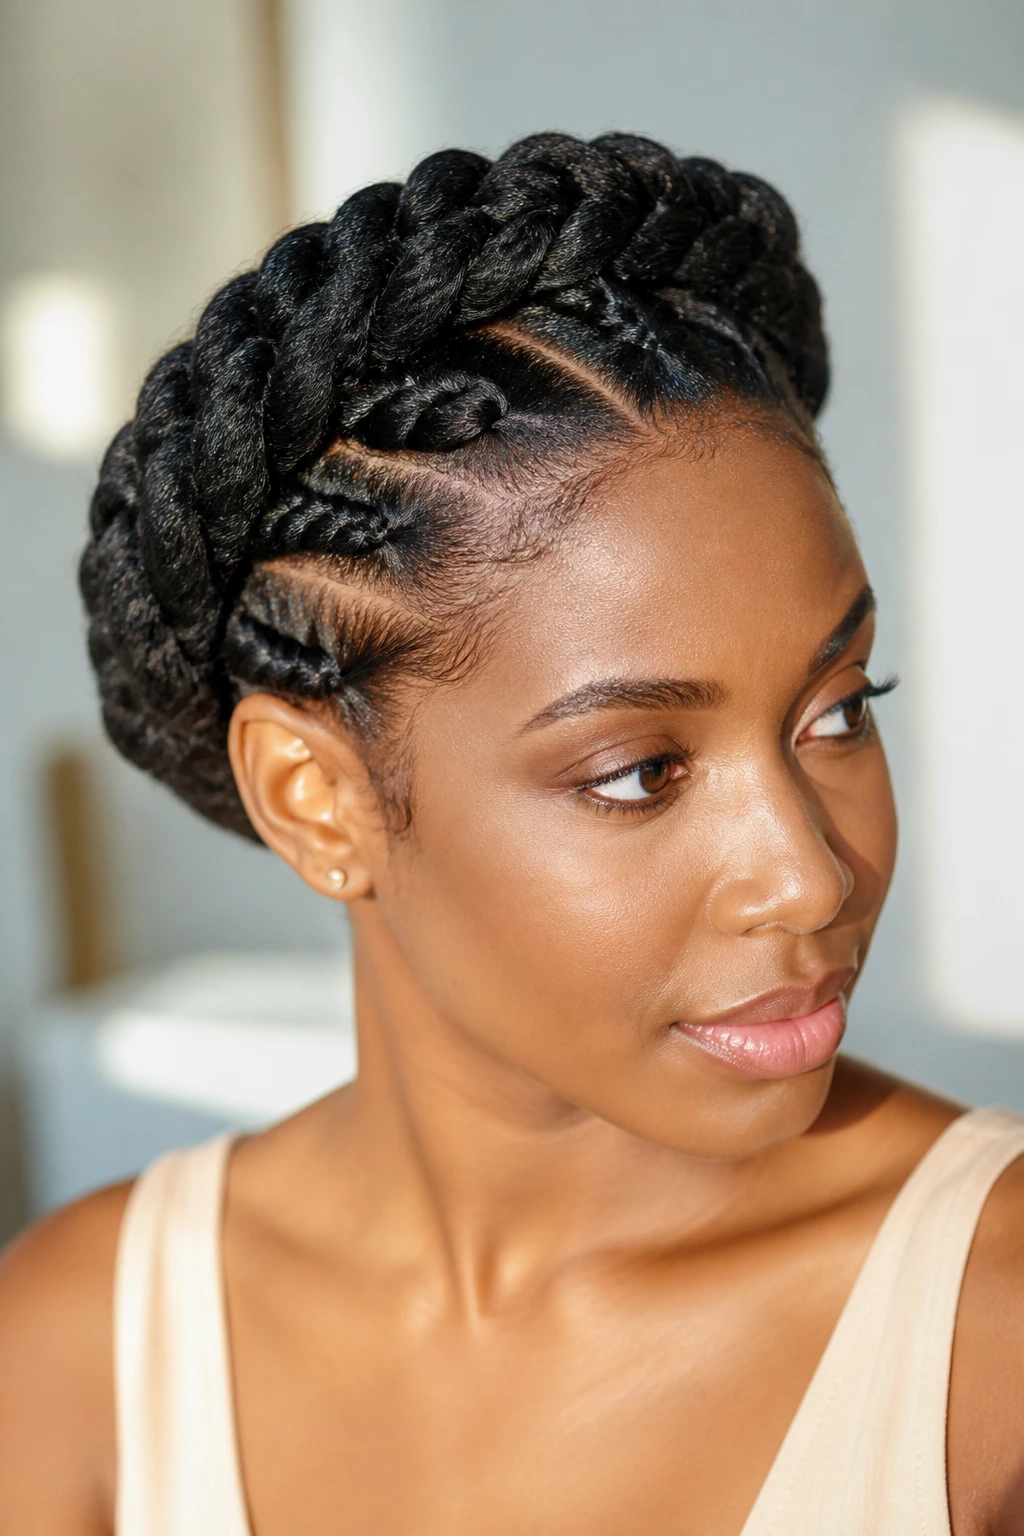
Why does a crown of flat twists look finished even when it only takes a few sections? Because the shape does the decorating for you. The hair wraps around the head in a circle, so the eye reads it as intentional immediately.
This style is useful for medium-length natural hair that can be tucked into the crown without too much struggle. It keeps the ends protected, keeps the front neat, and leaves the face open in a way that feels calm rather than severe. If you have a busy week and want one style to carry you through a few days, this is a good candidate.
How to Use It
Start with a side part or center part, then build the flat twists around the perimeter of the head. Pin the ends into the crown where they disappear into the braid line. A few discreet pins hold better than one stubborn pin at the wrong angle.
This style does not need much decoration. A clean line is enough.
10. Bantu Knots
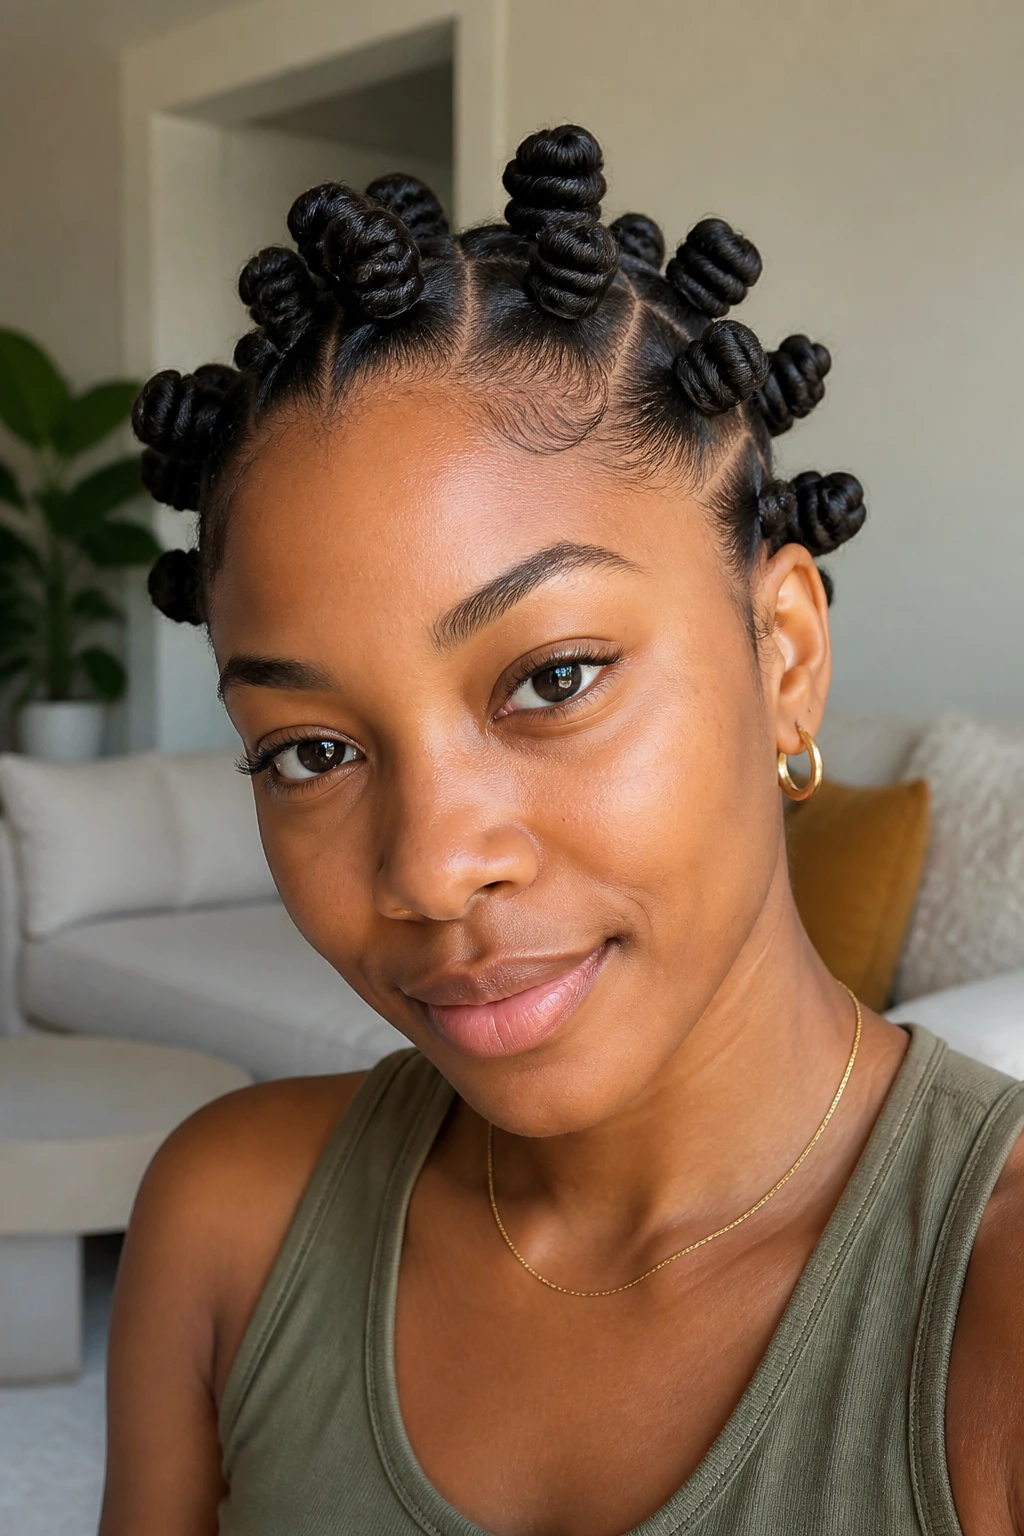
If you like a style that looks sculpted and gives you a second look when you take it down, Bantu knots are hard to beat. The hair is sectioned, twisted, then wrapped into small knots that sit close to the scalp like little coiled buns.
The shape matters. Tighter sections give smaller knots and a more precise finish. Bigger sections make rounder knots with a softer look. Both work, but they feel different on the head. Smaller knots usually last longer. Larger ones are easier to install.
- Section the hair evenly so the knots sit at the same height.
- Twist each section until it starts to coil on itself.
- Wrap the twist around the base and tuck the ends under.
- Secure with a pin only if the hair slips easily.
Wear them as knots for a bold look, or take them down later for a knot-out. Either way, they’re memorable without needing extensions or heat.
11. Bantu Knot-Out
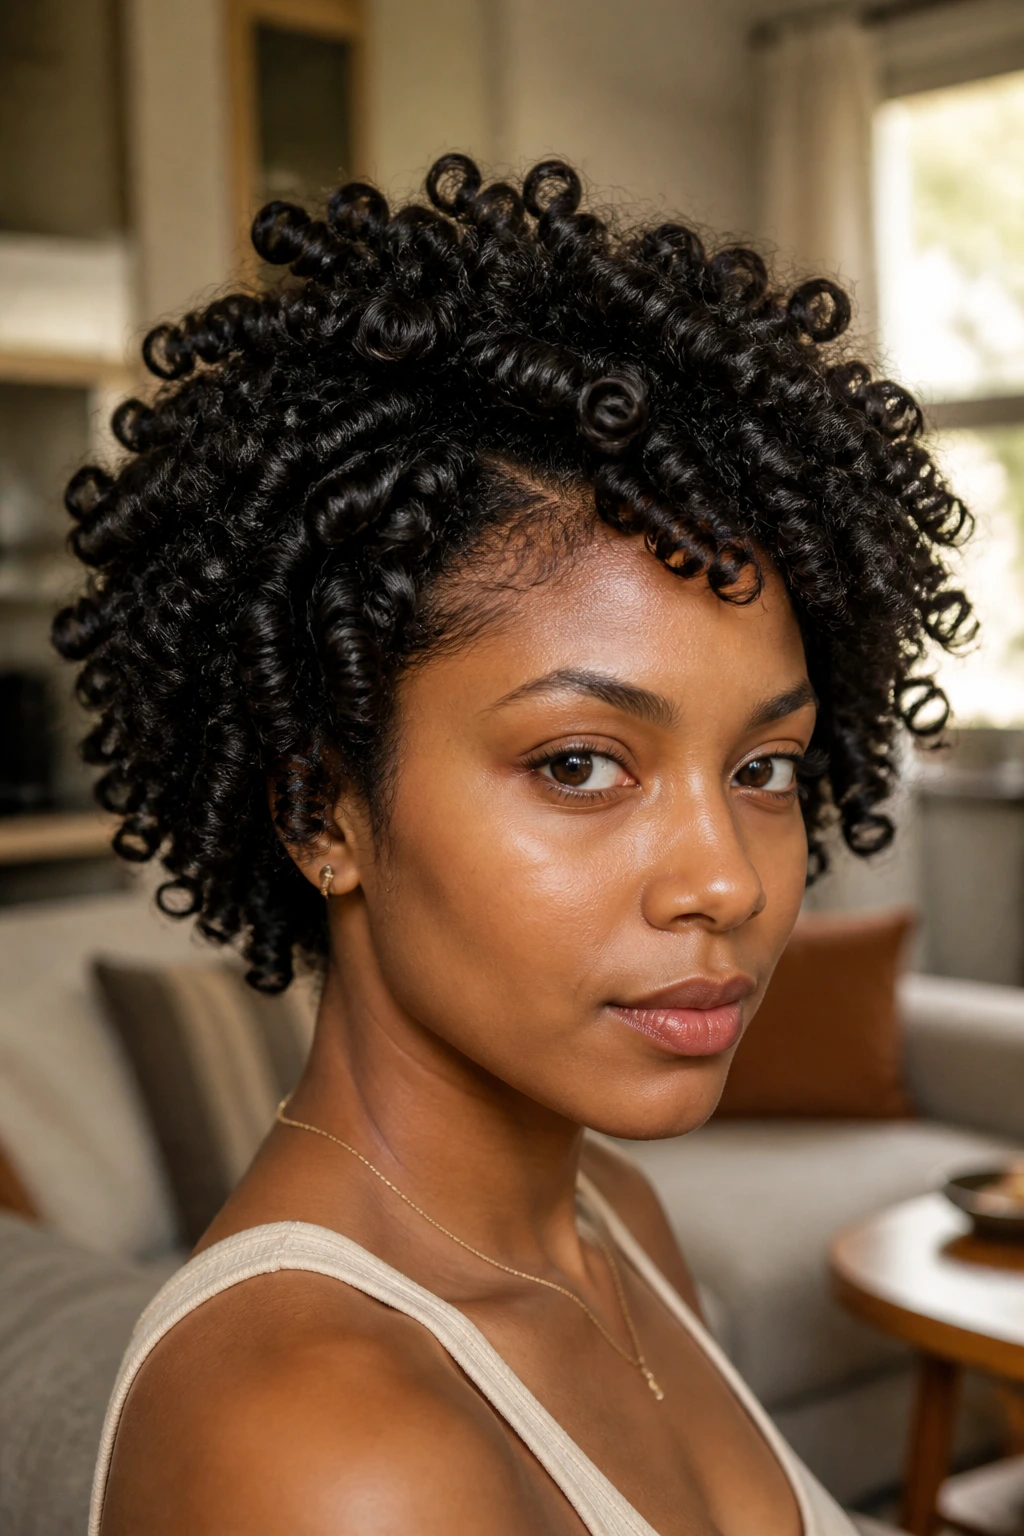
A Bantu knot-out gives you curl definition with a little more spring than a twist-out. The curl pattern tends to be tighter, rounder, and a bit more bouncy because the hair set in a coiled shape instead of a flat twist.
The most important part is dry time. If the knots still hold cool moisture inside, the definition falls apart the second you separate them. That is why many people rush this style and then blame the knots when the real issue was drying. Leave them alone until they feel light and dry all the way through.
When you take them down, use a tiny bit of oil on your fingertips. Unwrap, do not yank. Then separate only as much as the shape needs. If you keep breaking the curls into smaller pieces, the style gets wider, but it can also turn fuzzy fast.
I like this one when the hair needs shape and height at the same time. It has a little drama. In a good way.
12. Finger Coils
Finger coils make the curl pattern look crisp from root to end, and that is the reason people either love them or avoid them. They take time. They ask for patience. They reward both.
Compared with a twist-out, finger coils usually look more uniform. Compared with rod sets, they sit closer to the natural curl and feel less rigid once they dry. That makes them a smart choice for short natural hair, tapered cuts, or anyone who wants defined strands instead of a fluffy shape.
The Science Behind It
Each small section is coated with product, then wrapped around the finger until it springs into a tight spiral. The coil sets best when the section size stays consistent. If one coil is tiny and the next is wide, the finish will look uneven.
Once dry, the coils can be worn as they are or separated gently for more fullness. Do not pull at them too early. They need time to lock in.
This is a detail-heavy style, but the payoff is worth it when you want precision.
13. Curly Frohawk
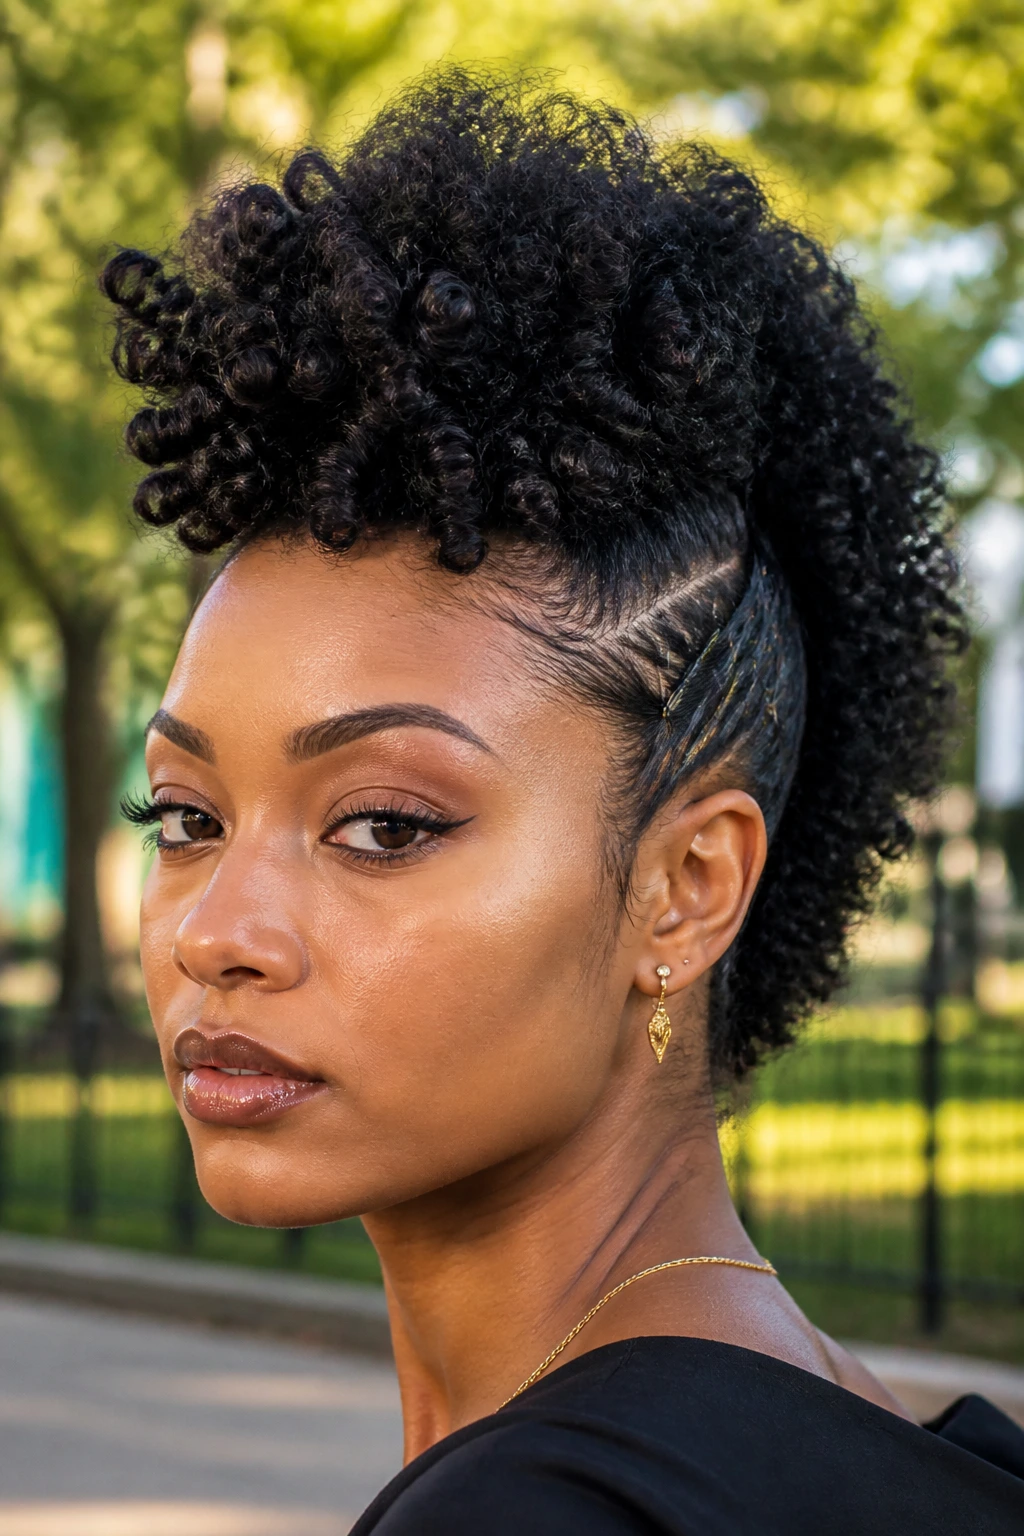
A frohawk keeps volume where you want it and clears the sides, which is why it feels bold without being complicated. The center section holds the shape, and the sides get braided, pinned, or slicked back so the middle can do the talking.
That makes it a good match for natural hair that already has a strong texture. You don’t need to flatten the whole head. You just need to direct it. A little gel at the sides, a few pins, and a pick at the center are often enough to build the shape.
- Use two or three center sections if you want a fuller ridge.
- Keep the side tension gentle so the hairline stays comfortable.
- Fluff the middle upward, not outward.
- Finish with a scarf for ten minutes if you want cleaner edges.
My rule here: if the sides hurt, the style is too tight.
14. Side-Part Afro
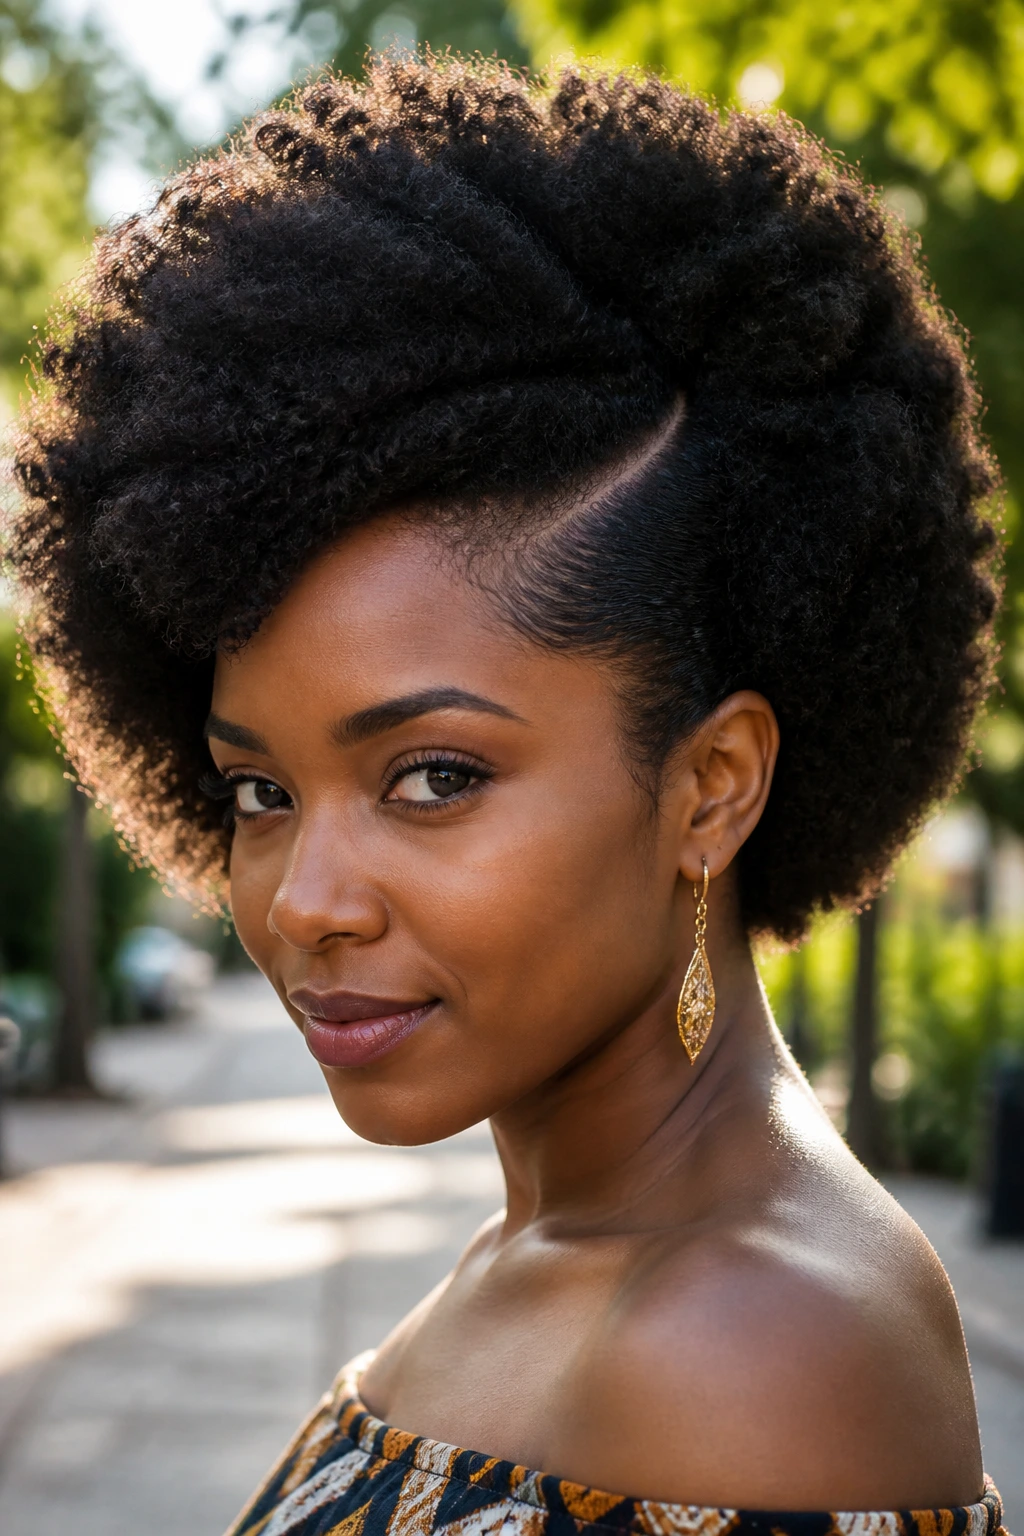
A side-part afro does more with less than people expect. One simple part changes the whole silhouette, especially on hair that already has decent density and shape.
The part gives the eye a place to start. That sounds small, but it matters. A centered cloud of hair can look massive in a flat way, while a side part creates direction. It also lets one side fall a little softer around the face, which can be flattering if you want less height in the middle.
You do not need to flatten the hair into submission. A little stretch at the roots and a wide-tooth comb or pick are enough. Build the shape from the roots upward, then use your hands to balance both sides. If one side feels too full, leave it. The natural asymmetry is part of the appeal.
This is one of those styles that looks casual and deliberate at the same time. Hard to fake, in the best way.
15. Rounded Shaped Afro
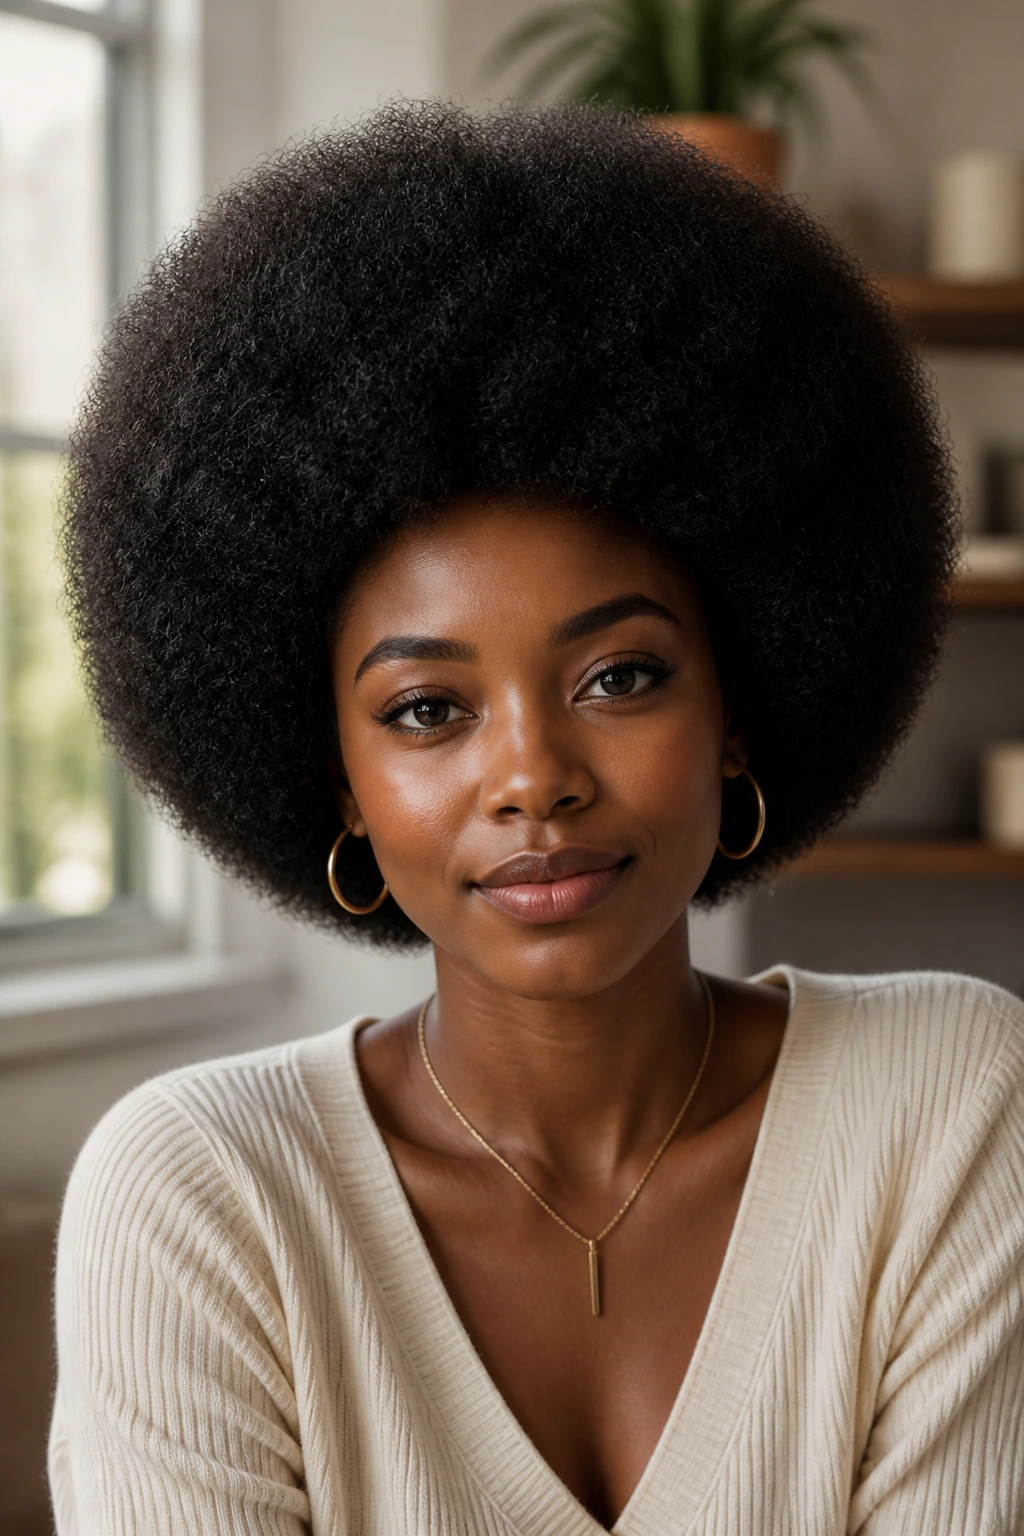
What makes a shaped afro look clean instead of random? The outline. Once the hair has a clear silhouette, the whole style starts to read as intentional.
A rounded afro works best when the cut or trim already supports the shape. If the ends are wildly uneven, the pick can only do so much. Start by stretching the hair a little, then pick from the roots outward so the body of the hair opens up without turning the ends frayed. You want width and balance, not a halo that sticks out in every direction.
How to Get the Most From It
Use a wide-tooth comb or afro pick on dry hair, not soaking wet hair. Wet hair stretches in ways that hide the real shape, and then it shrinks differently once it dries. A light moisturizer on the palms helps the surface look smoother.
This style is about form. Not stiffness. That distinction matters a lot.
16. Pineapple Updo
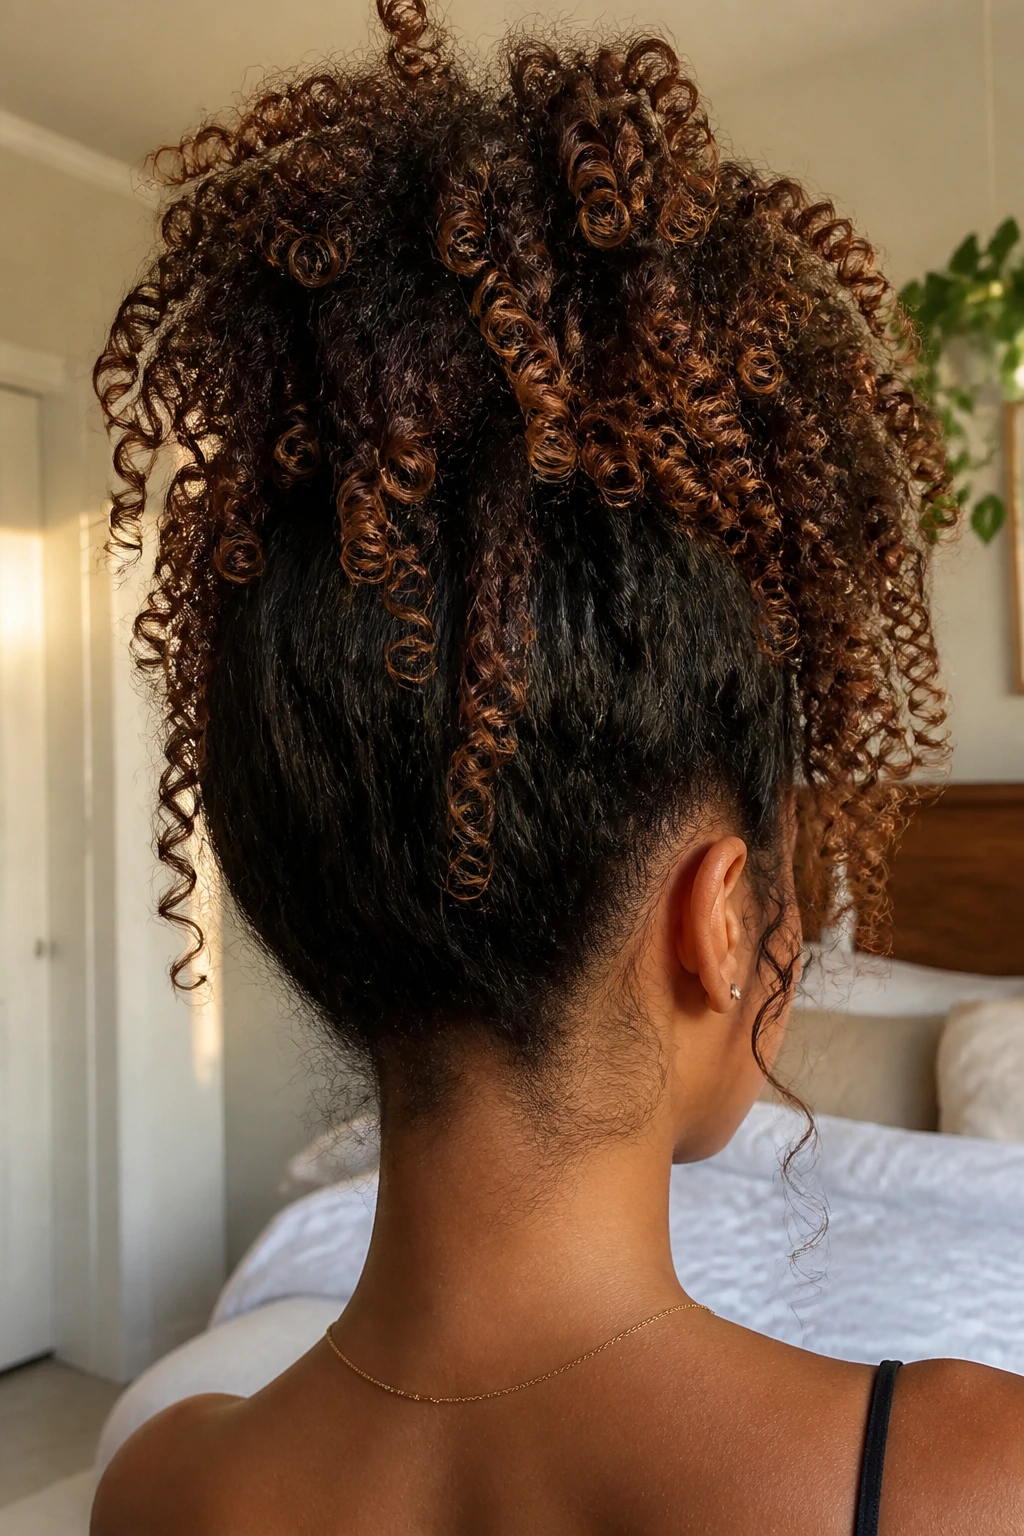
You know that moment when you wake up with flattened curls and a hair tie mark across the back? The pineapple style grew out of exactly that problem.
Pull the hair loosely to the top of the head so the curls fall forward and outward like a loose fountain. The point is to preserve the curl pattern, but the daytime version can look polished too. If the hair is long enough, the ends sit high and soft. If it’s shorter, the pineapple becomes more compact and playful.
- Use a loose satin scrunchie so the base does not dent the curls.
- Keep the tie high enough that the curls don’t press into the pillow or collar.
- Smooth only the front if you want a cleaner look.
- Fluff the crown with your fingers after removing the tie.
It is part styling, part rescue mission. Sometimes that is exactly what you need.
17. Double Space Buns
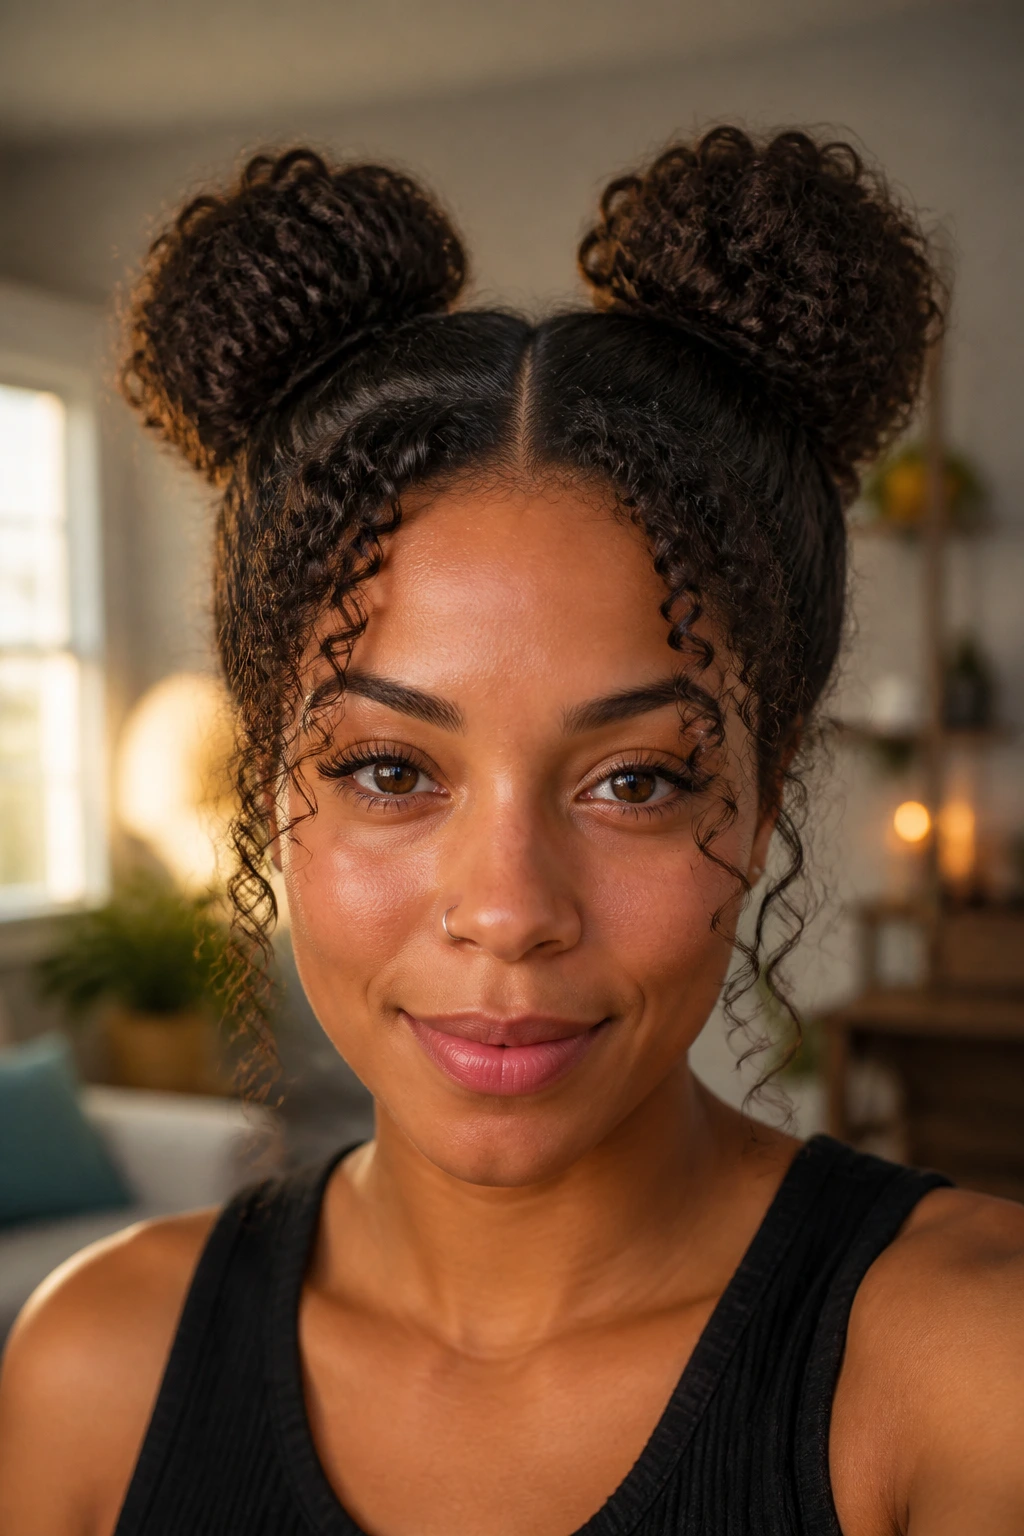
Double space buns have a little personality, and I mean that in a good way. They can look neat, playful, or street-casual depending on how tight you make the parts and how much texture you leave out around the face.
The style works well on medium-length natural hair because it lets you gather two separate sections without forcing the whole head into one lump. That means less tension in one spot and more shape overall. If your hair is thick, the buns can sit high and fluffy. If it is finer, smaller buns look better and stay balanced.
I like a center part for symmetry, but a slightly off-center part can soften the look. Leave the ends tucked or let a few coils escape. Either way works.
Not every style has to be serious. This one knows that.
18. Side-Part Low Bun
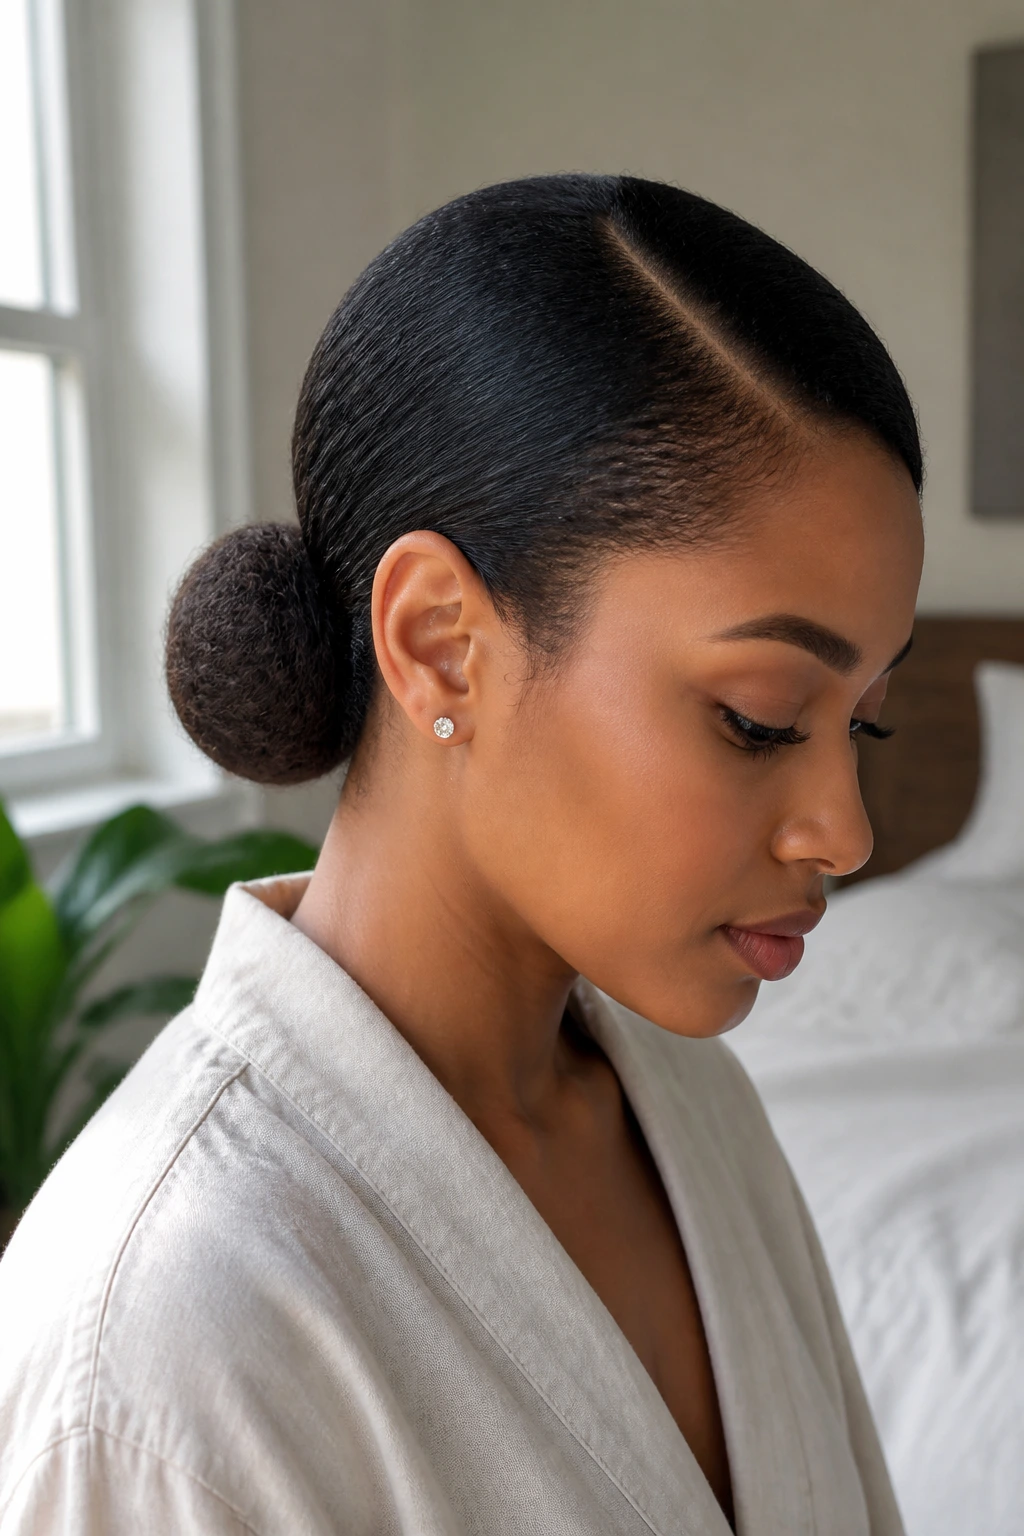
Compared with a high puff or top knot, a side-part low bun stays closer to the head and keeps the shape quiet. That makes it useful when you want your hair neat without pulling it into a slick, hard finish.
The side part gives the bun some direction, and the low placement keeps the style comfortable for longer wear. If the hair is medium length or stretched, you can tuck the ends into a compact bun at the nape. If the hair is shorter, use pins to shape it instead of forcing it into a tiny elastic knot.
A little cream on the front sections helps the bun sit smoother, but don’t overdo it. Too much product turns the hair greasy before the day is over. I’d rather see a soft edge and a tidy bun than a stiff helmet of hair.
This is the style I’d reach for when the day asks for calm.
19. Straight-Back Cornrows
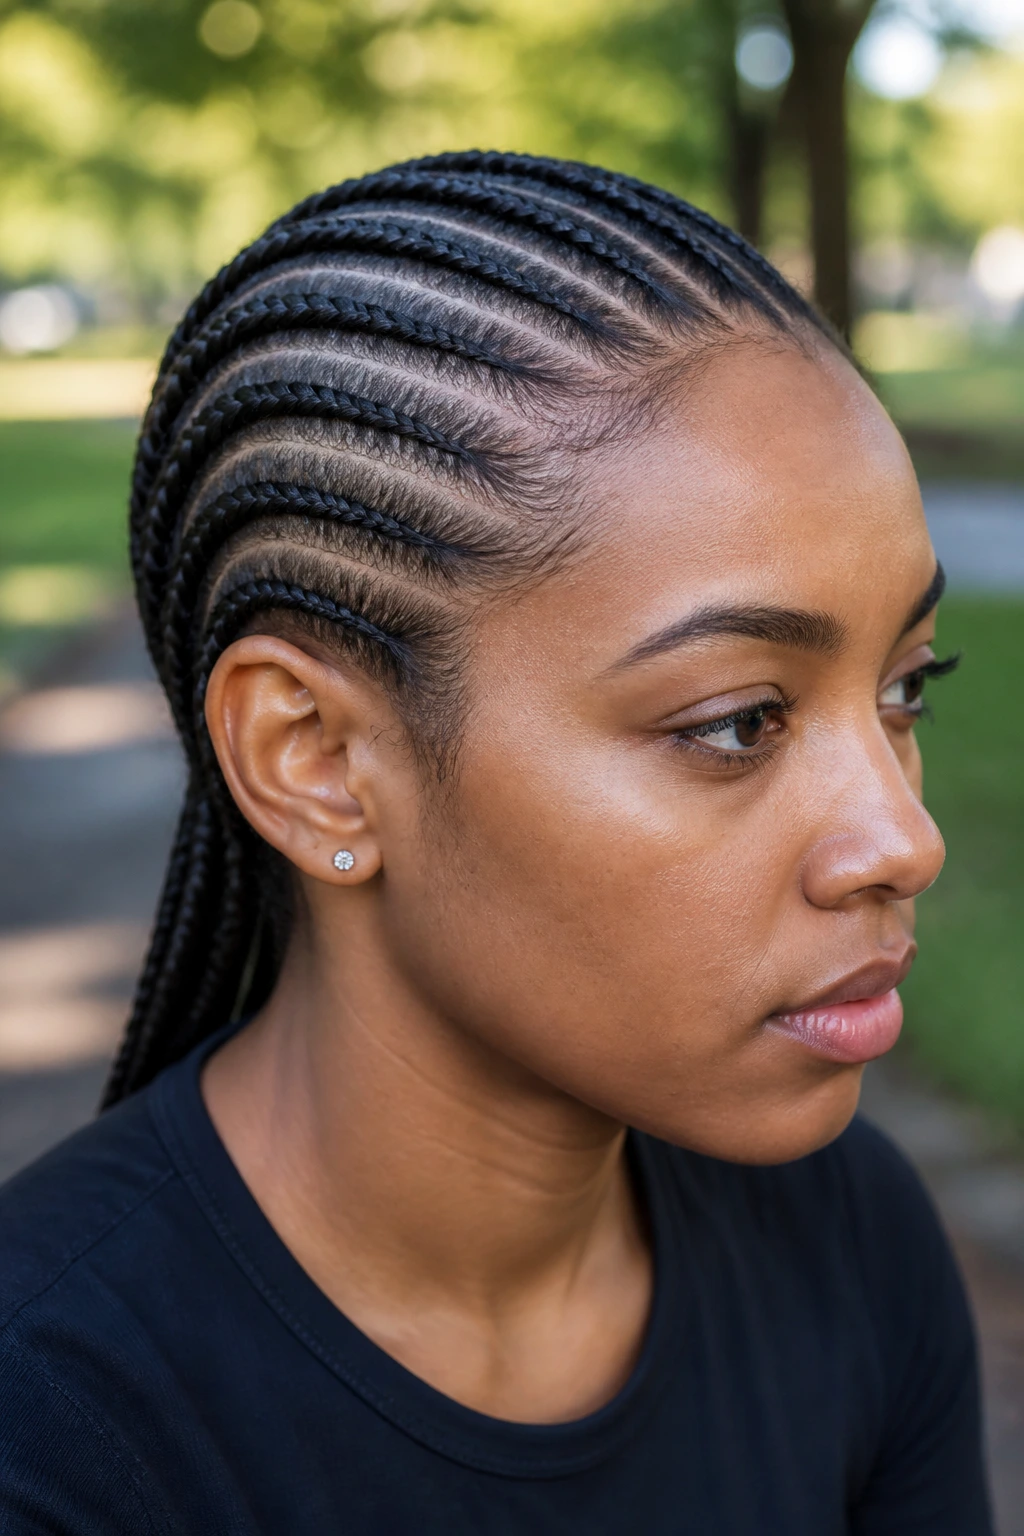
Straight-back cornrows are a classic for a reason. They hold the hair close to the scalp, give the ends a break, and create a clean pattern that looks good on nearly every density level when the spacing is right.
Why They Earn Their Spot in the Lineup
They’re practical first, pretty second — and that order is exactly why they work. The scalp stays accessible, the hair stays tucked, and the style can last a while with basic care. If the parts are neat, the whole head looks organized even before any accessories go on.
- Ask for medium-sized rows if your hair is thick and you want balance.
- Keep the braid tension even from front to back.
- Oil the scalp lightly if it tends to feel dry.
- Wrap the hair at night so the rows stay smooth.
Do not let anyone braid too tightly at the hairline. A clean braid should feel secure, not sharp.
20. Cornrow Bun
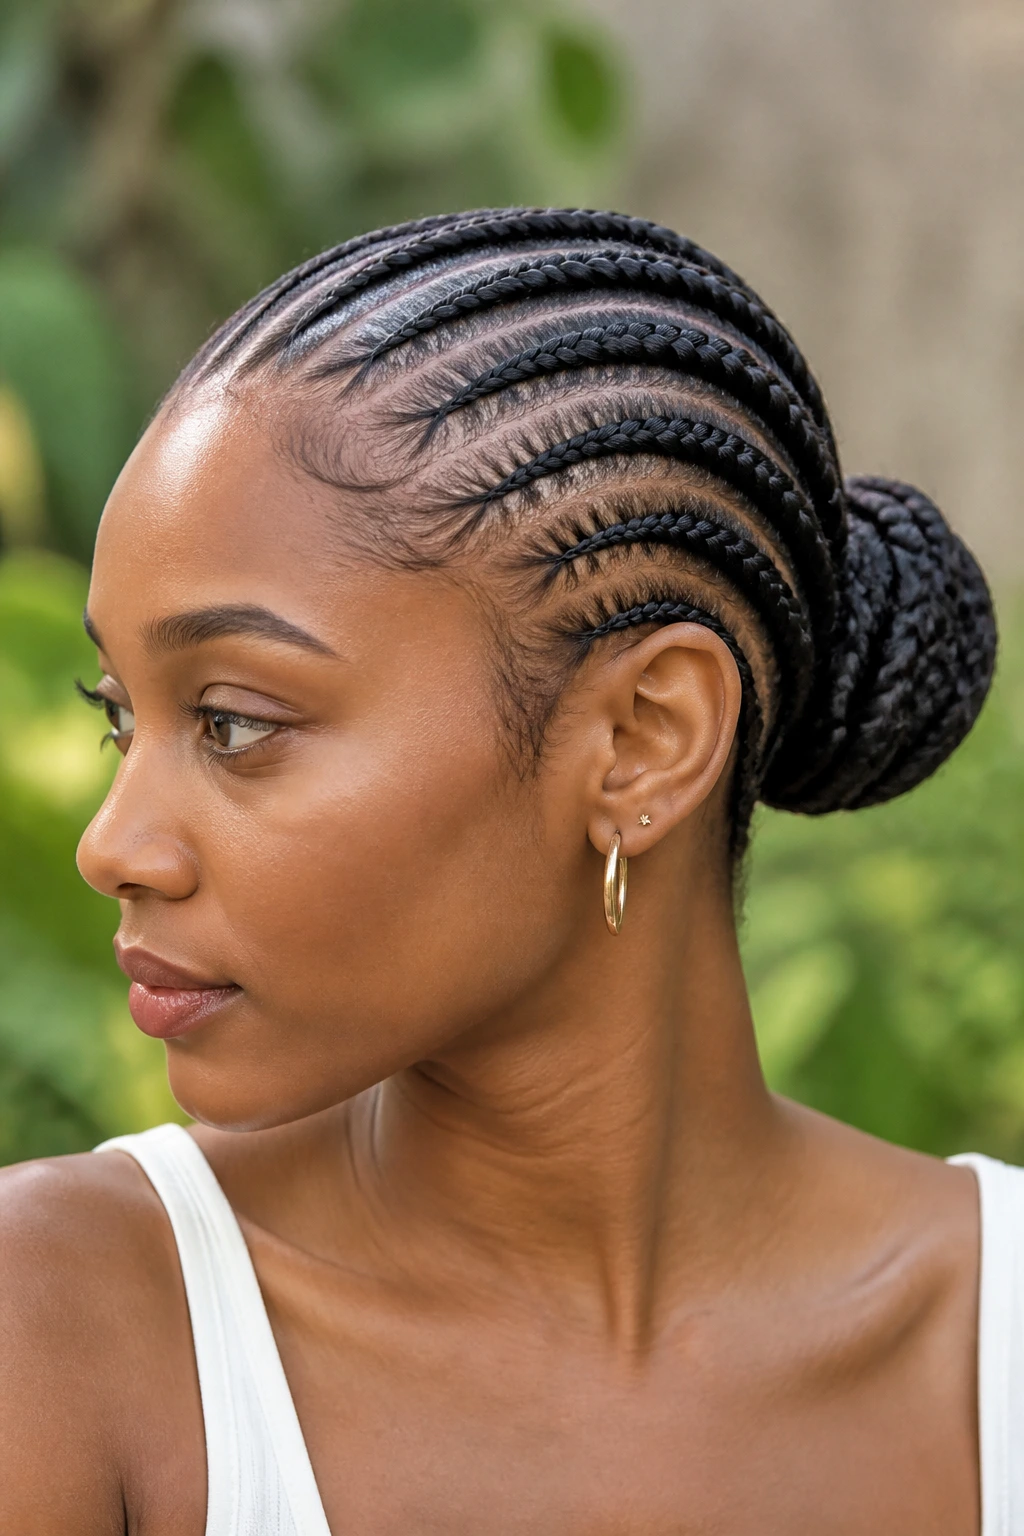
A cornrow bun solves two problems at once: it keeps the scalp flat and tucks the ends away. That makes it a strong option when you want the tidy look of braids with a little extra polish at the back.
The cornrows can feed into a low bun, a mid bun, or even a side bun if you want the silhouette to shift a little. The bun itself does not need to be huge. In fact, smaller buns often look better because they keep the style balanced against the rows. Once the braids are in, gather the remaining length and pin it so the bun feels secure but not bulky.
What I like here is how stable it feels. Nothing swings around. Nothing gets caught on collars. The style stays put while still looking finished.
A little scarf at night keeps the bun from frizzing at the base. Simple. Useful.
21. Tuck-and-Roll Updo
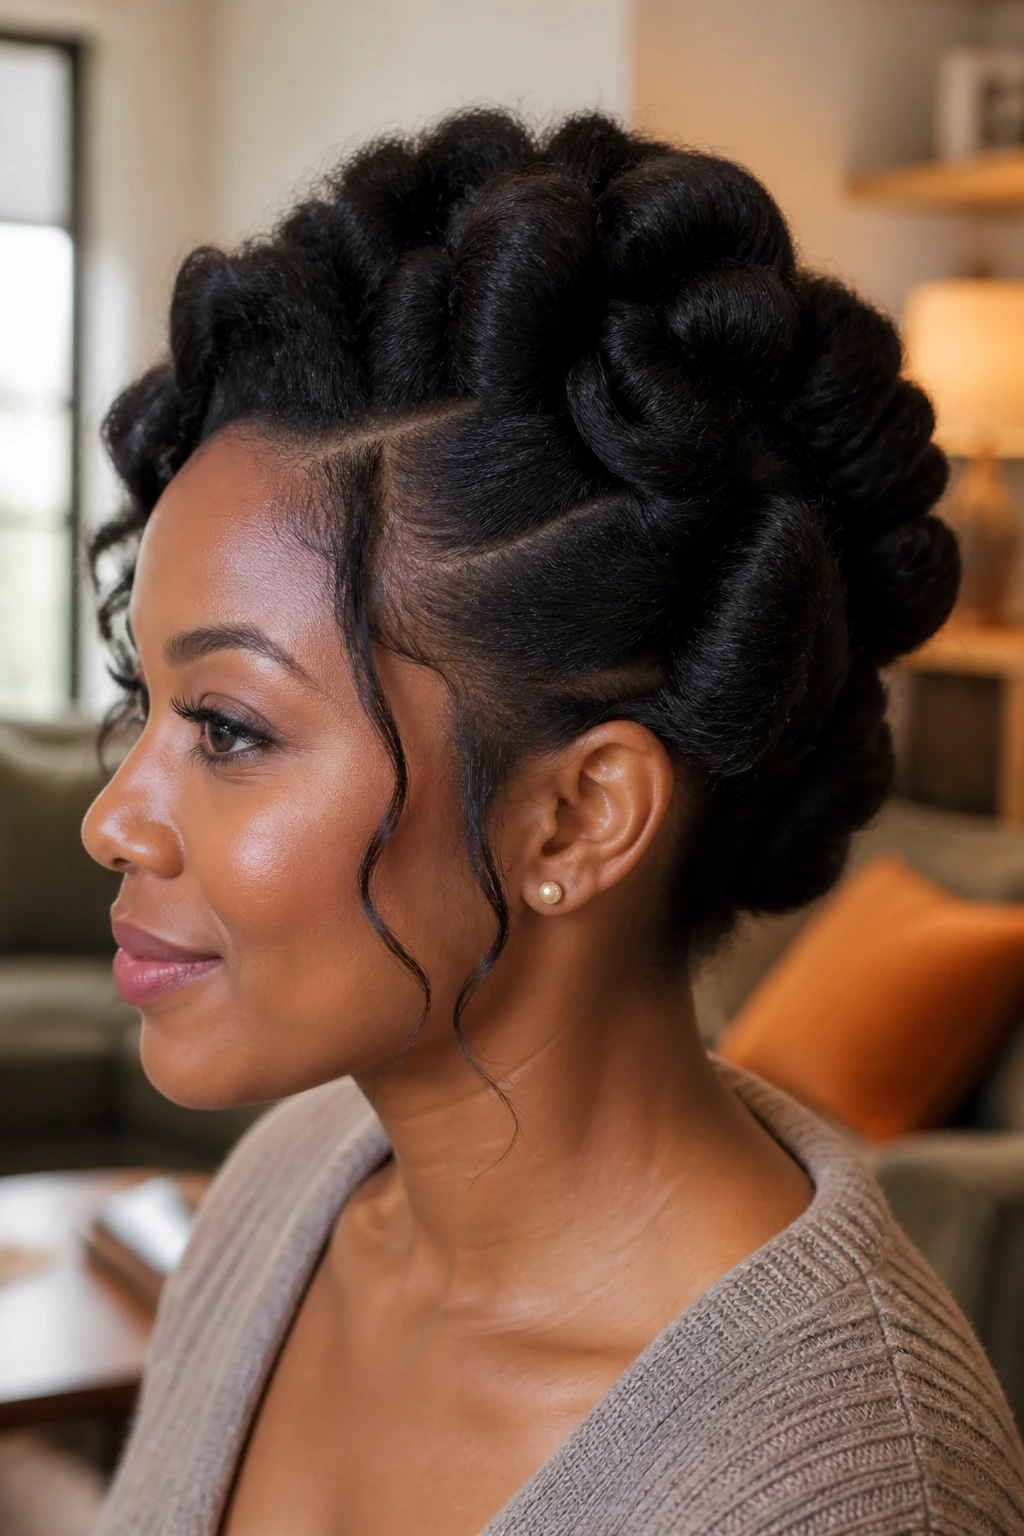
How do you make natural hair look pinned up without a dozen visible clips? You tuck and roll the sections into each other until the ends disappear.
This style works especially well on medium-length hair that has some stretch. You roll one section upward, tuck the end under the fold, then move to the next section and repeat. The shape can look soft and formal at the same time, which is rare enough to be useful. If the hair is dense, you may need six to ten pins. If it is finer, fewer pins and a tighter roll usually hold better.
How to Style It
Start with slightly stretched hair so the rolls sit flatter. Then part the hair into vertical or horizontal sections depending on the shape you want. Pin at angles, not straight down. That grip tends to hold better.
This one rewards patience, but it is worth learning. Once you get the hand motion, the style goes faster than it looks.
22. Headwrap Style with Curly Front Pieces
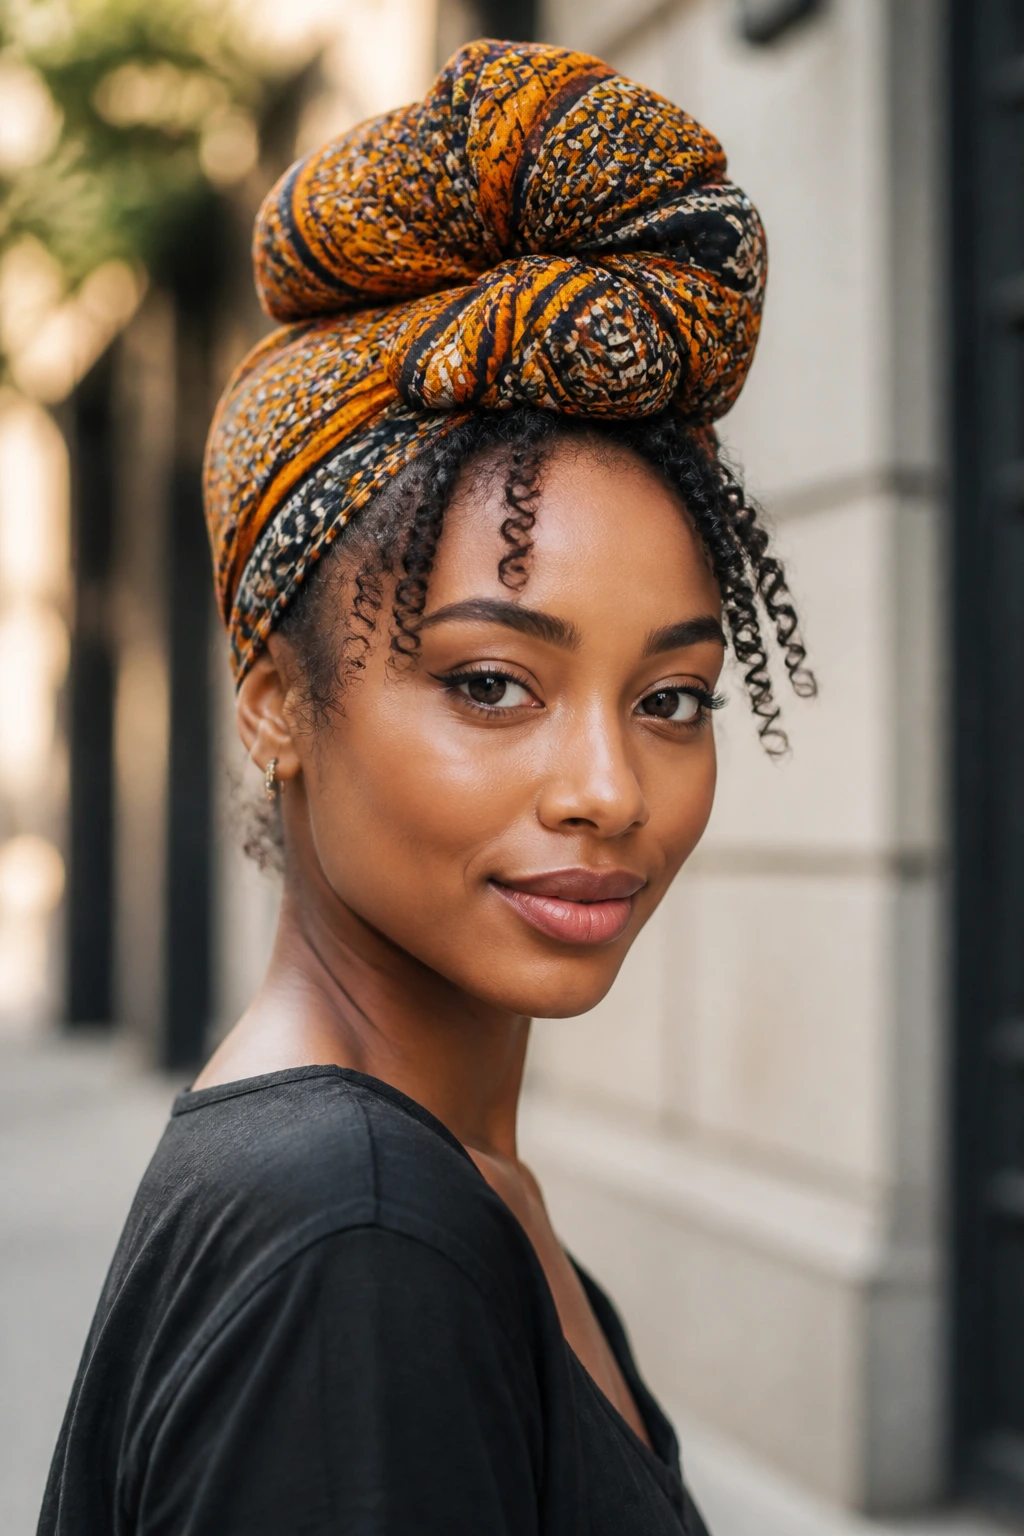
Some days the hairline wants a break. On those days, a headwrap style with curly front pieces feels like mercy and style at the same time.
Wrap the scarf or fabric around the head so it sits just behind the hairline, then leave a small section of curls, coils, or bangs out in front. That little bit of texture keeps the style from looking like a full cover-up. It also gives the face some softness, which matters more than people think.
- Choose a scarf that has enough width to stay in place.
- Tie it where the knot won’t press into your forehead all day.
- Leave the front pieces defined, not half-combed.
- Match the wrap to the outfit if you want the style to feel intentional.
This is not a backup plan. It can be the main look. And sometimes that is the smarter choice.
23. Flexi Rod Set
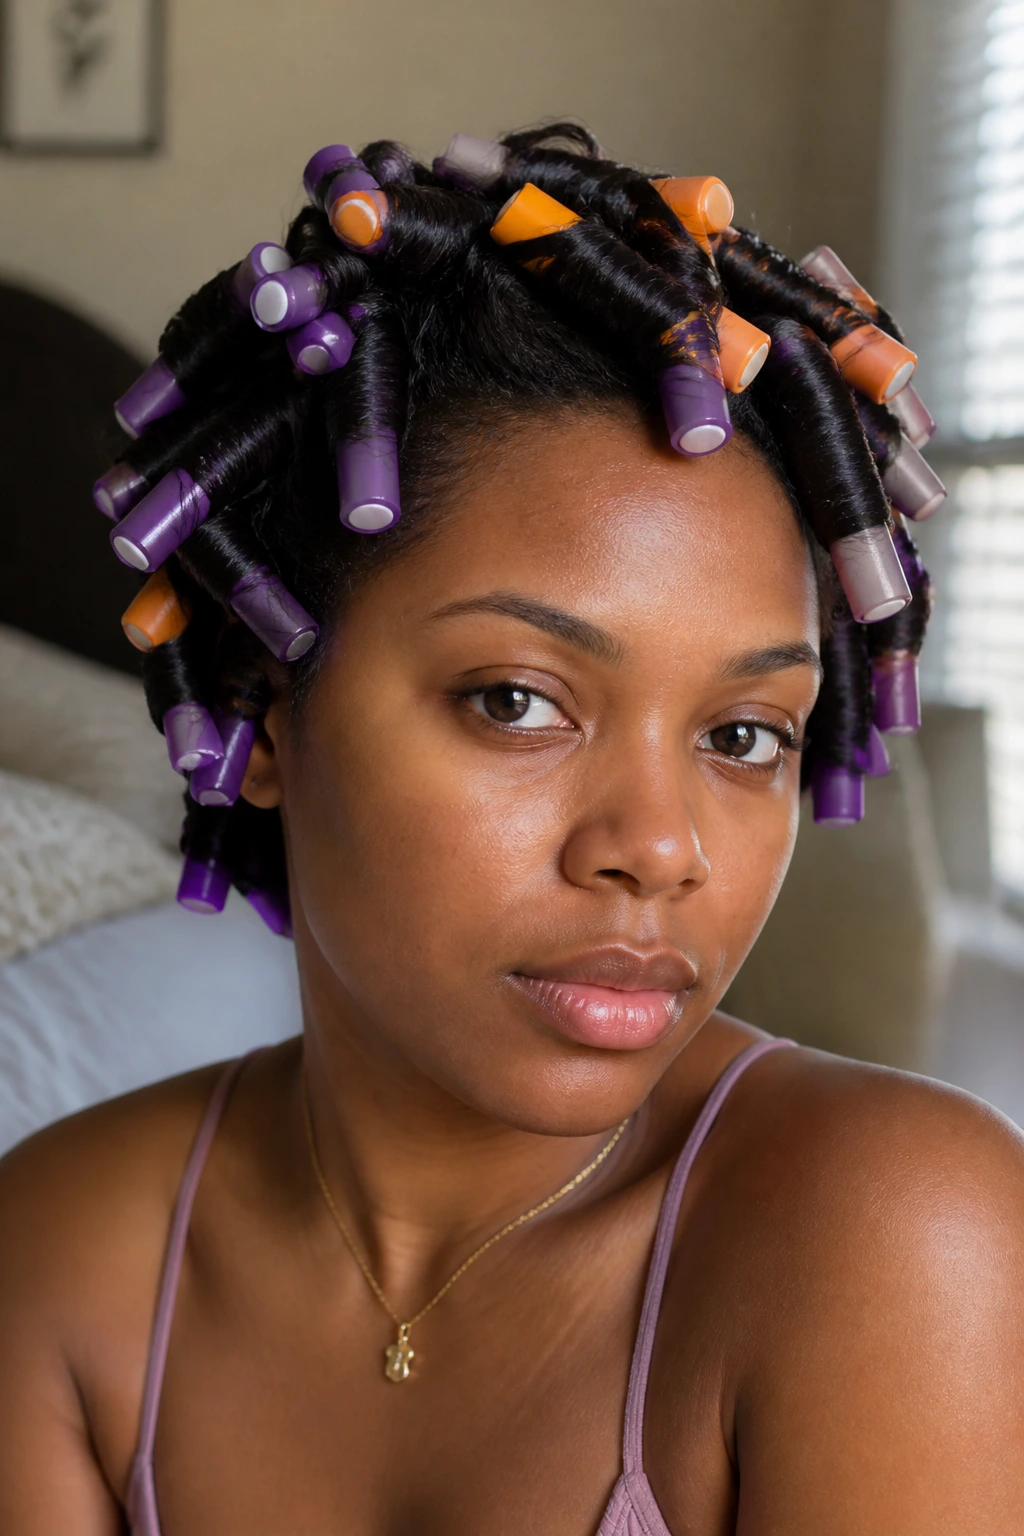
A flexi rod set gives you curls that look shaped, springy, and a little more uniform than a freehand twist-out. The rods bend, so they hold the hair in a curved position while it dries, which is why the finish tends to be smooth and round.
The setup matters a lot. Hair that is too wet takes forever to dry and can come out puffy at the roots. Hair that is too dry won’t mold around the rod cleanly. The sweet spot is damp, coated with a light styling product, and separated into sections that match the rod size. If the sections are too thick, the center stays soft and the curl falls apart sooner.
Sleeping in rods can be awkward. No point pretending otherwise. Still, the payoff is a set that can look polished without heat. Once the rods come out, separate the curls gently and leave the shape alone for a minute before fluffing.
That pause helps the style keep its line.
24. Satin Scarf Bun
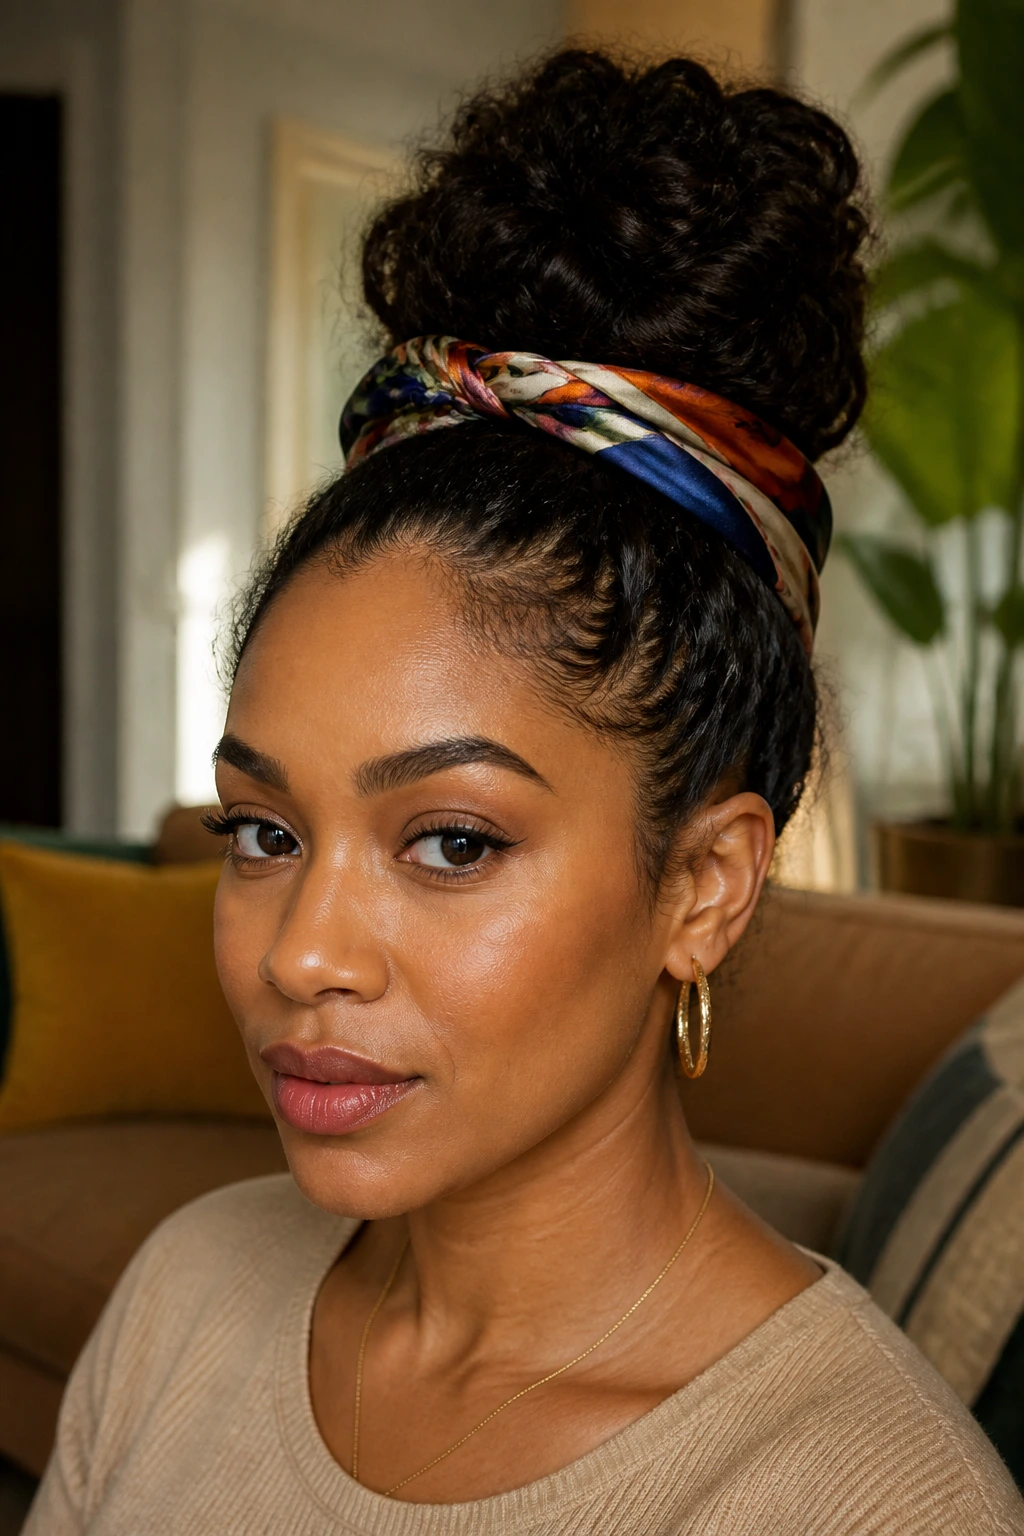
A satin scarf bun is different from a headwrap style because the scarf becomes part of the styling, not just the cover-up. You build the bun first, then wrap or tie the scarf around it so the fabric frames the shape.
That makes it useful on second-day hair or stretched curls that need a little control at the base. The bun can sit low for a softer look or mid-height if you want the silhouette to read a little sharper. The scarf adds color and texture, which means you don’t need much else — a plain outfit and this hairstyle already feel finished.
Compared with a full wrap, this style leaves more of the hair visible. Compared with a plain bun, it gives you more personality. It sits in the middle, which is why I think it works so well.
Use a scarf that has enough grip to stay put, but not so much stiffness that it pulls the bun out of place. That part is annoyingly specific. Also necessary.
25. Half-Up, Half-Down on Stretched Curls
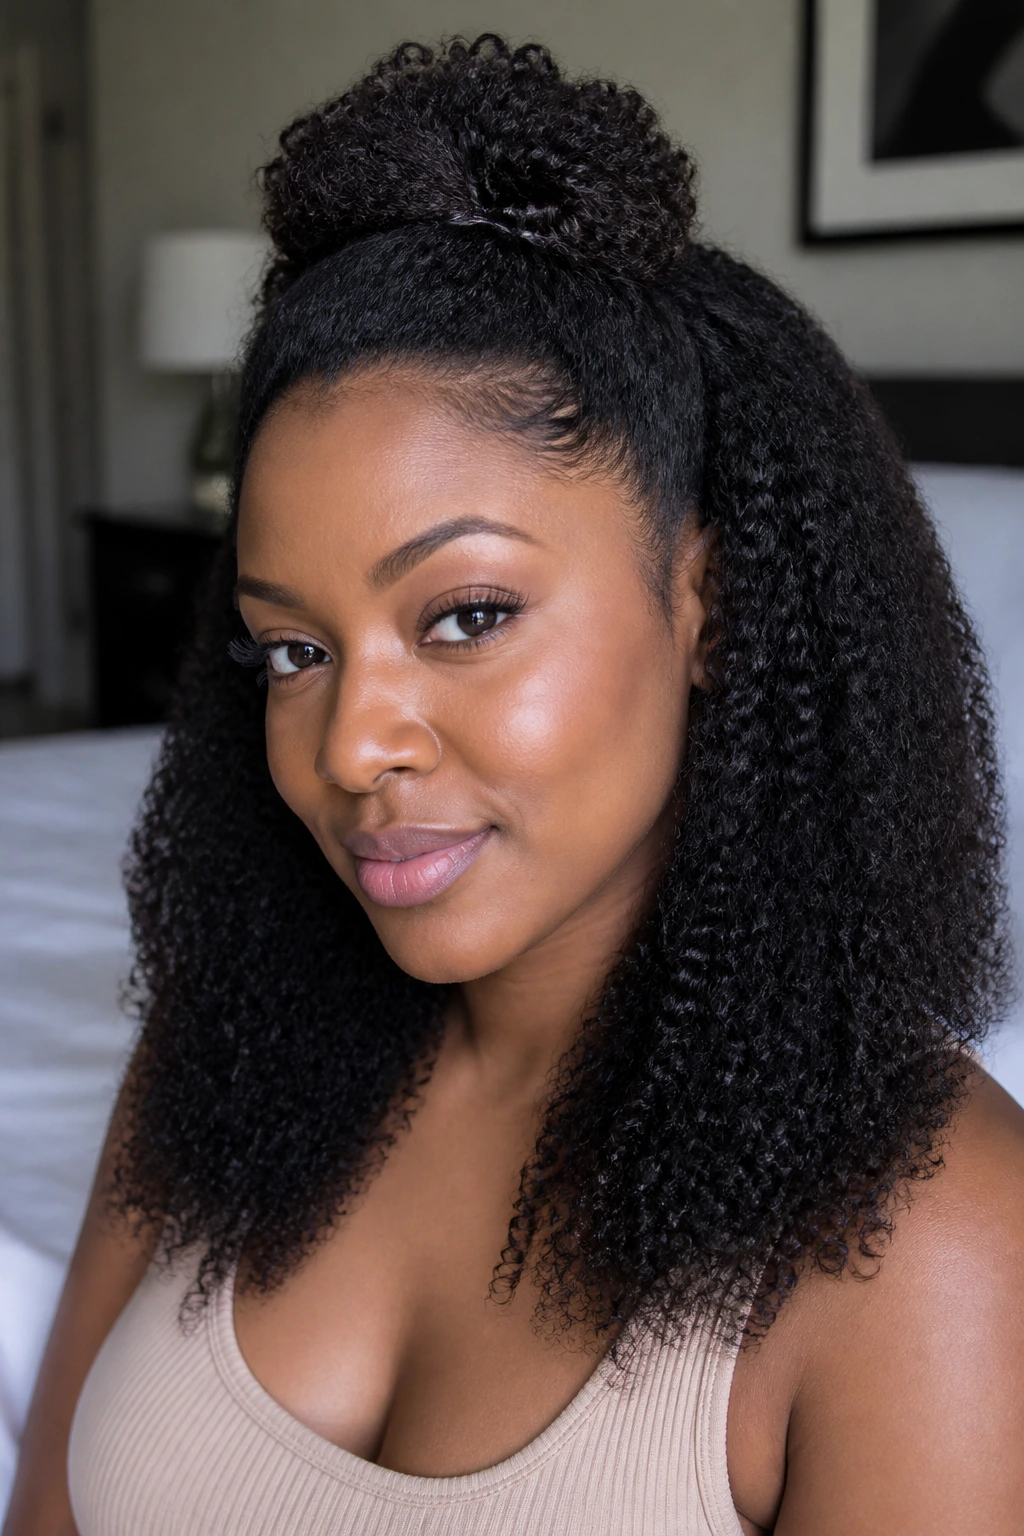
A half-up, half-down style gives you the best of both worlds: some hair stays controlled at the top, and the rest keeps its movement. On stretched natural curls, the shape feels especially balanced because the length shows without turning into a triangle.
This is a good option when you want the front off your face but still want your texture visible. The top section can be tied, clipped, or twisted back, while the bottom section stays loose and full. If the hair is layered, the style falls even better. If it is one length, a little root lift helps the top half avoid looking flat.
Why It Works on Mixed Lengths
It handles shrinkage better than a full loose style and feels lighter than a full updo. That makes it useful when your hair is thick enough to need control but too pretty to hide away completely.
A few pins, a satin tie, and a little root shaping are usually enough. Nothing dramatic. Just enough structure to let the curls do their thing.
Final Thoughts
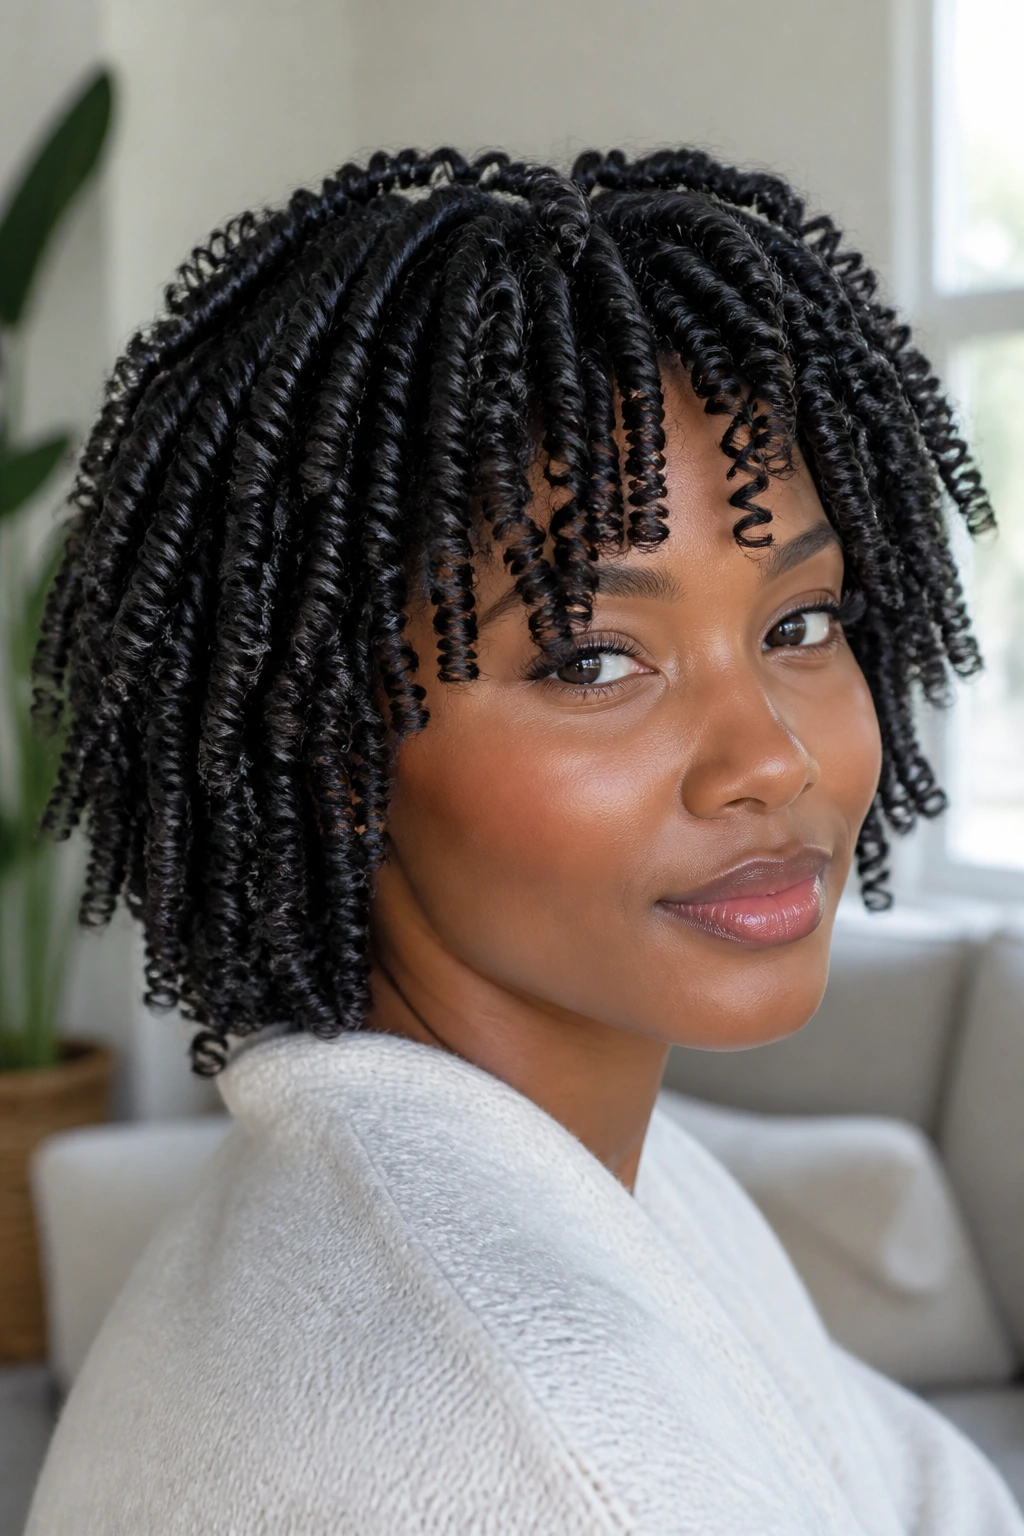
The best natural hairstyles for hair usually share the same three things: a shape that makes sense, tension that does not hurt, and a finish that matches how much time you actually have. That combination matters more than whether the style looks fancy in a mirror photo.
If a style keeps falling apart, the fix is not always more product. Sometimes it needs smaller sections, better drying time, or a gentler elastic. Sometimes your hair is telling you it wants stretch, not slickness. Listen to that. It saves a lot of frustration.
Keep a few tools close: a satin scrunchie, a rat-tail comb, a handful of pins, and something soft for nighttime. Those small things do more for natural hair than most flashy products ever will.
